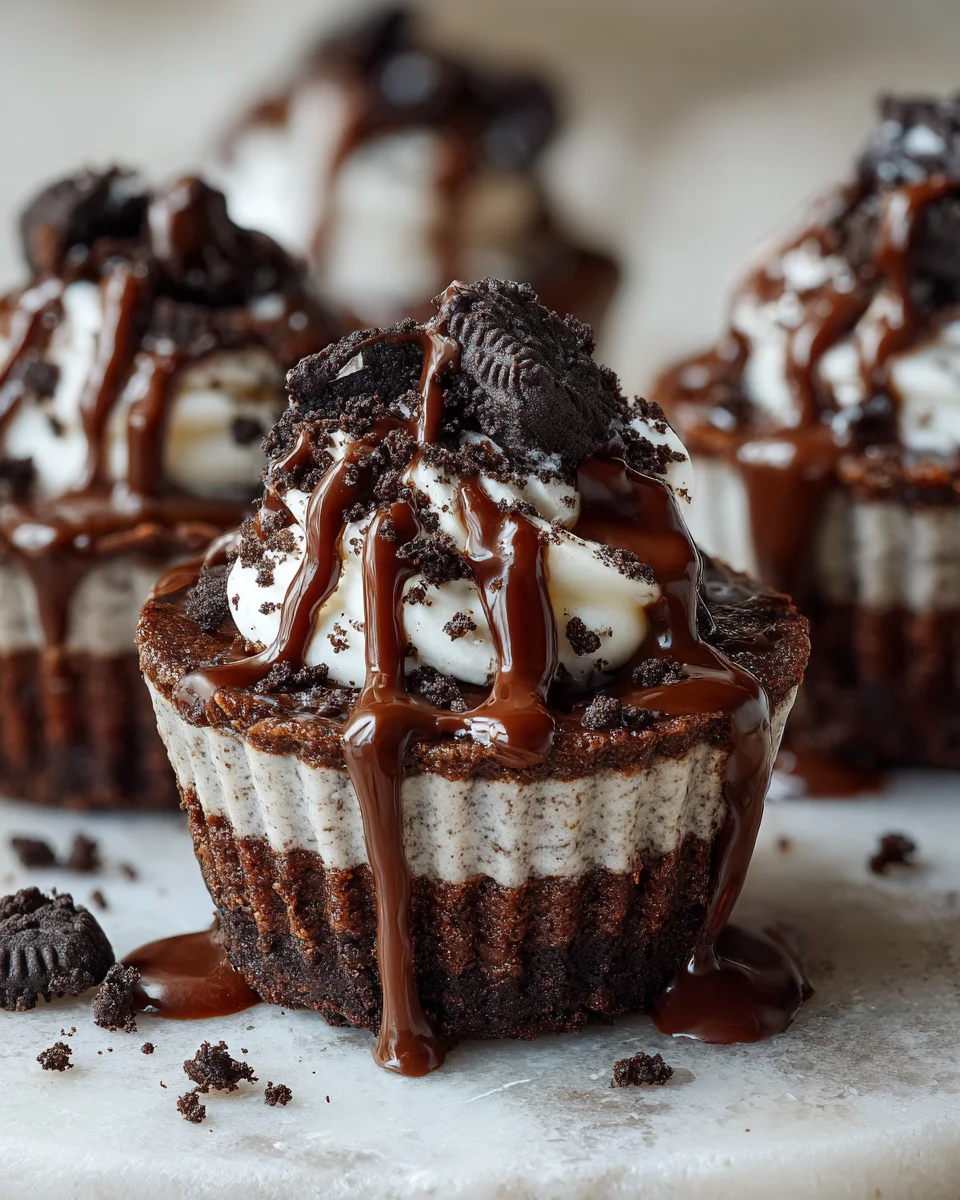
There is something nostalgic and undeniably joyful about a dessert that looks like it belongs in a garden but tastes like a slice of heaven. If you grew up attending backyard birthday parties or summer potlucks, you probably remember the iconic sight of chocolate cookie crumbs layered to look like soil, topped with colorful gummy worms. Today, we are taking that classic childhood favorite and elevating it into individual portions. Oreo Dirt Cake Cups are the perfect blend of creamy, crunchy, and whimsical, making them a hit for both children and adults who are young at heart.
This dessert is more than just a sweet treat; it is an experience. It plays with textures—the velvety smoothness of the pudding and cream cheese mixture against the gritty, rich crunch of the chocolate cookies. Because they are served in individual cups, they are mess-free and visually stunning, showing off the beautiful layers of “earth” and “filling.” Whether you are planning a themed party or just want a fun project to do with the family, this recipe is a guaranteed winner.
What is the Oreo Dirt Cake Cups Recipe?
When people talk about this specific dessert, they are referring to a no-bake treat that mimics the appearance of real dirt. However, instead of soil, we use finely crushed sandwich cookies to create a dark, chocolatey base. The “mud” in our Oreo Dirt Cake Cups is a luxurious, fluffy mousse made from a combination of chocolate pudding, softened cream cheese, and whipped topping.
Unlike a standard pudding cup, the addition of cream cheese and powdered sugar gives the filling a cheesecake-like depth and stability. This ensures that the layers stay distinct and do not turn into a soggy mess. It is a dessert that relies on assembly rather than baking, making it an excellent choice for those who want a high-impact result without having to turn on the oven. It is essentially a deconstructed chocolate cheesecake that puts the fun of the presentation front and center.
The Origin of the Famous Dirt Cake
The concept of “Dirt Cake” or “Dirt and Worms” is a quintessentially American invention that gained massive popularity in the late twentieth century. While the exact creator is lost to history, the recipe began appearing in community cookbooks and Midwest potluck circles during the late nineteen seventies and early eighties. It was a time when “cool whip” and “instant pudding” were staples of the modern pantry, allowing for quick and creative dessert solutions.
The genius of the recipe was its playfulness. It broke the rules of formal dining by encouraging guests to eat something that looked like it came from the backyard. Initially, it was often served in a brand-new, clean plastic flower pot with a silk flower stuck in the middle to complete the illusion. Over time, the recipe evolved. Home cooks began making Oreo Dirt Cake Cups as a more convenient way to serve the dessert at schools or office parties. Today, it remains a beloved staple because it is incredibly reliable and can be customized in dozens of different ways.
Ingredients for Your Creamy Chocolate Creation
To make these cups truly superior, you want to focus on the balance between the creaminess and the crunch. While the ingredients are simple, using the right quantities is essential for achieving the perfect consistency.
The Cookie Base
You will need between twenty to twenty five Oreo cookies. You want enough to create substantial layers and a thick topping. These will be crushed into fine crumbs. You can use the traditional flavor or even the double-stuffed variety if you want a bit more sweetness in your “dirt.”
The Pudding Layer
A single package of instant chocolate pudding mix serves as the flavor anchor. Note that it must be instant pudding, not the cook-and-serve variety, to ensure it sets properly at room temperature. You will combine this with two cups of cold milk. Whole milk is recommended for the richest texture, but two percent will work as well.
The Creamy Mousse Components
The secret to the stability of these Oreo Dirt Cake Cups is the combination of four ounces of softened cream cheese and one cup of whipped topping. To sweeten the cream cheese, you will add one fourth cup of powdered sugar and one teaspoon of vanilla extract. The vanilla helps bridge the flavors between the tangy cheese and the rich chocolate.
Decorative Extras
Finally, for that iconic look, you will want gummy worms. These add a chewy texture and a pop of color that makes the dessert immediately recognizable. You can also use edible flowers or mint sprigs if you want a more “sophisticated” garden look.
Step by Step Direction and Preparation Method: Oreo Dirt Cake Cups
Creating these cups is a process of building layers. Precision in the mixing stage ensures that the filling is light and airy rather than dense and heavy.
Preparing the Cookie Crumbs
Start by taking your cookies and turning them into “soil.” You can do this by placing them in a large plastic bag and crushing them with a rolling pin, or for a more uniform “fine” dirt, pulse them in a food processor. You want some variety in the crumbs—mostly fine dust with a few small chunks to provide a realistic texture. Set these aside in a bowl.
Creating the Chocolate Pudding
In a large mixing bowl, whisk together the instant chocolate pudding mix and the two cups of cold milk. Continue whisking for about two to three minutes. You will feel the mixture begin to thicken. Once it has reached a pudding-like consistency, set it aside to firm up further while you work on the other elements.
Preparing the Cream Cheese Base
In a separate bowl, beat the softened cream cheese until it is completely smooth and free of lumps. Add the powdered sugar and the vanilla extract, beating again until the mixture is light and fluffy. This is a critical step; if the cream cheese is too cold or not beaten enough, you will have white lumps in your dessert.
Once the cream cheese mixture is ready, gently fold in the whipped topping using a spatula. You want to be careful not to deflate the air in the whipped topping. Finally, take your thickened chocolate pudding and fold it into the cream cheese mixture. The result should be a beautiful, light brown, fluffy mousse that tastes like a cloud of chocolate.
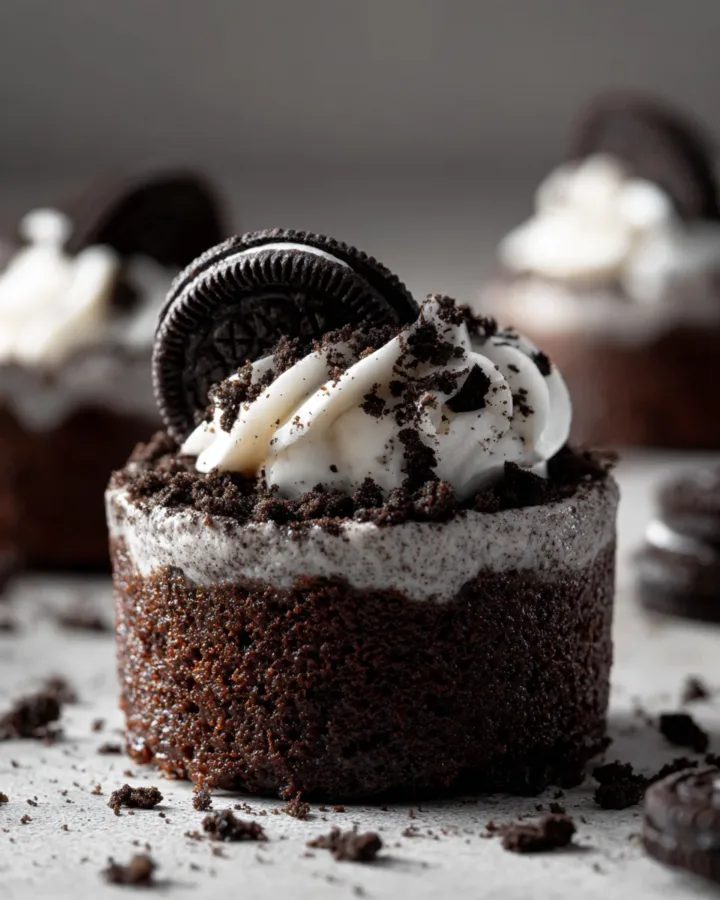
Assembling the Oreo Dirt Cake Cups
Now comes the fun part. Grab your clear glasses, jars, or plastic cups. Start by placing a generous spoonful of the crushed cookies at the bottom of each cup. This represents the “bedrock” of your soil. Follow this with a layer of the chocolate cream filling.
Repeat the layers—crumbs, then filling—until you reach the top of the cup. Always finish with a thick layer of cookie crumbs on top so that the “dirt” is the first thing people see. Stick a gummy worm or two into the top of each cup, perhaps having one “burrowing” into the chocolate.
The Chilling Phase
While you could eat these immediately, they are much better if you let them rest. Place the cups in the refrigerator for at least one to two hours. This chilling time allows the cookies to soften slightly where they touch the cream, creating a cake-like texture, and ensures the mousse is perfectly set and cold.
Creative Variations to the Classic Recipe
One of the best things about the Oreo Dirt Cake Cups recipe is how easily it can be adapted for different holidays, seasons, or dietary needs.
Golden Sand Cups
If you want to move away from the “dirt” theme, you can use Golden Oreos or vanilla sandwich cookies instead of chocolate. This creates a “sand” effect. You can replace the chocolate pudding with vanilla or banana pudding and top the cups with gummy fish or cocktail umbrellas. This is a fantastic variation for beach-themed parties or summer luaus.
The Minty Garden
For a refreshing twist, use Mint Oreos and add a drop of peppermint extract to the cream filling. You can even add a tiny bit of green food coloring to the cream cheese portion to make it look like “grass” hidden beneath the soil. Top with a sprig of fresh mint to complete the look.
Holiday Themed Dirt
You can change the gummy worms to suit the season. For Halloween, use gummy spiders or pumpkins. For Easter, you can use marshmallow chicks or chocolate eggs. The chocolate “soil” is a neutral background that makes any bright candy pop.
Peanut Butter Mud
If you are a fan of the chocolate and peanut butter combination, stir two tablespoons of smooth peanut butter into the cream cheese mixture. Use Peanut Butter Oreos for the crumbs. This creates a much richer, saltier dessert that appeals to those who find the original version too sweet.
Frequently Asked Questions: Oreo Dirt Cake Cups
Can I make these Oreo Dirt Cake Cups in advance?
Yes, this is actually recommended. You can make them up to twenty four hours in advance. In fact, many people prefer them after they have sat overnight because the cookie crumbs absorb a bit of moisture and become even more flavorful. Just be sure to wait until right before serving to add the gummy worms, as the moisture from the pudding can sometimes make the sugar on the gummies bleed or become sticky.
Is there a way to make this Oreo Dirt Cake Cups dairy-free?
You can certainly make a vegan or dairy-free version. Use dairy-free sandwich cookies (many standard brands are accidentally vegan), almond or oat milk for the pudding (note that you may need to use less liquid as non-dairy milks don’t always set instant pudding as firmly), vegan cream cheese, and a coco-whip topping.
My filling is too runny, what happened?
This usually occurs if the milk was not cold enough or if the pudding was not whisked long enough before being added to the cream cheese. To fix this, you can put the mixture in the fridge for an hour to see if it firms up. If it is still too soft, you can fold in a little more whipped topping to give it more body.
Can I use homemade whipped cream instead of whipped topping?
You can use homemade whipped cream, but keep in mind that it is less stable than commercial whipped toppings. If you use real whipped cream, the Oreo Dirt Cake Cups should be eaten within a few hours, as the real cream will eventually start to weep and make the dessert watery.
How many cups does this Oreo Dirt Cake Cups make?
Depending on the size of your containers, this recipe typically yields about eight to ten servings if you are using standard six-ounce clear plastic cups. If you are using smaller “shot” sized cups for a party, you could easily get twenty servings out of one batch.
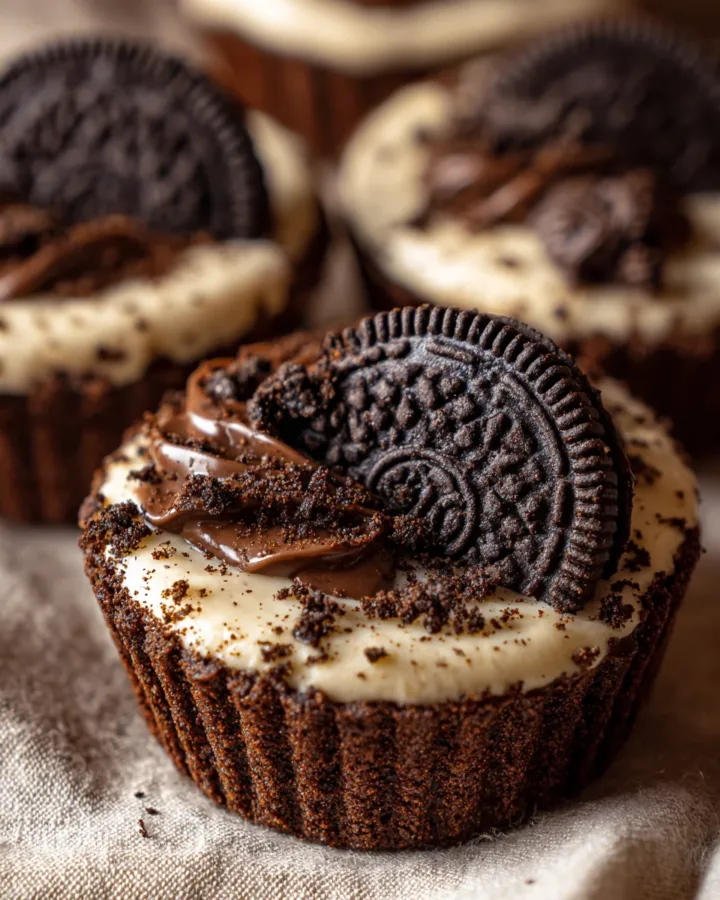
Tips for the Most Professional Presentation
To make your Oreo Dirt Cake Cups look like they were made by a professional caterer, consider using clear glass mason jars or high-quality clear acrylic cups. The visual appeal of this dessert comes entirely from seeing the layers through the side of the container.
Another tip is to use a piping bag to put the filling into the cups. If you try to spoon it in, you might get smears of chocolate on the sides of the glass, which can make the layers look messy. Piping the mixture allows you to place it precisely in the center, keeping the edges of the “soil” clean and distinct. Finally, don’t be afraid to go heavy on the top layer of crumbs. You want a thick, opaque layer of “dirt” so that the gummy worms look like they are truly emerging from the ground.
Conclusion: Oreo Dirt Cake Cups
The enduring popularity of Oreo Dirt Cake Cups is a testament to the fact that we never truly outgrow the fun of playing with our food. This recipe takes simple, everyday ingredients and transforms them into a conversation piece that brings a smile to everyone’s face. By focusing on high-quality cookies, ensuring your cream cheese is perfectly softened, and allowing the layers time to set in the refrigerator, you create a dessert that is as delicious as it is charming. Whether you are reliving a childhood memory or creating new ones for your family, these cups are a reminder that the best desserts are the ones that don’t take themselves too seriously. So, grab your cookies, start crushing, and enjoy the process of building your very own edible garden.
Print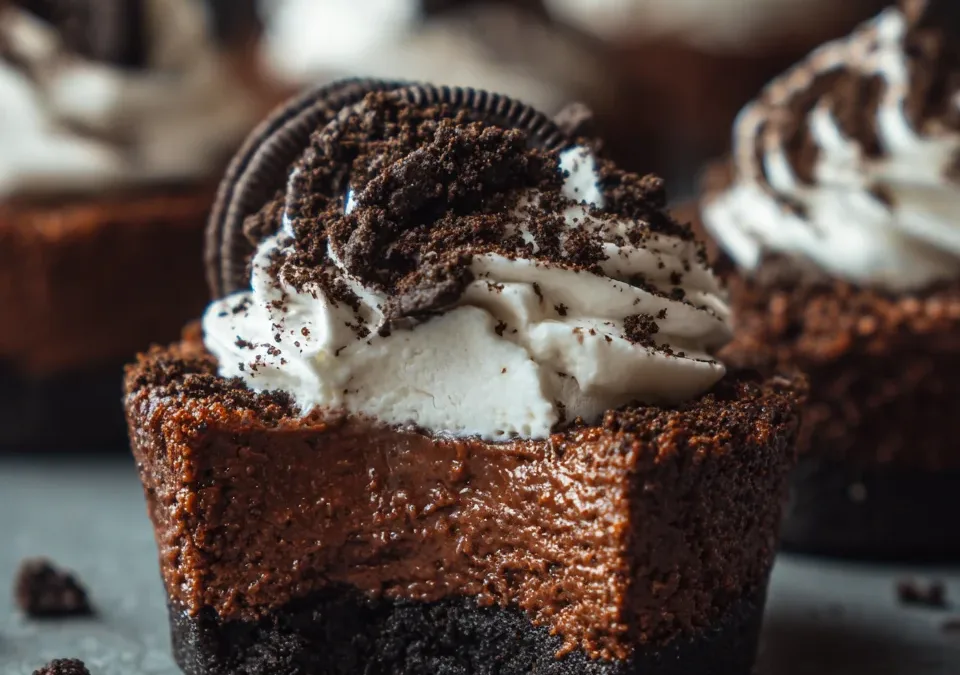
The Ultimate Guide to Making Oreo Dirt Cake Cups
- Total Time: 1 hour 15 minutes (includes chilling time)
- Yield: 6–8 cups 1x
- Diet: Vegetarian
Description
When people talk about this specific dessert, they are referring to a no-bake treat that mimics the appearance of real dirt. However, instead of soil, we use finely crushed sandwich cookies to create a dark, chocolatey base. The “mud” in our Oreo Dirt Cake Cups is a luxurious, fluffy mousse made from a combination of chocolate pudding, softened cream cheese, and whipped topping.
Ingredients
- 20–25 Oreo cookies (crushed)
- 1 package (3.4 oz) instant chocolate pudding mix
- 2 cups cold milk
- 1 cup whipped topping (Cool Whip or similar)
- 4 oz cream cheese (softened)
- ¼ cup powdered sugar
- 1 tsp vanilla extract
- Optional: gummy worms for decoration 🪱
Instructions
- Crush Oreos into fine crumbs (set aside).
- In a bowl, whisk pudding mix and milk for 2–3 minutes until thick.
- In another bowl, beat cream cheese, powdered sugar, and vanilla until smooth.
- Fold in whipped topping into the cream cheese mixture.
- Gently combine pudding mixture with the cream mixture.
- In cups or jars, layer:
- Oreo crumbs
- Cream filling
- Repeat layers
- Top with crushed Oreos and gummy worms if using.
- Chill for at least 1–2 hours before serving.
Notes
Individual Dirt Dessert Jars, Chocolate Oreo Pudding Cups, Gummy Worm Dirt Cups, No-Bake Oreo Cream Cups
- Prep Time: 15 minutes
- Cook Time: 0 minutes (no-bake dessert)
- Category: Dessert
- Method: Layering
- Cuisine: American
Nutrition
- Serving Size: 1 cup
- Calories: 320–420 kcal
Keywords: Individual Dirt Dessert Jars, Chocolate Oreo Pudding Cups, Gummy Worm Dirt Cups, No-Bake Oreo Cream Cups