Finding a baking recipe that perfectly balances the comforting sweetness of ripe fruit with a rich, complex depth of flavor can completely transform your weekend routine. If you are searching for a treat that elevates standard kitchen ingredients into something truly extraordinary, you need to learn how to bake brown butter banana crunch bars. This dessert brings together the familiar, cozy moisture of a classic fruit loaf with a nutty, caramelized luxury that only toasted fat can provide. Topped with a deeply satisfying, crisp oat layer, it offers a wonderful contrast of textures that makes it an instant favorite for morning coffee pairings or late-night dessert cravings. It is an approachable yet incredibly sophisticated bake that will quickly become your absolute go-to when you have overripe fruit sitting on your kitchen counter.
The real secret behind why this particular treat stands out so dramatically from your standard bake lies in the initial preparation of the fat. By taking a few extra minutes to heat your unsalted butter until the milk solids toast and turn a beautiful golden amber, you introduce a rich flavor profile that normal melting simply cannot replicate. This complex liquid gold ties together the sweetness of the bananas and the molasses undertones of the brown sugar, ensuring that every square tastes like it came from a high-end artisanal pastry shop. It is the perfect project for home bakers looking to impress their family with minimal effort and maximum reward.
What is the Brown Butter Banana Crunch Bars Recipe?
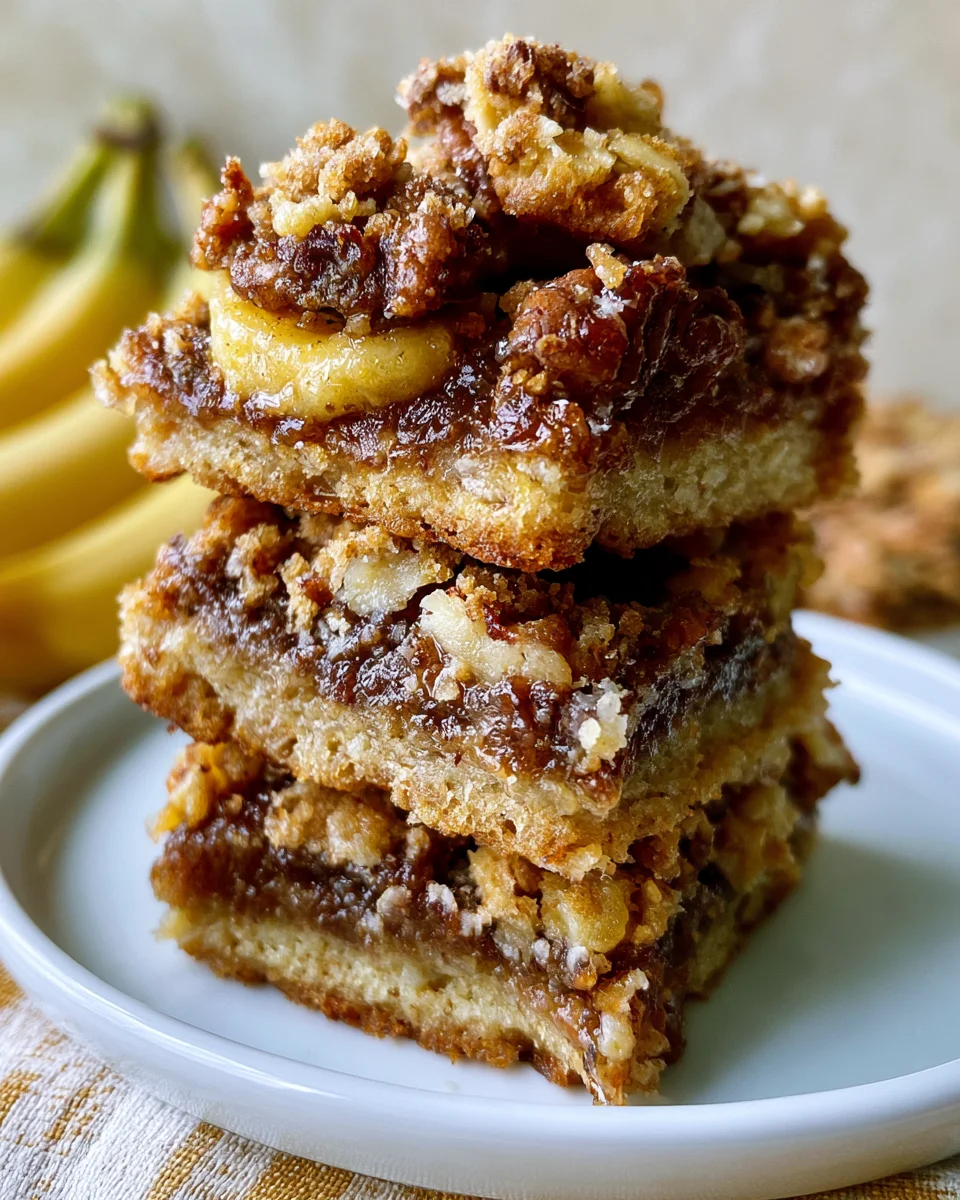
To understand what makes this bake so incredibly unique, it helps to break down the architectural layers of the dessert itself. This recipe is a modern hybrid bar that combines the dense, tender interior of an elevated fruit snack with a crunchy, texturally diverse topping. It is not quite a cake, nor is it a cookie; instead, it offers a dense, chewy crumb structure that holds its shape beautifully when sliced, making it highly portable and perfect for sharing.
The base layer leverages the natural sugars and high moisture content of mashed fruit to maintain a soft, ultra-tender interior that resists drying out, even days after baking. Wrapped inside this base is the rich flavor of toasted dairy, which offsets the sweetness with an almost savory, toasted quality. Sitting proudly on top of this soft base is a dedicated crunch layer made of oats, sugars, and chopped nuts, creating a beautiful structural contrast where every soft, pillowy bite is immediately answered by a satisfying, crispy snap.
Origin of the Banana Bar with Toasted Butter
While this specific modern combination is a contemporary development designed for quick pan baking, the components themselves have a long and storied history in global home baking. Fruit breads and bars grew immensely in popularity throughout the twentieth century, particularly during the era of the Great Depression. Resourceful home cooks hated wasting ingredients, so when tropical fruits became widely available and overripened quickly on the counter, bakers discovered that mashing them into flour and sugar mixtures created incredibly moist, shelf-stable breads without requiring expensive extra fats or dairy.
The culinary technique of browning dairy, historically known in French cuisine as beurre noisette, translates literally to hazelnut butter. For centuries, professional pastry chefs across Europe have used this simple reduction process to add a warm, complex, nutty aroma to delicate pastries, financiers, and sauces. In recent years, modern creative bakers began marrying this classic French technique with rustic, comforting American-style bakes. Combining the old-world sophistication of caramelized milk solids with the humble utility of a fruit bar created the modern brown butter banana crunch bars we enjoy today—a brilliant fusion that honors historical pastry arts while embracing practical, comforting home baking.
Ingredients for This Rich and Textured Bake: brown butter banana crunch bars
Before you turn on your oven, it is highly beneficial to gather all your necessary components and organize them by the specific roles they play in the construction of these magnificent bars.
For the Toasted Liquid Base
-
Half a cup of high-quality unsalted butter, which translates directly to one standard stick, serving as the foundation for our deep flavor development.
For the Main Fruit Batter Layer
-
Two large exceptionally ripe bananas, thoroughly mashed until smooth to provide the essential natural sweetness and deep moisture.
-
Three quarters of a cup of light brown sugar, which adds a beautiful molasses undertone and helps keep the crumb structure incredibly soft.
-
One quarter cup of fine granulated white sugar, introducing a clean sweetness that aids in forming the delicate top crust.
-
One large farm-fresh egg, acting as the critical binding agent that provides structure and lift to the bar interior.
-
One teaspoon of pure vanilla extract, offering a warm floral aroma that complements the toasted dairy perfectly.
-
One and a half cups of standard all-purpose flour, providing the primary structural network for the batter.
-
One full cup of old-fashioned rolled oats, adding a wonderful chewiness and whole-grain complexity to the crumb.
-
One teaspoon of fresh baking powder, to assist the bar in rising slightly during the baking process.
-
Half a teaspoon of baking soda, which reacts with the natural acids to ensure a tender texture.
-
Half a teaspoon of ground cinnamon, introducing a subtle, comforting spice note that runs throughout the batter.
-
One quarter cup of fine table salt, which is absolutely vital for balancing the sweetness and highlighting the toasted flavors.
Crisp Crunch Topping
-
Half a cup of cleanly chopped pecans or walnuts, adding a rich, buttery crunch and healthy oils to the top layer.
-
One quarter cup of old-fashioned rolled oats, creating a rustic, visually appealing texture on the surface.
-
Two tablespoons of light brown sugar, which will melt and caramelize slightly over the nuts during baking.
-
Two tablespoons of melted butter, used to bind the dry topping ingredients together and ensure they crisp up uniformly.
-
One quarter teaspoon of ground cinnamon, adding a final hint of spiced warmth to the very top of the dessert.
Step by Step Direction and Preparation Method: brown butter banana crunch bars
Because this baking process moves swiftly once the batter components are combined, you will get the best results by following these detailed chronological steps with care and precision.
Step One: Toasting the Butter to Golden Perfection
Begin your baking session by preheating your oven to a steady temperature of three hundred and fifty degrees Fahrenheit, which is equivalent to one hundred and seventy-five degrees Celsius. While your oven is warming up, place your half cup of unsalted butter into a light-colored saucepan set over medium heat. Using a light-colored pan is a helpful trick because it allows you to monitor the changing color of the dairy accurately. As the butter melts, it will begin to foam and bubble vigorously as the water content evaporates. Stir the pan frequently.
After roughly five to seven minutes, the foaming will subside, and you will notice little dark specks settling at the bottom of the pan. The liquid will turn a beautiful golden brown and release an incredibly rich, nutty aroma. Immediately remove the saucepan from the heat source and pour the liquid into a heatproof dish to cool slightly so it does not burn.
Step Two: Mixing the Wet and Dry Components
In a large mixing bowl, combine your two thoroughly mashed bananas, light brown sugar, granulated white sugar, the large egg, and your vanilla extract. Pour your slightly cooled toasted butter directly into this mixture, whisking vigorously until the sugars begin to dissolve and the wet ingredients form a smooth, unified base. In a separate, medium-sized bowl, whisk together your all-purpose flour, one cup of rolled oats, baking powder, baking soda, ground cinnamon, and salt until the dry spices are evenly distributed. Gently fold the dry flour mixture into the wet banana bowl using a flexible spatula. Stir just until the flour disappears and a thick batter forms; over-mixing at this stage will develop too much gluten, making the bars tough rather than tender.
Step Three: Creating the Textured Topping
In a small separate dish, prepare the elements that will form your crisp surface layer. Combine your chopped pecans or walnuts, the remaining one quarter cup of rolled oats, two tablespoons of brown sugar, and one quarter teaspoon of cinnamon. Pour your two tablespoons of melted butter over these dry ingredients and stir thoroughly with a fork. Every oat flake and nut piece should be lightly coated in the melted butter and spiced sugar, creating a loose, fragrant, crumbly mixture.
Step Four: Pan Assembly and Layering
Take a standard eight-by-eight-inch square baking pan and line it carefully with a sheet of parchment paper, leaving a slight overhang on the sides. This overhang acts as a helpful sling that will allow you to lift the baked squares out cleanly later. Transfer your thick banana batter into the prepared pan, using your spatula to smooth the surface into a completely flat, even layer that reaches all four corners. Scatter your prepared crunch topping evenly over the entire surface of the batter, ensuring full coverage. Use the palms of your hands or the back of a spoon to press down very gently on the topping, which helps the oats and nuts adhere to the batter so they do not spill off after baking.
Step Five: Baking and Slicing the Bars
Place the assembled pan onto the middle rack of your preheated oven. Bake undisturbed for thirty to thirty-five minutes. You will know your dessert is perfectly finished when the crunch topping achieves a beautiful golden-brown hue and a wooden toothpick inserted directly into the center of the pan comes out mostly clean, with perhaps a few moist crumbs attached. Remove the pan from the oven and place it onto a wire rack. It is absolutely crucial to allow the bake to cool completely inside the pan before attempting to cut it. As it cools, the internal structure sets, ensuring clean cuts. Once cold, use your parchment paper sling to lift the block out, place it on a cutting board, and cut cleanly into twelve uniform square bars.
Flavor Adaptations and Creative Variations
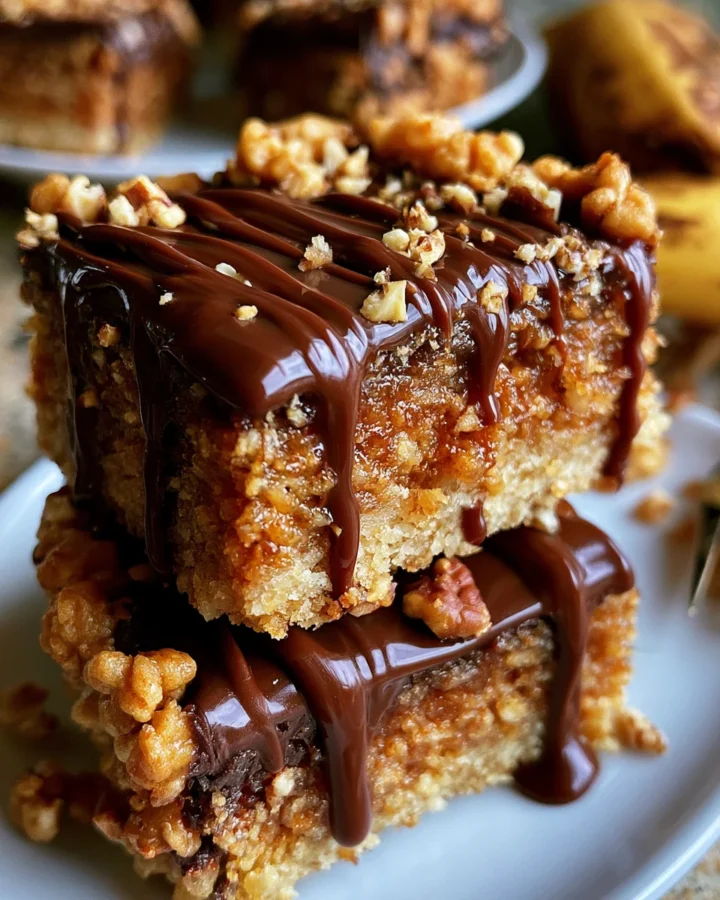
The fundamental framework of this recipe makes it an incredibly versatile canvas for personal customization and seasonal adjustments. If you want to lean into a more decadent flavor profile, you can easily fold half a cup of high-quality semi-sweet chocolate chips or rich butterscotch chips directly into the main batter just before spreading it into the baking pan. The pockets of melted chocolate provide a spectacular contrast to the sweet, fruity base and the nutty undertones of the toasted dairy.
For those who have a nut allergy or simply prefer a different style of crunch, you can completely omit the pecans or walnuts from the topping. In their place, substitute an equal amount of toasted sunflower seeds, pumpkin seeds, or even crushed graham crackers. The crushed graham crackers melt slightly with the brown sugar, creating a spectacular, caramel-like crust that mimics a traditional pie base. You can also experiment with your choice of spices; swapping out the standard cinnamon for ground nutmeg, cardamom, or a dash of ground ginger can give the bars a bright, sophisticated autumnal twist that pairs beautifully with the caramelized fruit notes.
Pro Techniques for Successful Baking: brown butter banana crunch bars
Mastering a few small baker secrets will ensure your square treats turn out flawlessly consistent every single time you make them.
-
Select the Right Fruit: The success of the flavor profile relies heavily on the state of your bananas. Avoid using fruit that is yellow with green tips, as they lack sufficient sugars and will make the bars starchy. Instead, wait until the skins are completely covered in dark brown spots or turn entirely black; this indicates the starches have completely converted to sugar, providing maximum moisture and natural sweetness.
-
Watch the Browning Process: When toasting your dairy in the saucepan, do not walk away from the stove. The transition from beautifully toasted amber solids to completely burnt, bitter black dairy happens in a matter of seconds. Keep the pan moving and trust your sense of smell; as soon as it smells like warm hazelnuts, take it off the heat.
-
Let Them Cool Completely: Cutting into a warm bar is tempting, but doing so will cause the dense, moist interior to collapse and tear, resulting in a messy presentation. Allowing the pan to sit on your counter until it reaches room temperature guarantees clean, sharp edges that look highly professional.
Frequently Asked Questions: brown butter banana crunch bars
Why do we use old-fashioned oats instead of instant oats?
Old-fashioned rolled oats are highly preferred for both the batter and the topping because they undergo minimal processing, meaning they retain their whole structure. This structural integrity provides a distinct, hearty chewiness inside the bar and a superior crunch on the surface. Quick or instant oats are chopped much finer and will absorb moisture far too quickly, which can make the internal batter unpleasantly gummy and cause the topping to turn into a soft, powdery crust rather than a distinct, crispy layer.
What is the best way to store brown butter banana crunch bars to keep them fresh?
To maintain the ideal balance between the moist interior and the crisp top layer, store your cut squares in a single layer inside a tightly sealed airtight container. They will remain perfectly fresh and delicious when kept at normal room temperature for up to three days. If you wish to extend their shelf life, you can place the container into the refrigerator for up to one full week. When eating them from the refrigerator, letting them sit on the counter for ten minutes allows the toasted butter fats to soften, restoring their signature chewy texture.
Can I use a larger pan if I do not have an eight-by-eight pan?
If you only have a larger pan available, such as a nine-by-thirteen-inch cake pan, you can still make this recipe, but you will need to adjust your expectations or your ingredient quantities. Spreading this exact amount of batter into a larger pan will result in an incredibly thin layer that will cook much faster and can dry out easily. To use a larger pan successfully, it is best to double all the ingredient measurements completely and extend the baking time by roughly five to ten minutes, keeping a close eye on the toothpick test.
Is there a suitable replacement for light brown sugar?
If your cupboards are missing light brown sugar, you can easily substitute it with an equal amount of dark brown sugar, which will introduce an even deeper molasses flavor and a slightly darker color to the interior crumb. Alternatively, you can use standard granulated white sugar mixed with one tablespoon of pure molasses. If you have neither, using all white granulated sugar will work structurally, but the bars will lose that distinct caramel complexity and may turn out slightly less moist than intended.
Can these banana crunch bars be frozen for later enjoyment?
Yes, this dessert freezes exceptionally well, making it a fantastic option for long-term meal planning or unexpected guests. Wrap each individual sliced square tightly in plastic wrap, then place them all inside a heavy-duty freezer bag. They can be frozen safely for up to three months. When a craving hits, simply pull a bar from the freezer and let it thaw on your kitchen counter for about half an hour, or warm it gently in a toaster oven for a few minutes to crisp up the topping.
Conclusion: brown butter banana crunch bars
Creating a memorable sweet treat does not require overly complicated methods or specialized kitchen equipment; it simply requires maximizing the potential of everyday kitchen staples. By intentionally browning your unsalted butter to unlock its deep, nutty capabilities, you instantly elevate a humble fruit batter into a luxurious dessert experience. The contrast between the incredibly moist, tender banana crumb and the sweet, textured nut and oat topping ensures that every bite is thoroughly engaging. Whether you pack them into school lunches, serve them alongside afternoon tea, or enjoy them as a weekend baking project, mastering the art of making brown butter banana crunch bars will provide you with an elegant, crowd-pleasing recipe that you will return to time and time again.
Print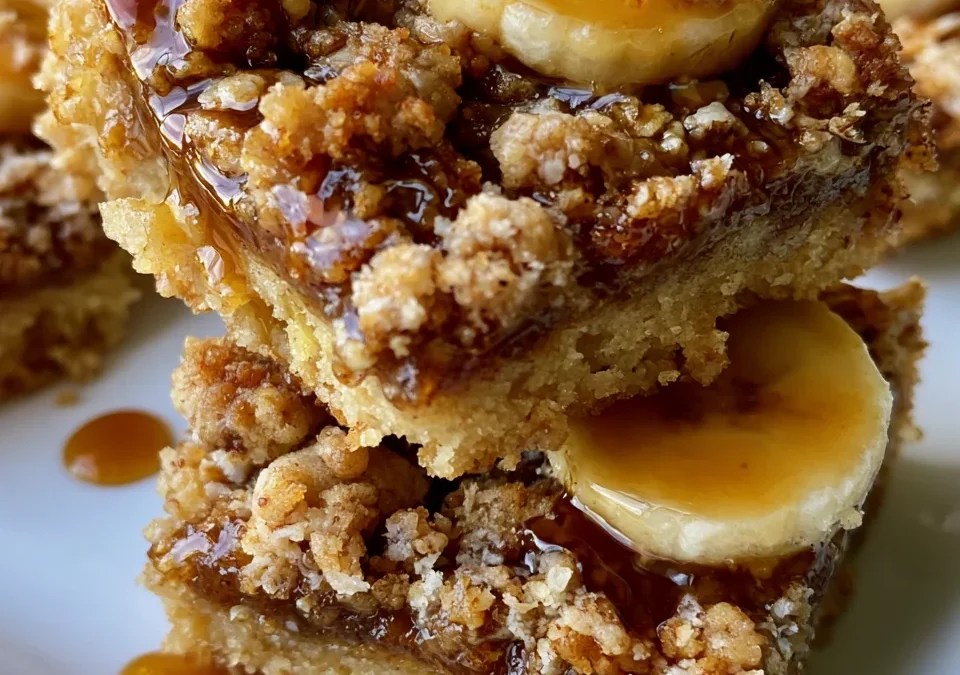
The Ultimate Guide to Making Brown Butter Banana Crunch Bars
- Total Time: 50 minutes
- Yield: 12 bars 1x
- Diet: Vegetarian
Description
To understand what makes this bake so incredibly unique, it helps to break down the architectural layers of the dessert itself. This recipe is a modern hybrid bar that combines the dense, tender interior of an elevated fruit snack with a crunchy, texturally diverse topping. It is not quite a cake, nor is it a cookie; instead, it offers a dense, chewy crumb structure that holds its shape beautifully when sliced, making it highly portable and perfect for sharing.
Ingredients
For the Brown Butter
- ½ cup (1 stick) unsalted butter
For the Bars
- 2 ripe bananas, mashed
- ¾ cup light brown sugar
- ¼ cup granulated sugar
- 1 large egg
- 1 tsp vanilla extract
- 1½ cups all-purpose flour
- 1 cup old-fashioned rolled oats
- 1 tsp baking powder
- ½ tsp baking soda
- ½ tsp ground cinnamon
- ¼ tsp salt
For the Crunch Topping
- ½ cup chopped pecans or walnuts
- ¼ cup rolled oats
- 2 tbsp brown sugar
- 2 tbsp melted butter
- ¼ tsp cinnamon
Instructions
1. Brown the Butter
- Preheat the oven to 350°F (175°C).
- Melt the butter in a saucepan over medium heat, stirring frequently until it turns golden brown and smells nutty (about 5–7 minutes).
- Remove from the heat and let cool slightly.
2. Prepare the Batter
- In a large bowl, whisk together the mashed bananas, brown sugar, granulated sugar, egg, vanilla, and browned butter.
- In another bowl, combine the flour, oats, baking powder, baking soda, cinnamon, and salt.
- Fold the dry ingredients into the wet ingredients until just combined.
3. Make the Crunch Topping
- Mix the chopped nuts, oats, brown sugar, melted butter, and cinnamon until evenly coated.
4. Assemble
- Line an 8×8-inch baking pan with parchment paper.
- Spread the batter evenly into the pan.
- Sprinkle the crunch topping over the batter and gently press it down.
5. Bake
- Bake for 30–35 minutes, or until the top is golden brown and a toothpick inserted into the center comes out mostly clean.
- Allow the bars to cool completely before slicing into 12 squares.
Notes
Enjoy these bars warm with a scoop of vanilla ice cream, a drizzle of caramel sauce, or alongside a hot cup of coffee or tea.
- Prep Time: 15 minutes
- Cook Time: 35 minutes
- Category: Dessert
- Method: Baking
- Cuisine: American
Nutrition
- Serving Size: 1 bar
- Calories: 245 kcal
Keywords: toasted butter banana bars, banana oat crunch squares, easy brown butter banana dessert