
There is nothing quite like the comforting aroma of a homemade fruit dessert baking in your kitchen oven, filling your entire house with warmth and sweetness. While many people associate fruit desserts exclusively with the height of the summer harvest, you do not have to wait for a specific season to enjoy a spectacular, bakery-style sweet treat. This recipe for a classic Cherry Cobbler with Frozen Cherries is the ultimate year-round comfort dessert, transforming accessible freezer staples into a warm, bubbling masterpiece. By utilizing fruit that was picked and flash-frozen at its absolute peak of ripeness, you guarantee a consistently juicy, intensely flavorful filling every single time you bake, completely bypassing the tedious chore of pitting pounds of fresh stone fruit.
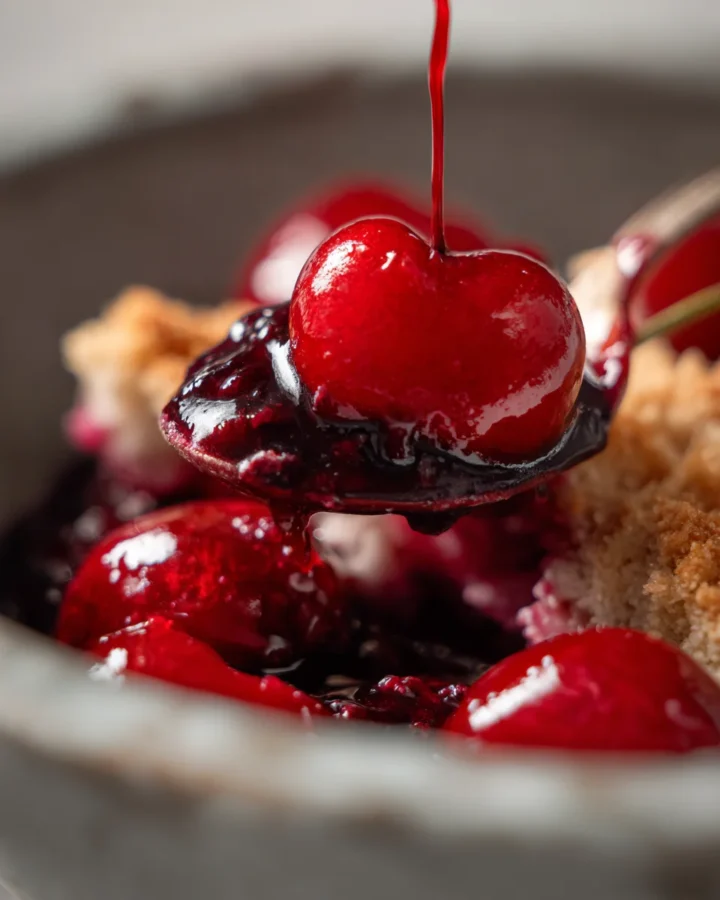
The magic of a traditional cobbler lies in the contrast between its distinct layers. The bottom layer consists of a glossy, tart, and deeply ruby-colored fruit base that thickens beautifully as it bakes, while the top layer features a soft, buttery, and golden-brown biscuit-style dough. This combination provides a delightful balance of textures, matching the melting tenderness of the hot fruit with the slight crunch of a perfectly baked crust. Whether you are hosting a cozy family Sunday dinner, bringing a dish to a casual neighborhood potluck, or simply satisfying a sudden weeknight sweet craving, this comprehensive baking guide will show you how to pull together this timeless dessert with minimal effort.
What is This Frozen Fruit Dessert?
To master this baking project, it is helpful to understand what defines an authentic Cherry Cobbler with Frozen Cherries and how it differs from other rustic fruit desserts, such as crisps, crumbles, or pies. A cobbler earns its unique name because the dollops of batter or biscuit dough dropped onto the fruit filling bake up into a bumpy, uneven surface that resembles a rustic cobblestone street.
Unlike a pie, which requires a rolling pin and a delicate, flaky pastry crust on both the top and bottom, a cobbler is much more forgiving and approachable for home bakers. The topping in this specific recipe is a rich, drop-style batter made with melted butter and milk, which rises beautifully around the fruit as it cooks. As the dessert bakes in the oven, the juices from the sweet cherries bubble up around the edges of the dough, creating a gorgeous contrast of vibrant red fruit and golden pastry that looks completely irresistible when carried straight to the dining table.
Origin of the Cherry Cobbler with Frozen Cherries
The history of the cobbler is a fascinating tale of resourcefulness and culinary adaptation. This beloved dessert can be traced back to the early British colonists who traveled to America during the seventeenth and eighteenth centuries. These early settlers brought with them a deep love for traditional British steamed puddings and suet crust pies, which were common staples of their home diet. However, upon arriving in the New World, they quickly discovered that they lacked the specific ingredients, proper equipment, and brick ovens required to recreate those precise recipes.
Being highly resourceful, the colonists adapted their cooking methods to fit their new environment. They placed whatever wild berries or stone fruits they could forage into a deep iron pot or a Dutch oven, covered the fruit with irregular dollops of leftover biscuit dough or cornmeal batter, and cooked the entire assembly over an open campfire. Over the generations, as ingredients like refined sugar and white flour became more readily available, this survival food evolved into a cherished regional staple across the United States, particularly in the South. Infusing this historic format with modern frozen fruit preserves that beautiful legacy of resourcefulness, allowing anyone to enjoy a traditional scratch-baked dessert regardless of the season or location.
Ingredients with Quantity: Cherry Cobbler with Frozen Cherries
Achieving the ideal balance of a thick, jammy fruit base and a light, tender biscuit top requires measuring your components with care. Using the correct proportions ensures that your filling becomes beautifully glossy without turning into a watery soup.
The Sweet and Tart Fruit Filling
-
Four full cups of frozen sweet or tart cherries, kept completely frozen until assembly
-
Half a cup of granulated white sugar to balance the natural acidity
-
One tablespoon of freshly squeezed lemon juice for a bright contrast
-
One teaspoon of pure vanilla extract for aromatic depth
-
Two teaspoons of cornstarch to serve as a thickening agent
-
A tiny pinch of fine sea salt to enhance all the natural flavors
The Buttery Biscuit Cobbler Topping
-
One cup of premium all-purpose flour, spooned and leveled
-
Half a cup of granulated white sugar for the batter
-
One and a half teaspoons of baking powder to provide the perfect rise
-
One quarter of a teaspoon of fine sea salt
-
Half a cup of whole milk or high-quality buttermilk
-
Four tablespoons of unsalted butter, thoroughly melted and cooled slightly
-
Half a teaspoon of ground cinnamon for a warm flavor note
The Ultimate Finishing Touch
-
A generous scoop of premium vanilla bean ice cream or heavy whipping cream for serving
Step by Step Direction and Preparation Method: Cherry Cobbler with Frozen Cherries
Creating this dessert is an incredibly straightforward and rewarding process. Because there is no need to roll out any dough or wait for ingredients to thaw, you can easily move from your pantry to the oven in under fifteen minutes.
Preparing the Juicy Fruit Base
The foundation of a spectacular Cherry Cobbler with Frozen Cherries requires coating the fruit evenly so that the starches can activate properly during the baking process.
Begin by preheating your kitchen oven to three hundred and seventy-five degrees Fahrenheit, ensuring your oven rack is set to the middle position. Take a large mixing bowl and dump in your four cups of frozen cherries straight from the freezer. It is incredibly important that you do not let the fruit thaw on your counter, as thawing will cause them to release all their natural juices prematurely, which can make your final crust soggy.
Add the half cup of sugar, the tablespoon of fresh lemon juice, the teaspoon of pure vanilla extract, the two teaspoons of cornstarch, and that tiny pinch of salt directly into the bowl with the frozen fruit. Use a large rubber spatula to toss the ingredients together gently but thoroughly, ensuring that every single piece of fruit is evenly coated in a light white powder of sugar and cornstarch. Take a standard nine-inch baking dish or a decorative pie plate, grease the inside lightly with a little butter, and pour the coated cherry mixture directly into the bottom, spreading it into an even layer.
Mixing the Drop Batter Topping
The texture of your cobbler top depends heavily on how gently you handle the batter. Over-mixing will develop the gluten in the flour, resulting in a tough, dense crust rather than a light, cake-like biscuit.
In a separate medium mixing bowl, whisk together your one cup of all-purpose flour, the half cup of sugar, the one and a half teaspoons of baking powder, the quarter teaspoon of salt, and the optional half teaspoon of ground cinnamon. Whisking these dry ingredients together ensures that the baking powder is distributed perfectly throughout the flour, which guarantees an even rise across the entire dessert.
Pour the half cup of milk and the four tablespoons of melted unsalted butter directly into the center of your dry ingredients. Using a wooden spoon or a sturdy fork, stir the mixture together just until the flour disappears and a thick, soft batter forms. A few tiny lumps in the batter are perfectly fine. Grab a large tablespoon and scoop up portions of the thick dough, dropping them evenly over the top of your prepared fruit layer. Do not worry about smoothing the batter out or trying to cover every single inch of the cherries; leaving a few open gaps allows the steam from the bubbling fruit to escape, creating that iconic cobblestone appearance as it expands.
Baking to Golden Perfection
Watching your dessert transform in the oven is one of the most satisfying parts of the entire baking experience.
Slide your assembled baking dish carefully onto the middle rack of your preheated oven. Bake the dessert undisturbed for thirty-five to forty-five minutes. If your baking dish is filled to the very brim, you can place a large sheet of aluminum foil or a baking sheet on the rack directly beneath the dish to catch any stray drops of juice that might bubble over.
As the clock ticks down, keep a close eye on the progress through your oven window. Your Cherry Cobbler with Frozen Cherries is officially finished baking when the thick biscuit dough has puffed up beautifully, turning a deep, rich golden brown across the entire surface, and the fruit juices along the edges of the pan are thick, glossy, and bubbling vigorously. Remove the hot dish from the oven using sturdy oven mitts and set it on a wire cooling rack on your kitchen counter. Let the dessert rest and cool down for at least fifteen to twenty minutes before serving. This cooling period is crucial because it allows the starches in the cornstarch to settle and fully thicken the fruit syrup.
Serving Your Warm Masterpiece
To experience this classic dessert at its absolute best, it should always be served while it is still comfortably warm from the oven.
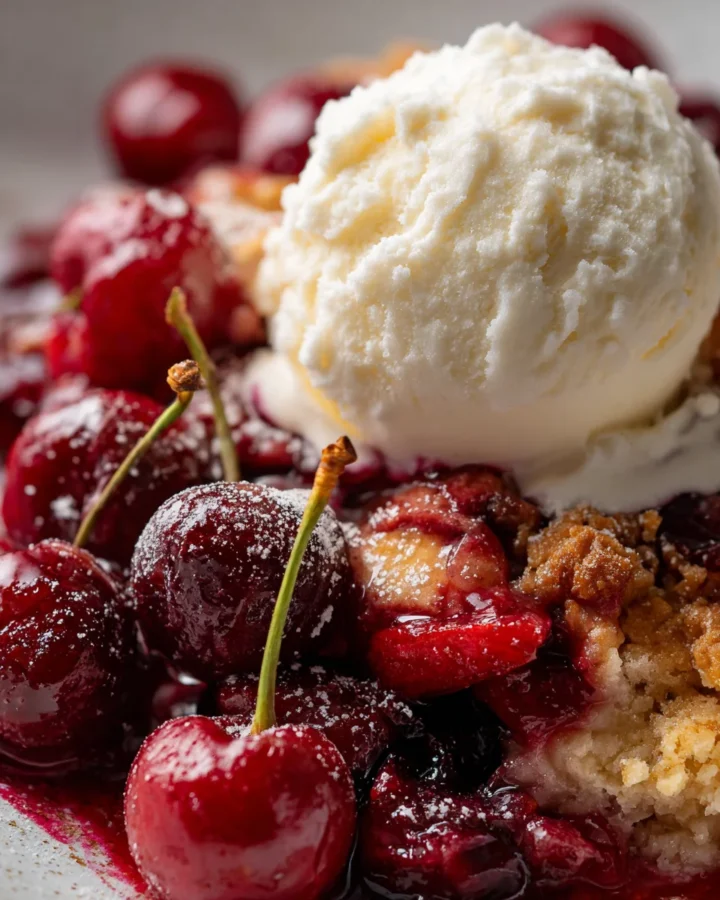
Use a large serving spoon to scoop deep into the baking dish, ensuring that you capture a generous amount of the juicy, dark red fruit along with a large piece of the golden, buttery crust. Deposit the hot portion into a shallow dessert bowl.
Immediately place a massive scoop of high-quality vanilla bean ice cream right on top of the warm biscuit crust. The intense residual heat from the baked pastry will cause the cold ice cream to melt slowly, creating a luxurious, creamy vanilla sauce that flows down into the tart cherry juices, creating an incredibly rich and decadent flavor combination that will make your taste buds sing.
Flavor Variations to Explore
One of the absolute best things about mastering a basic cobbler format is how incredibly easy it is to adapt the ingredients to suit different flavor preferences or to experiment with unique culinary combinations.
If you love complex, gourmet flavor notes, consider adding a quarter of a teaspoon of pure almond extract into your fruit filling along with the vanilla. Almond and cherry are a classic culinary pairing; the nuttiness of the extract enhances the stone fruit flavor beautifully, giving the entire dessert a sophisticated flavor profile that tastes like it came from an upscale French pastry shop. For a spicy autumn twist, you can increase the amount of cinnamon in the biscuit batter and add a tiny pinch of ground cloves or ground ginger to the fruit, creating a warm, comforting dessert that is perfect for chilly evening gatherings.
For those who want to experiment with mixed fruit profiles, you can easily substitute two cups of the cherries with an equal amount of frozen sliced peaches, frozen blackberries, or frozen dark blueberries. A cherry-mango combination offers an exciting tropical twist, while a cherry-blackberry blend provides a deeply complex berry richness. If you follow a dairy-free lifestyle, you can easily substitute the whole milk in the batter with a rich barista-style oat milk or almond milk, and use a high-quality plant-based stick butter for the melting process, resulting in an equally flaky and delicious vegan-friendly treat.
Frequently Asked Questions: Cherry Cobbler with Frozen Cherries
Can I use fresh cherries instead of frozen ones?
Yes, you can absolutely use fresh fruit if they happen to be in season. However, you will need to spend the extra time washing, stemming, and pitting four full cups of fresh cherries. Because fresh fruit contains slightly less water than frozen varieties, you can reduce the baking time by about five minutes, keeping a close eye on the bubbling juices to determine when it is finished.
Why did my fruit filling turn out too watery?
A watery filling is almost always the result of letting the fruit thaw before mixing, or omitting the cornstarch. Frozen fruit naturally releases extra moisture as it heats up in the oven, and the cornstarch acts as a vital thickening agent that binds that moisture into a glossy syrup. Make sure to keep your fruit in the freezer until the exact moment you are ready to mix and bake.
How should I store and reheat any leftovers?
If you happen to have any leftovers, allow the baking dish to cool completely to room temperature. Cover the dish tightly with plastic wrap or aluminum foil and store it in your refrigerator for up to four days. To reheat, avoid using a microwave if possible, as it will make the biscuit topping soggy. Instead, place a portion in a three hundred and fifty degree oven for ten minutes until the fruit is warm and the crust is crisp again.
Can I make this Cherry Cobbler with Frozen Cherries gluten-free?
Yes, this recipe adapts beautifully to gluten-free lifestyles. Simply replace the one cup of all-purpose flour with an equal amount of a high-quality, measures-for-measure gluten-free flour blend that contains xanthan gum. The texture of the biscuit dough will remain remarkably soft, light, and delicious.
What can I use instead of cornstarch to thicken the filling?
If you do not have cornstarch in your kitchen cupboard, you can easily substitute it with an equal amount of arrowroot powder or double the amount of regular all-purpose flour. Keep in mind that flour will make the cherry syrup slightly cloudy rather than perfectly clear and glossy, but it will still taste absolutely spectacular.
Conclusion: Cherry Cobbler with Frozen Cherries
Baking an unforgettable, comforting dessert does not require hours of meticulous kitchen work or expensive specialized equipment; it is simply about celebrating simple flavor combinations with care and precision. This glorious Cherry Cobbler with Frozen Cherries perfectly demonstrates that philosophy, proving that with a few basic baking staples and a bag of high-quality frozen fruit, you can create a luxurious, bakery-style treat that brings comfort to any table at any time of the year. By mastering the simple art of a toss-and-bake fruit filling and pairing it with a rich, drop-style biscuit batter, you create a timeless classic that easily outshines complicated modern pastries. Enjoy the wonderful ease of pulling this dessert together, savor the sweet aroma as it bakes in your kitchen, and share it proudly with the people you love.
Print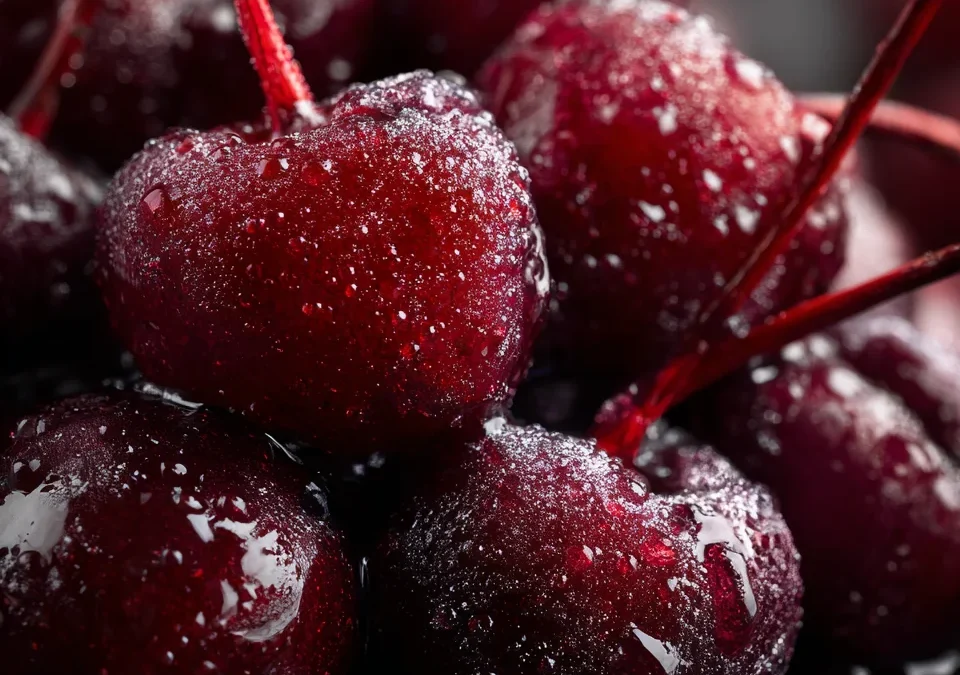
Cherry Cobbler with Frozen Cherries
- Total Time: 50 minutes
- Yield: 6 servings 1x
- Diet: Vegetarian
Description
To master this baking project, it helps to understand what defines an authentic Cherry Cobbler with Frozen Cherries and how it differs from other rustic fruit desserts like crisps, crumbles, or pies. A cobbler earns its unique name because the dollops of batter or biscuit dough dropped onto the fruit filling bake up into a bumpy, uneven surface that resembles a rustic cobblestone street.
Ingredients
Cherry filling
- 4 cups frozen cherries (no need to thaw)
- ½ cup sugar
- 1 tbsp lemon juice
- 1 tsp vanilla extract
- 2 tsp cornstarch
- Pinch of salt
Cobbler topping
- 1 cup all-purpose flour
- ½ cup sugar
- 1½ tsp baking powder
- ¼ tsp salt
- ½ cup milk
- 4 tbsp melted butter
- ½ tsp cinnamon (optional)
Optional
- Vanilla ice cream for serving
Instructions
1. Prepare filling
- Preheat oven to 375°F (190°C).
- In a bowl, mix frozen cherries, sugar, lemon juice, vanilla, cornstarch, and salt.
- Pour into a greased baking dish.
2. Make topping
- In a separate bowl, mix flour, sugar, baking powder, salt, and cinnamon.
- Stir in milk and melted butter until just combined (don’t overmix).
- Spoon batter over cherries (it doesn’t need to fully cover).
3. Bake
- Bake for 35–45 minutes.
- Cobbler is done when topping is golden and filling is bubbling.
4. Serve
Let cool slightly and serve warm with vanilla ice cream.
Notes
This Cherry Cobbler with Frozen Cherries transforms simple pantry ingredients into a warm, comforting dessert with a juicy fruit filling and soft, golden topping—perfect for cozy nights or effortless entertaining.
- Prep Time: 10 minutes
- Cook Time: 40 minutes
- Category: Dessert
- Method: Baked
- Cuisine: American
Nutrition
- Serving Size: 1 slice
- Calories: 310 kcal
Keywords: Easy frozen fruit cobbler, homemade quick cherry dessert, baked tinned sweet cherry crisp, simple biscuit top cherry crumble