The holiday season is a time for celebration, and what better way to sweeten your festivities than with a cake that combines the rich, decadent flavor of chocolate with the tropical sweetness of coconut? The Festive Chocolate Coconut Christmas Cake offers a perfect balance of flavors and textures, making it an ideal dessert for family gatherings, holiday dinners, or a Christmas party. With layers of moist chocolate cake, a creamy coconut filling, and a luscious chocolate glaze, this cake is sure to become a holiday favorite.
In this article, we’ll take a deep dive into the details of creating this festive treat. From the list of ingredients to the step-by-step directions, FAQs, and a final conclusion, you’ll have all the information you need to bake this showstopper and impress your guests this holiday season.
Ingredients for the Chocolate Coconut Christmas Cake
For the Chocolate Cake:
- 1 1/2 cups all-purpose flour
- 1/2 cup unsweetened cocoa powder
- 1 teaspoon baking powder
- 1/2 teaspoon baking soda
- 1/4 teaspoon salt
- 1/2 cup unsalted butter (softened)
- 1 cup granulated sugar
- 2 large eggs
- 1 teaspoon vanilla extract
- 1/2 cup buttermilk
- 1/2 cup boiling water
For the Coconut Filling:
- 2 cups shredded sweetened coconut
- 1/2 cup sweetened condensed milk
- 1/4 cup unsweetened coconut milk (or regular milk)
- 1/4 teaspoon vanilla extract
For the Chocolate Glaze:
- 1/2 cup heavy cream
- 1 cup semi-sweet chocolate chips
- 2 tablespoons unsalted butter
For Garnish:
- Shredded coconut (for sprinkling on top)
- Optional: Edible gold or silver stars for decoration
This recipe yields approximately 8-10 servings, making it the perfect cake to serve at family gatherings or small parties. The balance of rich chocolate and sweet coconut gives the cake a festive flavor that complements the Christmas spirit.
Directions for the Chocolate Coconut Christmas Cake
1. Preheat the Oven and Prepare the Cake Pans for the Chocolate Coconut Cake
Before you start assembling your cake, it’s important to prepare your equipment. Preheat your oven to 350°F (175°C). While the oven is heating, grease two 8-inch round cake pans with butter or non-stick cooking spray. For an extra layer of protection, line the bottoms of the pans with parchment paper to ensure the cakes don’t stick once baked.
2. Sift the Dry Ingredients for a Moist Chocolate Coconut Christmas Cake
Next, combine the dry ingredients in a medium-sized bowl. Start by sifting 1 1/2 cups of all-purpose flour to remove any lumps. Then, sift in 1/2 cup of unsweetened cocoa powder, 1 teaspoon of baking powder, 1/2 teaspoon of baking soda, and 1/4 teaspoon of salt. Sifting these ingredients ensures a light and airy cake texture and helps evenly distribute the baking soda and powder, which are key for leavening.
3. Cream the Butter and Sugar
In a large mixing bowl, cream 1/2 cup of softened unsalted butter and 1 cup of granulated sugar together. Using an electric mixer or a whisk, beat the butter and sugar until the mixture is light and fluffy. This step helps incorporate air into the batter, giving the cake its soft, tender crumb.
4. Add Eggs and Vanilla to Create a Rich Chocolate Coconut Cake Base
Once the butter and sugar are creamed, add 2 large eggs, one at a time, making sure to mix well after each addition. Add 1 teaspoon of vanilla extract and continue mixing until the mixture is smooth and well incorporated.
5. Combine Wet and Dry Ingredients to Form the Perfect Chocolate Coconut Cake Batter
Gradually add the sifted dry ingredients to the wet ingredients in two to three additions. Start by adding about a third of the flour mixture, followed by half of the buttermilk. Mix until just combined, and then add the next third of the dry ingredients, followed by the remaining buttermilk. Stir gently to avoid overmixing, as this can result in a dense cake.
6. Add Boiling Water for a Moist and Fluffy Chocolate Coconut Cake
The boiling water is added last to thin out the batter, making it smooth and slightly runny. Stir the boiling water into the batter until it is completely incorporated. This will help the cake become moist and ensure it bakes evenly.
7. Bake the Layers of Chocolate Coconut Cake to Perfection
Evenly divide the cake batter between the two prepared cake pans. Smooth the top of the batter with a spatula to ensure the cakes bake evenly. Place the pans in the oven and bake for 30-35 minutes or until a toothpick inserted into the center of the cakes comes out clean.
Once baked, remove the cakes from the oven and allow them to cool in the pans for about 10 minutes. Afterward, transfer the cakes to a wire rack to cool completely.
Preparing the Coconut Filling for Your Chocolate Coconut Christmas Cake
8. Making a Creamy Coconut Filling for the Chocolate Coconut Cake
While the cakes are cooling, it’s time to make the coconut filling. In a separate bowl, combine 2 cups of shredded sweetened coconut, 1/2 cup of sweetened condensed milk, 1/4 cup of unsweetened coconut milk (or regular milk), and 1/4 teaspoon of vanilla extract. Stir until the mixture is smooth and the coconut is well coated with the sweetened condensed milk. Set the coconut filling aside to allow the flavors to meld.
Assemble the Chocolate Coconut Cake with Coconut Filling
9. Layering the Chocolate Coconut Cake and Coconut Filling
Once the cakes have cooled completely, it’s time to assemble your chocolate coconut masterpiece. Place one cake layer on a serving plate or cake stand. Spread the coconut filling evenly over the top of the cake layer, making sure to cover the entire surface.
Place the second cake layer on top of the coconut filling and gently press down to ensure it sticks together.
Prepare the Chocolate Glaze for the Final Touch on Your Christmas Cake
10. Creating a Smooth Chocolate Glaze for Your Chocolate Coconut Cake
To make the chocolate glaze, heat 1/2 cup of heavy cream in a small saucepan over medium heat. Stir occasionally until the cream begins to simmer. Remove the pan from the heat and stir in 1 cup of semi-sweet chocolate chips and 2 tablespoons of unsalted butter. Stir until the chocolate is completely melted and the glaze is smooth and glossy.
Pour the Chocolate Glaze
11. Finishing the Cake with Chocolate Glaze and Shredded Coconut for a Festive Look
Pour the warm chocolate glaze over the top of the assembled cake, allowing it to drip down the sides. Use a spatula to smooth out the glaze if necessary. Once the cake is covered in glaze, sprinkle shredded coconut over the top for an extra touch of flavor and texture. If desired, add edible gold or silver stars to make the cake even more festive.
Allow the glaze to set for a few minutes before slicing and serving the cake.
FAQs
1. Can I use a different type of milk for the coconut filling?
Yes, you can substitute regular milk for the coconut milk in the filling. However, coconut milk gives the filling a richer, more authentic flavor. If you prefer a lighter taste, regular milk will work just fine.
2. Can I make this cake ahead of time?
Absolutely! You can prepare the cake layers and the coconut filling a day ahead and store them separately. Assemble the cake and add the glaze on the day you plan to serve it to ensure the glaze remains glossy.
3. Is it possible to make this cake gluten-free?
Yes, you can make this cake gluten-free by substituting the all-purpose flour with a gluten-free flour blend. Be sure to check that your cocoa powder and other ingredients are certified gluten-free.
4. Can I use dark chocolate for the glaze?
You can use dark chocolate for the glaze if you prefer a more intense chocolate flavor. Keep in mind that dark chocolate has a slightly different texture and taste than semi-sweet chocolate, so the glaze may be a bit more bittersweet.
5. Can I freeze this cake?
Yes, this cake can be frozen. To freeze, wrap each cake layer tightly in plastic wrap and place them in a freezer-safe bag. You can freeze the cake layers for up to 3 months. To thaw, simply leave the layers at room temperature for a few hours before assembling.
6. Can I use sweetened coconut flakes instead of shredded coconut?
Yes, you can use sweetened coconut flakes instead of shredded coconut for the filling. However, be sure to check the sweetness level as it may affect the overall flavor of the cake.
7. Can I use a different type of chocolate for the glaze?
Yes, you can use milk chocolate or even white chocolate for the glaze, depending on your preference. Just keep in mind that the sweetness and texture of the glaze will vary with the type of chocolate used.
8. Can I add nuts or other flavors to the cake?
Absolutely! You can add chopped nuts, like toasted coconut or walnuts, to the cake batter for added texture. You could also experiment with a little almond extract or cinnamon in the cake for extra flavor.
9. How do I store leftover cake?
Store any leftover cake in an airtight container at room temperature for up to 3 days. If you want to keep it longer, refrigerate it for up to a week. Make sure the glaze is set before storing to prevent it from becoming sticky.
10. Can I make this cake in a different pan size?
Yes, you can make this cake in different pan sizes, but the baking time may vary. If using a larger or smaller pan, keep an eye on the cake as it bakes and test with a toothpick for doneness. A 9-inch pan may bake faster, while a 6-inch pan may require a bit more time.
Conclusion
The Festive Chocolate Coconut Christmas Cake is a showstopper that combines two beloved ingredients—chocolate and coconut—into a deliciously rich and moist holiday treat. With its tender chocolate cake layers, creamy coconut filling, and smooth chocolate glaze, this cake is sure to bring joy to your holiday celebrations. Whether you’re hosting a family dinner or attending a festive gathering, this cake will impress both visually and with its delightful flavor. So, roll up your sleeves, gather your ingredients, and get baking—your perfect Christmas cake is just a few steps away!
Print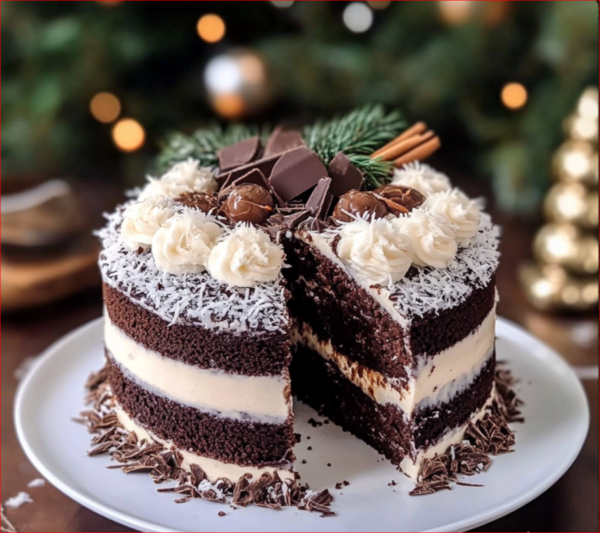
Chocolate Coconut Christmas Cake – Festive Holiday Dessert Recipe
- Total Time: 1 hour 10 minutes
- Yield: 8-10 servings 1x
Description
The Festive Chocolate Coconut Christmas Cake is a delicious holiday dessert featuring rich chocolate cake layers, a creamy coconut filling, and a glossy chocolate glaze. Perfect for Christmas gatherings, this cake offers a delightful blend of chocolate and coconut flavors, topped with shredded coconut for an extra festive touch. Easy to make and sure to impress, it’s the ideal treat for any holiday celebration.
Ingredients
1 1/2 cups all-purpose flour
1/2 cup unsweetened cocoa powder
1 teaspoon baking powder
1/2 teaspoon baking soda
1/4 teaspoon salt
1/2 cup unsalted butter, softened
1 cup granulated sugar
2 large eggs
1 teaspoon vanilla extract
1/2 cup buttermilk
1/2 cup boiling water
For the Coconut Filling:
2 cups shredded sweetened coconut
1/2 cup sweetened condensed milk
1/4 cup unsweetened coconut milk (or regular milk)
1/4 teaspoon vanilla extract
For the Chocolate Glaze:
1/2 cup heavy cream
1 cup semi-sweet chocolate chips
2 tablespoons unsalted butter
For Garnish:
Shredded coconut (for sprinkling on top)
Optional: Edible gold or silver stars
Instructions
Preheat your oven to 350°F (175°C) and grease two 8-inch round cake pans.
Line the bottoms with parchment paper.
In a medium bowl, sift together the flour, cocoa powder, baking powder, baking soda, and salt.
In a large mixing bowl, cream the butter and sugar together until light and fluffy. Add the eggs, one at a time, followed by the vanilla extract.
Gradually add the dry ingredients, alternating with the buttermilk, mixing until smooth. Stir in the boiling water until the batter is well combined.
Pour the batter evenly into the prepared cake pans. Bake for 30-35 minutes or until a toothpick inserted into the center comes out clean.
While the cakes are baking, make the coconut filling by combining the shredded coconut, sweetened condensed milk, coconut milk, and vanilla extract in a bowl. Set aside.
Once the cakes have cooled completely, spread the coconut filling evenly between the layers of cake.
To make the chocolate glaze, heat the heavy cream in a small saucepan over medium heat until it begins to simmer.
Remove from heat and stir in the chocolate chips and butter until the chocolate is completely melted and smooth.
Pour the chocolate glaze over the top of the cake, allowing it to drip down the sides.
Garnish the cake with additional shredded coconut and edible stars if desired. Let the glaze set before slicing and serving.
Notes
Prep Time: 25 minutes | Cooking Time: 35 minutes | Total Time: 1 hour 10 minutes
- Prep Time: 25 minutes
- Cook Time: 35 minutes
- Category: Dessert
- Method: Baking
- Cuisine: American
Nutrition
- Serving Size: 1 slice (based on 8-10 servings)
- Calories: Approx. 380 kcal per serving
Keywords: Chocolate Coconut Cake, Christmas Cake, Festive Dessert, Holiday Cake, Coconut Filling, Chocolate Glaze