There is absolutely nothing quite like the experience of slicing into a thick, multi-layered ice cream cake during a warm summer birthday or a festive family gathering. For generations, one specific fast-food giant has reigned supreme when it comes to frozen treats, capturing our hearts with a legendary combination of velvety soft serve, decadent fudge, and that iconic, crunchy cookie center. If you want to recreate that nostalgic magic right in your own kitchen without spending a fortune, you have come to the right place. This spectacular copycat dairy queen blizzard cake recipe allows you to mimic those exact premium textures and rich flavor profiles using straightforward ingredients from your local grocery store.
By taking control of the assembly process at home, you unlock the ability to customize the components to your exact preferences while ensuring every single slice is packed with an abundance of mix-ins. Whether you are celebrating a monumental milestone or simply want to surprise your loved ones with a decadent weekend project, this dessert is guaranteed to outperform any store-bought alternative. In this comprehensive guide, we will break down the history of this frozen masterpiece, outline the exact quantities required, and walk you through a foolproof step-by-step assembly process that guarantees a flawless presentation.
What Is This copycat dairy queen blizzard cake
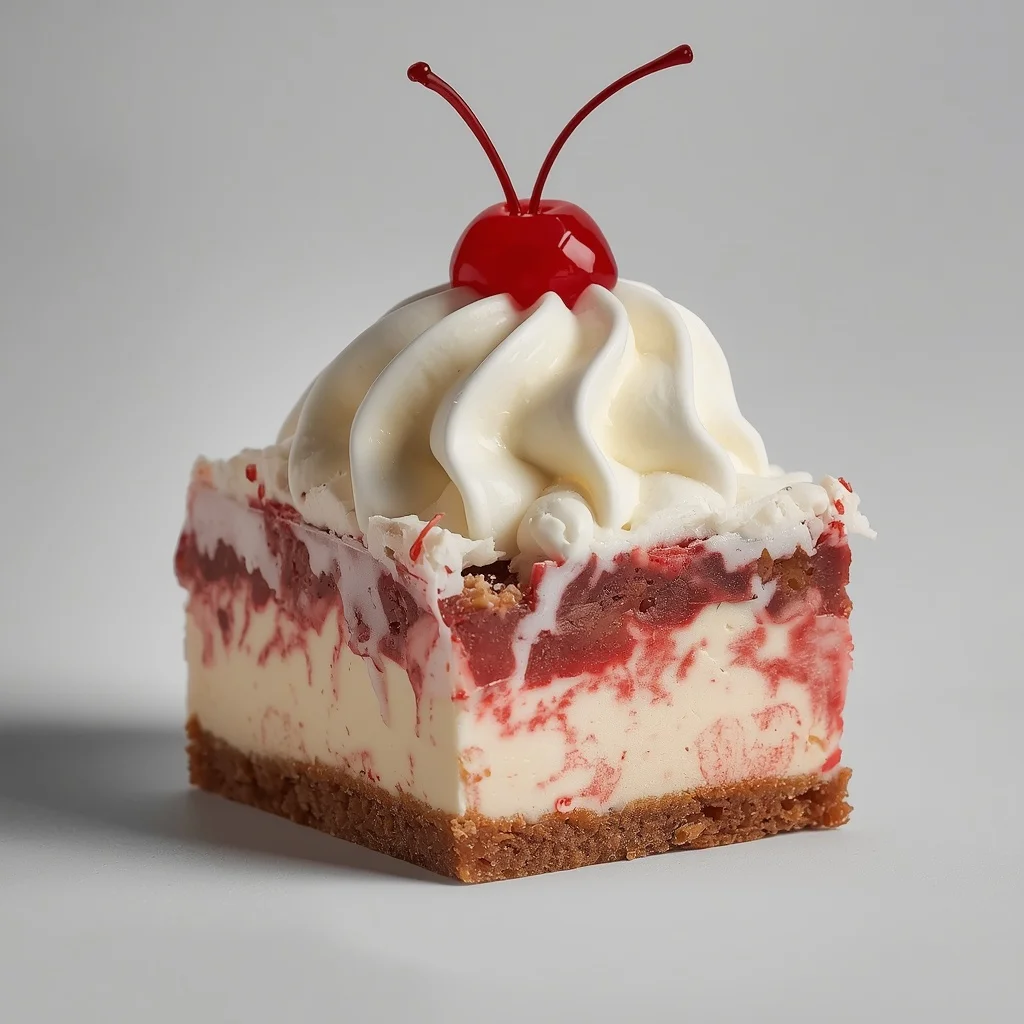
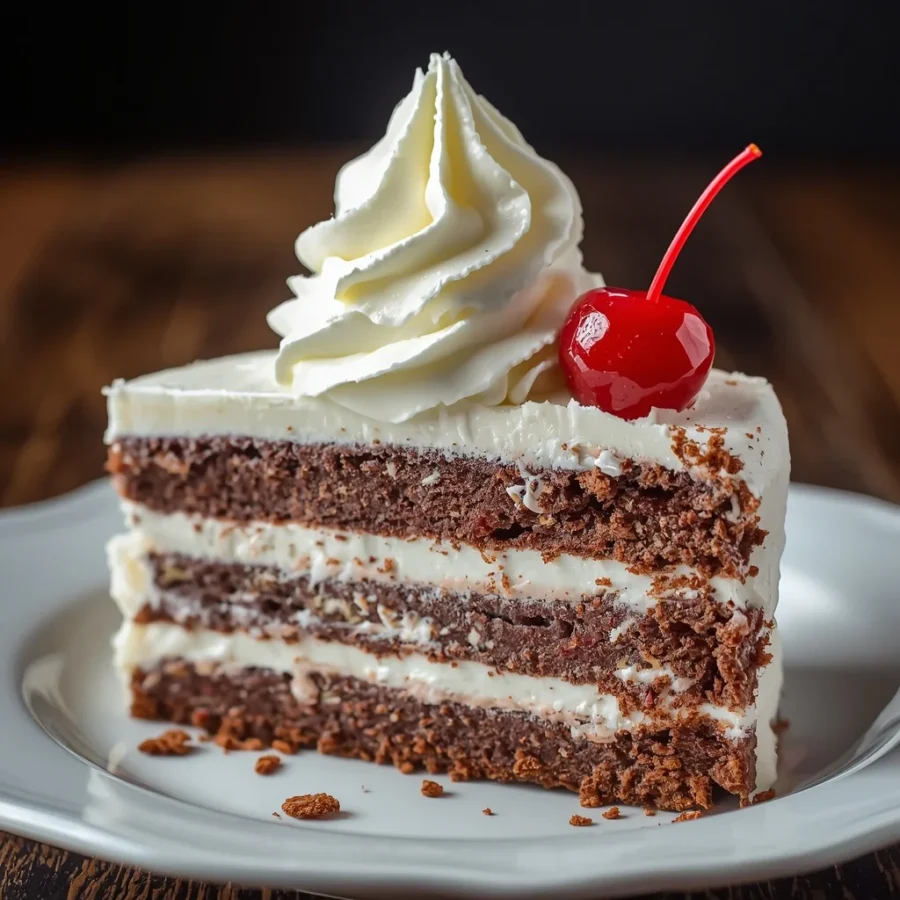
To successfully execute this dessert, it helps to understand exactly what makes it so distinct from a standard supermarket ice cream cake. When people rave about this copycat dairy queen blizzard cake recipe, they are referring to a highly structured, deep-dish frozen creation that expertly balances contrasting textures. Unlike basic ice cream cakes that merely stack two flavors of frozen dairy next to each other, this specific style relies on a solid, moist baked foundation capped with an intense chocolate core and a towering layer of premium aerated ice cream.
The undisputed soul of the entire construction is the legendary middle section, which home bakers affectionately refer to as the crunch layer. This element provides a dramatic, crispy interruption to the smooth, melting dairy, mirroring the exact mouthfeel of a freshly blended drive-thru treat. The entire structure is then enveloped in a light, stable whipped shell that locks in the cold temperature and serves as a blank canvas for beautiful decorative garnishes. It is an engineering marvel of the dessert world, designed to remain firm yet easily sliceable when served.
Origin of copycat dairy queen blizzard cake
The roots of this specific frozen confection trace back to the mid-eighties when a major American soft-serve franchise revolutionized the fast-food industry by introducing a mechanically blended, upside-down-defying soft-serve treat packed with candy pieces. The phenomenal global success of that individual treat naturally led to demand for a larger, shareable format that could be brought home for parties, birthdates, and major seasonal celebrations. Thus, the commercial sheet-style ice cream cake was born, quickly becoming a multi-million-dollar staple of suburban celebrations.
For decades, the precise method for replicating that signature crunchy chocolate center and maintaining a perfectly soft, scoopable texture at home remained a closely guarded secret among commercial kitchen developers. Early internet copycat attempts often fell flat because standard cookies would turn incredibly soggy and mushy when exposed to freezing moisture over long periods. Modern culinary bloggers eventually cracked the code by introducing a brief, high-heat baking process that completely seals the cookie crumbs in butter, allowing home cooks to effortlessly recreate this beloved restaurant tradition in their own home kitchens.
Ingredients with Quantity: copycat dairy queen blizzard cake
Achieving a professional-grade structure that will not collapse as it thaws requires using high-quality components measured in precise proportions. Because this is a frozen assembly project, ensuring you have the exact amounts ready beforehand will make the building process smooth and stress-free.
For the Foundation Cake Layer
-
Chocolate cake mix: One standard box. You will also need to gather the auxiliary liquid ingredients listed on that specific back panel, which typically include vegetable oil, water, and whole eggs.
-
Alternative option: If you prefer a completely scratch-made approach, you can substitute this with one single, pre-baked eight-inch homemade chocolate cake layer that has been cooled completely to room temperature.
For the Legendary Crunch Layer
-
Chocolate sandwich cookies: Twenty-four whole cookies. Brand-name cream-filled chocolate cookies work best here because the sugary cream filling melts slightly during the baking process, helping to form spectacular crunchy clusters.
-
Unsalted butter: One quarter cup. This will be completely melted to coat the cookie crumbs, acting as a moisture barrier that keeps the center perfectly crispy even after days in the freezer.
Decadent Fudge Layer
-
Hot fudge sauce: One cup of high-quality, thick store-bought hot fudge. Avoid using thin chocolate syrup for this specific layer, as syrup will run and bleed into the cake rather than forming a distinct, fudgy ribbon.
For the Ice Cream Layer
-
Vanilla ice cream: One and a half quarts. For the most authentic copycat experience, look for a premium, smooth vanilla bean flavor that boasts a high dairy fat content, which closely mimics the luxurious mouthfeel of commercial soft-serve.
For the Outer Frosting and Elegant Garnish
-
Whipped topping: Two cups total. Ensure this is completely thawed in the refrigerator before you begin decorating so that it spreads smoothly without tearing the frozen surface.
-
Chocolate syrup: A few tablespoons for a decorative final drizzle over the top.
-
Chocolate shavings or additional crushed sandwich cookies: A handful to scatter across the top surface to provide visual contrast and hint at the treasures hidden within the cake.
Step by Step Direction and Preparation Method: copycat dairy queen blizzard cake
Assembling a frozen dessert requires a bit of patience and a clear understanding of temperature control. Because we are dealing with melting components, following these stages sequentially will ensure your layers remain perfectly distinct and structurally sound.
Baking and Cool Down of the Foundation
The very first stage focuses entirely on creating your base. Prepare your chocolate cake batter according to the directions outlined on your specific box mix. Pour the rich batter into a greased eight-inch round cake pan. Bake the layer thoroughly, keeping a close eye on the center until a toothpick inserted comes out completely clean. Once fully baked, remove it from the oven and let it sit on a cooling rack.
It is absolutely vital that this cake layer cools down entirely to room temperature, followed by an hour in the refrigerator. Attempting to assemble an ice cream cake on top of a even slightly warm base will instantly melt your dairy, resulting in a soggy, structural disaster.
Crafting the Definitively Crunchy Center
While your baked layer is cooling down, you can focus on creating the signature crunch element. Preheat your oven to three hundred and fifty degrees Fahrenheit. Take your twenty-four chocolate sandwich cookies and place them into a large plastic zip-top bag. Use a rolling pin or the flat side of a heavy meat mallet to crush the cookies into a mixture of fine crumbs and small, chunky pieces.
Pour these crushed crumbs into a medium mixing bowl and drizzle the quarter cup of melted unsalted butter over the top. Toss the mixture thoroughly with a spoon until the crumbs resemble wet black sand and are uniformly coated. Spread this mixture out into a single flat layer on a large rimmed baking sheet.
Bake in your preheated oven for exactly eight minutes. This brief baking process toasts the cookies and causes the sugars to caramelize with the butter, creating an impermeable shield against moisture. Remove the sheet from the oven and let the crumbs cool completely until they are totally hard and crunchy.
Prepping the Springform Pan and Initial Assembly
To achieve clean, professional edges, you will want to utilize an eight-inch springform pan with removable sides. Line the bottom of the pan with a circle of parchment paper, and place a long strip of parchment paper along the interior walls to prevent sticking. Place your thoroughly chilled, pre-baked chocolate cake layer directly into the very bottom of the pan, pressing it down gently so it fits snugly against the walls.
Take your one cup of thick hot fudge sauce, ensuring it is at room temperature and easily spreadable, and pour it evenly over the top of the chocolate cake. Use an offset spatula to smooth the fudge out into a uniform layer, covering the cake completely from edge to edge.
Layering the Crunch and Softened Ice Cream
Immediately after smoothing out the hot fudge, take your cooled cookie crunch mixture and scatter it generously over the entire surface of the fudge layer. Press down very gently with the palms of your hands so the crumbs embed themselves slightly into the sticky fudge, which anchors them in place. Next, take your one and a half quarts of vanilla ice cream, which should be slightly softened to a spreadable texture but not watery or melted.
Scoop the softened dairy in large dollops over the top of the crunch layer. Using a clean spatula or the back of a large spoon, gently smooth the ice cream out into a flat, level surface, filling in any gaps along the perimeter of the springform pan. Take care not to disturb the cookie layer underneath as you glide across the top.
The Essential Deep Freeze Period
Once the top surface of your ice cream is perfectly smooth and level with the top of your pan, cover the entire springform assembly tightly with a double layer of plastic wrap or aluminum foil. Place the pan into the coldest section of your freezer.
Leave the dessert undisturbed for a minimum of four to six hours. For the absolute best structural integrity, letting it freeze overnight is highly recommended, as this ensures the internal core becomes completely solid and firm enough to support its own weight when the metal sides are removed.
Stripping the Mold and Final Decoration
When the freezing period is complete, remove the pan from the freezer. Carefully open the latch on the side of your springform pan and slowly lift the metal ring upward and away from the cake. Gently peel away the parchment paper strips from the sides to reveal your perfectly clean, distinct frozen layers. Place the naked cake onto your intended serving platter.
Take your two cups of completely thawed whipped topping and use a clean spatula to frost the entire exterior of the cake, coating the top and the sides generously just like a traditional birthday cake. Once frosted, create a beautiful finish by drizzling chocolate syrup in an elegant zigzag pattern across the top, and scatter your remaining chocolate shavings or cookie bits around the perimeter.
Slicing and Serving Protocol
Because the internal components will be exceptionally solid right out of the deep freeze, allow the decorated masterpiece to sit out on your kitchen counter at room temperature for five to ten minutes before you attempt to slice it. This brief tempering period softens the outer whipped shell and the internal fudge just enough to allow a clean cut.
When you are ready to serve, fill a tall glass with very warm tap water. Dip a long, sharp chef’s knife into the warm water, wipe it dry with a clean towel, and slice decisively through the layers. Repeat this dipping and wiping process between every single slice to ensure beautiful, restaurant-quality portions with perfectly defined layers.
Variations: copycat dairy queen blizzard cake
One of the most exciting aspects of making this copycat dairy queen blizzard cake recipe at home is the absolute freedom to deviate from the classic vanilla profile and explore your favorite flavor combinations.
Leaning into Total Chocolate Intoxication
If you or the guest of honor are a certified chocoholic, you can easily transform this into a double-chocolate extravaganza. Swap out the vanilla dairy layer for an ultra-rich Dutch-process chocolate ice cream, and consider mixing a half cup of mini semi-sweet chocolate chips directly into the batter of your baseline cake layer before it goes into the oven.
Incorporating Peanut Butter Candy Elements
For an incredibly popular flavor twist, try introducing peanut butter elements into the mix. You can replace the classic hot fudge ribbon with a thick layer of warm, creamy peanut butter sauce, and scatter chopped peanut butter cup candies directly into the crunch layer. This creates a spectacular salty-sweet dynamic that balances the rich dairy beautifully.
Introducing Gourmet Cookie Dough Chunks
If your favorite drive-thru order involves chunks of raw dough, you can easily replicate that experience at home. Purchase or prepare a batch of eggless, food-safe edible chocolate chip cookie dough. Roll the dough into tiny, bite-sized spheres and fold them generously throughout the softened vanilla ice cream layer before you smooth it over the crunchy cookie base.
Swapping the Cookie Archetype: copycat dairy queen blizzard cake
While the classic recipe demands a chocolate sandwich cookie foundation, there is no rule stopping you from experimenting with different biscuit bases. Utilizing crushed golden sandwich cookies paired with a rich caramel sauce drizzle yields a spectacular dulce de leche profile, while using spiced ginger snap cookies creates a phenomenal seasonal holiday variation.
Frequently Asked Questions: copycat dairy queen blizzard cake
Why did my cookie crunch layer turn soggy after a few days?
If your middle layer lost its signature bite, it is almost always because the cookie crumbs were not baked thoroughly enough with the butter, or the hot fudge sauce was too hot when applied. The butter-baking step is absolutely critical because it coats the porous cookie starch in a fat barrier. If you skip the oven-toasting stage, the crumbs will naturally absorb moisture from the surrounding melting ice cream over time, leading to a soft, mushy texture.
Can I substitute the whipped topping with real homemade whipped cream?
While real whipped cream made from heavy whipping sugar tastes wonderful, it is not recommended for frosting the exterior of a long-term frozen cake. Real dairy whipped cream tends to separate, become icy, and crack significantly when stored in a residential deep freeze for more than a few hours. Stabilized whipped topping, on the other hand, contains specific emulsifiers that allow it to retain its fluffy, velvety texture perfectly even at sub-zero temperatures.
How long can I safely store copycat dairy queen blizzard cake in my freezer?
As long as the cake remains tightly covered in plastic wrap or stored inside a specialized airtight cake keeper dome, it will keep its optimal flavor and texture beautifully for up to one full week in a standard freezer. Try to avoid leaving the cake sitting out on the counter for more than fifteen minutes during serving, as repeated cycles of partial melting and re-freezing will cause large ice crystals to form, ruining the smooth texture.
What should I do if I do not own a springform pan?
If you do not have a springform pan with removable sides, you can still create a delicious version of this treat by utilizing a standard nine by thirteen inch metal baking dish. Simply line the entire interior of the dish with a large sheet of aluminum foil, leaving several inches of overhang on the sides. Assemble the layers horizontally within the lined dish, freeze it solid, and then use the foil overhang as handles to lift the entire frozen block out of the pan before slicing.
Conclusion: copycat dairy queen blizzard cake
Recreating the copycat dairy queen blizzard cake recipe at home is an incredibly rewarding culinary project that brings pure, nostalgic joy to any dinner table. By carefully constructing a solid chocolate foundation, baking a dedicated moisture-resistant cookie crunch layer, and capping it all with rich vanilla dairy, you achieve a professional-grade frozen dessert that easily rivals the commercial original. It completely demystifies a beloved childhood treat, replacing expensive store orders with a fun, customizable kitchen experience that you can share with friends and family. Follow the proper freezing and tempering protocols, choose your favorite candy modifications, and enjoy the undisputed title of ultimate dessert champion at your next special gathering.
Print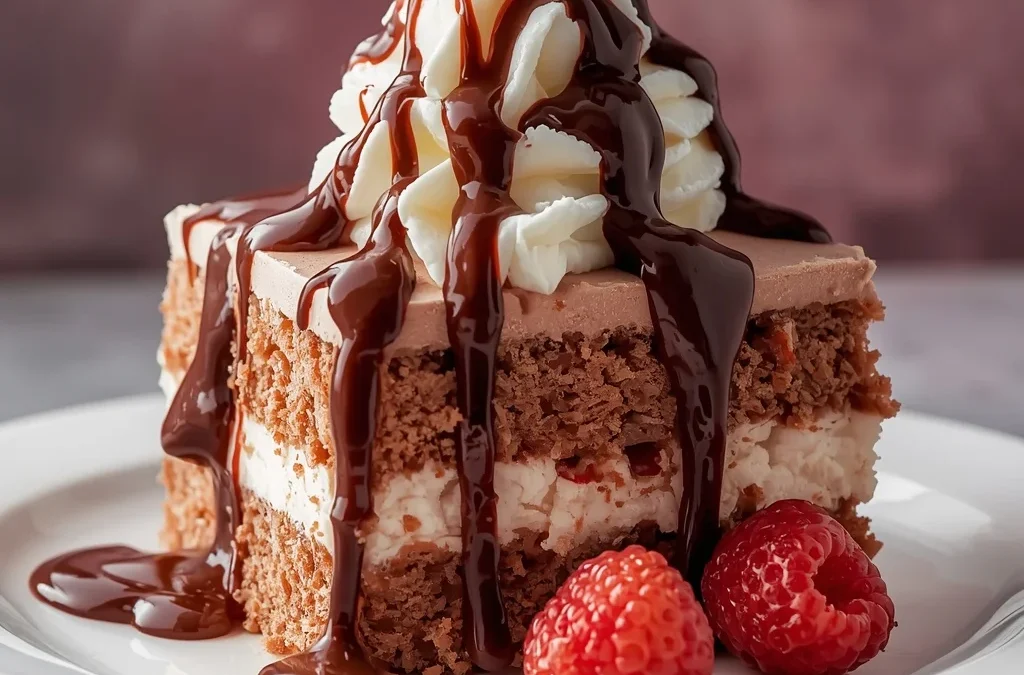
The Ultimate Copycat Dairy Queen Blizzard Cake Recipe
- Total Time: 5 hours (includes freezing time)
- Yield: 10 servings 1x
- Diet: Vegetarian
Description
To successfully execute this dessert, it helps to understand exactly what makes it so distinct from a standard supermarket ice cream cake. When people rave about this copycat dairy queen blizzard cake recipe, they are referring to a highly structured, deep-dish frozen creation that expertly balances contrasting textures. Unlike basic ice cream cakes that merely stack two flavors of frozen dairy next to each other, this specific style relies on a solid, moist baked foundation capped with an intense chocolate core and a towering layer of premium aerated ice cream.
Ingredients
For the Cake Layer
- 1 box chocolate cake mix (plus ingredients listed on the box)
- or one 8-inch homemade chocolate cake layer
For the Crunch Layer
- 24 chocolate sandwich cookies (such as Oreos), crushed
- ¼ cup unsalted butter, melted
For the Fudge Layer
- 1 cup hot fudge sauce
For the Ice Cream Layer
- 1½ quarts vanilla ice cream, softened slightly
For the Frosting
- 2 cups whipped topping, thawed
- Chocolate syrup (optional)
- Chocolate shavings or crushed cookies, for garnish
Instructions
1. Bake the Cake
- Prepare the chocolate cake according to the package directions.
- Bake in an 8-inch round pan.
- Allow the cake to cool completely.
2. Make the Crunch Layer
- Combine the crushed chocolate cookies and melted butter.
- Spread the mixture onto a baking sheet.
- Bake at 350°F (175°C) for 8 minutes.
- Let cool completely.
3. Assemble the Cake
- Line an 8-inch springform pan with parchment paper.
- Place the cooled cake layer in the bottom.
- Spread the hot fudge sauce evenly over the cake.
- Sprinkle the cookie crunch over the fudge.
- Spread the softened vanilla ice cream evenly over the crunch layer.
- Smooth the top with a spatula.
4. Freeze
- Cover tightly and freeze for 4–6 hours, or until completely firm.
5. Decorate
- Remove the cake from the pan.
- Frost the top and sides with whipped topping.
- Drizzle with chocolate syrup.
- Garnish with chocolate shavings or crushed cookies.
6. Serve
- Let the cake sit at room temperature for 5–10 minutes before slicing.
- Use a warm knife for clean slices.
Notes
Whether you’re celebrating a birthday or simply craving an ice cream cake, this easy homemade recipe delivers all the flavors you love—without the trip to the ice cream shop.
- Prep Time: 30 minutes
- Cook Time: 30 minutes
- Category: Dessert
- Method: Baking & Freezing
- Cuisine: American
Nutrition
- Serving Size: 1 slice
- Calories: 490 kcal
Keywords: homemade dq blizzard ice cream cake, copycat soft serve crunch cake, chocolate cookie crumble frozen dessert