If you’re a fan of Butterfinger candy bars and chocolate, you’ll absolutely love this Butterfinger Balls recipe! This no-bake treat is an easy, sweet snack that combines the iconic crispy, peanut buttery goodness of Butterfingers with a rich, creamy chocolate coating. Whether you’re looking for a fun treat for a holiday gathering, a quick dessert fix, or a party snack, these Butterfinger Balls will satisfy every craving.

In this guide, we’ll walk you through everything you need to know to make these mouth-watering Butterfinger Balls, including the origin of the recipe, step-by-step instructions, variations, and answers to frequently asked questions. So let’s dive in!
What is the Butterfinger Balls Recipe?
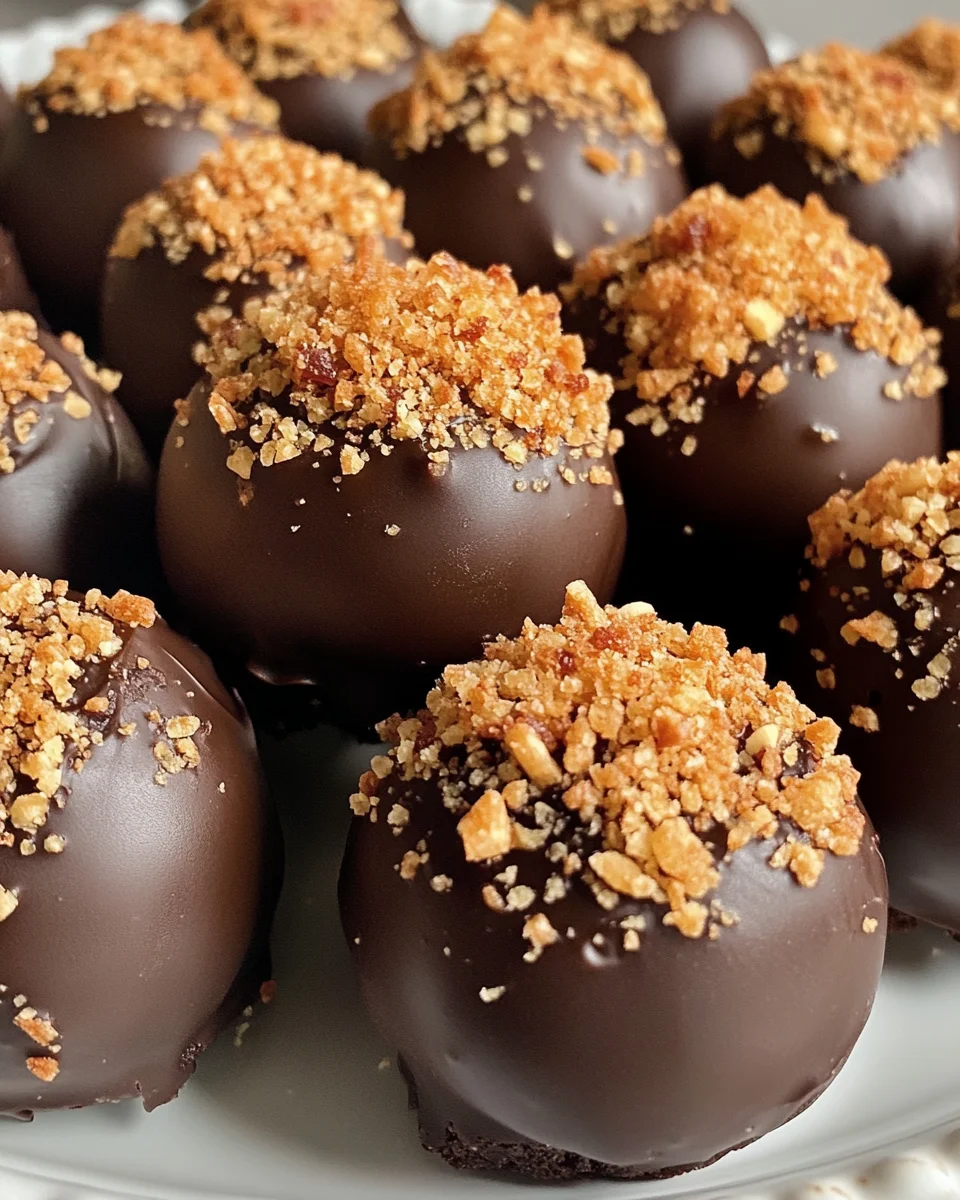
The Butterfinger Balls recipe is a simple, no-bake dessert that brings together the flavors of Butterfinger candy, creamy peanut butter, and rich chocolate. This treat is a crowd-pleaser, with a balance of textures from the crunchy candy and smooth, creamy filling. The balls are made by combining peanut butter, powdered sugar, softened butter, and crushed Butterfinger bars. After being rolled into bite-sized balls, they are coated in a smooth layer of melted semi-sweet chocolate.
This recipe is perfect for those who love easy, no-bake desserts that require minimal preparation but still deliver on flavor. The best part? It only takes about 45 minutes from start to finish, including chilling time!
The Origin of the Butterfinger Balls Recipe
The Butterfinger candy bar, which serves as the star ingredient of this recipe, was first introduced in 1923 by the Curtiss Candy Company. Over the years, the Butterfinger bar has become a popular treat, known for its crunchy peanut butter center coated in chocolate. The candy bar’s distinctive texture and flavor have made it a favorite among candy lovers worldwide.
The idea of transforming Butterfinger bars into bite-sized balls coated in chocolate is a modern twist on the classic candy bar. While the exact origin of the Butterfinger Balls recipe is not entirely clear, this no-bake dessert has become a staple in many households for holidays, parties, and casual snack moments. It is particularly popular in the fall and winter months when people are looking for easy, fun, and delicious treats.
Ingredients for Butterfinger Balls

This Butterfinger Balls recipe requires only a handful of ingredients, most of which are easy to find in any grocery store. Here’s a breakdown of what you’ll need:
- 2 cups (500g) creamy peanut butter: The base for the filling, adding richness and smoothness.
- 3 cups (300g) powdered sugar: To sweeten the mixture and give it a smooth, firm texture.
- 2 cups (340g) crushed Butterfinger candy bars (about 6 regular-sized bars): The star of the recipe, providing the crunchy texture and signature Butterfinger flavor.
- 1/4 cup (60g) unsalted butter, softened: Adds richness and helps bind the ingredients together.
- 2 cups (350g) semi-sweet chocolate chips: For the outer chocolate coating that perfectly complements the peanut butter filling.
- 1 tablespoon coconut oil or vegetable shortening (optional): This ingredient helps smooth the melted chocolate, making it easier to coat the balls and giving it a glossy finish.
These simple ingredients come together to create an irresistible treat that will have everyone coming back for more.
Step-by-Step Directions for Butterfinger Balls
Step 1: Prepare the Butterfinger Mixture
To begin, you’ll want to mix the filling ingredients. In a large mixing bowl, combine the creamy peanut butter, powdered sugar, and softened butter. Stir everything together until smooth and fully combined. The mixture should be thick and firm, making it easy to shape into balls later.
Next, fold in the crushed Butterfinger candy bars. You can crush the candy bars by placing them in a zip-top bag and using a rolling pin to break them into small pieces. Fold the crushed Butterfinger pieces into the mixture until they’re evenly distributed. This will ensure that every bite of the Butterfinger Balls has that signature candy crunch.
Step 2: Shape the Balls
Once your mixture is ready, it’s time to form the balls. Using a small cookie scoop or a spoon, scoop out portions of the peanut butter mixture. Roll each portion between your hands to form 1-inch balls.
Place the formed balls onto a baking sheet lined with parchment paper or wax paper to prevent them from sticking.
After all the balls have been rolled, place the baking sheet in the refrigerator to chill for about 30 minutes or until the balls are firm.
Step 3: Melt the Chocolate
While the balls are chilling, prepare the chocolate coating. In a microwave-safe bowl, combine the semi-sweet chocolate chips. Microwave the chocolate in 30-second intervals, stirring after each interval until the chocolate is fully melted and smooth. Alternatively, you can melt the chocolate using a double boiler.
If you want a smoother and shinier coating, stir in coconut oil or vegetable shortening once the chocolate has melted.
Step 4: Coat the Butterfinger Balls
Once the balls have chilled and the chocolate is ready, it’s time to coat the balls. Using a fork or dipping tool, dip each chilled ball into the melted chocolate, ensuring it is completely coated. Let any excess chocolate drip off before placing the coated balls back onto the lined baking sheet.
Step 5: Chill and Set
Once all the Butterfinger Balls have been coated in chocolate, return the baking sheet to the refrigerator. Let the balls chill for an additional 15-20 minutes, or until the chocolate has set and is firm to the touch.
Variations of Butterfinger Balls
While the classic Butterfinger Balls are delicious on their own, there are several ways you can mix things up and add your own unique twist to this recipe. Here are a few variations to consider:
- Use Milk Chocolate: If you prefer a sweeter chocolate coating, swap the semi-sweet chocolate chips for milk chocolate chips. The milk chocolate will create a creamier, sweeter contrast to the peanut butter filling.
- Add Crushed Nuts: For added crunch, try incorporating crushed peanuts or almonds into the filling along with the Butterfinger pieces. This will give your balls an extra layer of texture.
- Decorate with Sprinkles or Drizzles: For a festive touch, drizzle melted white chocolate over the top of the balls or sprinkle extra crushed Butterfinger candy on top. You can also add colored sprinkles for holidays like Christmas, Halloween, or Easter.
- Make them Gluten-Free: If you need to make this recipe gluten-free, be sure to check the label on your Butterfinger candy bars to confirm they don’t contain gluten. Most commercial candy bars are gluten-free, but it’s always good to double-check.
FAQs About Butterfinger Balls
1. How long can I store Butterfinger Balls?
You can store Butterfinger Balls in an airtight container in the refrigerator for up to 1 week. For longer storage, you can freeze them for up to 3 months.
2. Can I use crunchy peanut butter instead of creamy?
Yes, you can use crunchy peanut butter if you prefer a more textured filling. The flavor will be similar, but the consistency of the balls will be slightly different.
3. Can I use other candy bars instead of Butterfingers?
Absolutely! You can experiment with other candy bars like Snickers, Reese’s Peanut Butter Cups, or Milky Way to create your own variation of this recipe.
4. Do I need to refrigerate the balls?
Yes, the balls need to be chilled to firm up the filling and set the chocolate coating. Refrigerating them ensures they hold their shape and have the right texture.
Conclusion
In conclusion, the Butterfinger Balls recipe is a quick, easy, and absolutely delicious treat that combines the irresistible flavors of peanut butter, Butterfinger candy bars, and chocolate. Perfect for parties, holidays, or just a sweet snack, these bite-sized balls are sure to impress your family and friends. With minimal ingredients and simple steps, you can create a batch in no time. Whether you stick with the classic recipe or try out some creative variations, these Butterfinger Balls are bound to become a new favorite!
Print
Butterfinger Balls Recipe: A No-Bake Delight for Every Occasion
- Total Time: 20 mins
- Diet: Vegetarian
Description
The Butterfinger Balls recipe is a simple, no-bake dessert that brings together the flavors of Butterfinger candy, creamy peanut butter, and rich chocolate. This treat is a crowd-pleaser, with a balance of textures from the crunchy candy and smooth, creamy filling. The balls are made by combining peanut butter, powdered sugar, softened butter, and crushed Butterfinger bars. After being rolled into bite-sized balls, they are coated in a smooth layer of melted semi-sweet chocolate.
Ingredients
- 2 cups (500g) creamy peanut butter
- 3 cups (300g) powdered sugar
- 2 cups (340g) crushed Butterfinger candy bars (about 6 regular-sized bars)
- 1/4 cup (60g) unsalted butter, softened
- 2 cups (350g) semi-sweet chocolate chips
- 1 tablespoon coconut oil or vegetable shortening (optional, for smoother chocolate coating)
Instructions
1. Prepare the Butterfinger Mixture:
- In a large mixing bowl, combine the peanut butter, powdered sugar, and softened butter. Mix until smooth and well combined.
- Fold in the crushed Butterfinger candy bars until evenly distributed throughout the mixture.
2. Shape the Balls:
- Using a small cookie scoop or a spoon, scoop out portions of the mixture and roll them into 1-inch balls with your hands.
- Place the balls on a baking sheet lined with parchment paper or wax paper.
- Chill the balls in the refrigerator for about 30 minutes, or until firm.
3. Melt the Chocolate:
- In a microwave-safe bowl, melt the chocolate chips in 30-second intervals, stirring after each interval, until smooth. (You can also melt the chocolate over a double boiler if preferred.)
- If using, stir in coconut oil or vegetable shortening to make the chocolate coating smoother and shinier.
4. Coat the Butterfinger Balls:
- Remove the chilled balls from the refrigerator.
- Using a fork or dipping tool, dip each ball into the melted chocolate, ensuring it is fully coated. Let any excess chocolate drip off.
- Place the coated balls back onto the lined baking sheet.
5. Chill and Set:
- Once all the balls are coated, return the baking sheet to the refrigerator and chill for another 15-20 minutes, or until the chocolate is set.
Notes
Keep Butterfinger Balls refrigerated in an airtight container for up to a week—or freeze for longer freshness. Perfect for make-ahead treats or gifting!
- Prep Time: 20 mins
- Cook Time: 0 mins
- Category: Dessert
- Method: No-bake
- Cuisine: American
Keywords: Butterfinger Balls