There is something deeply comforting about the scent of cinnamon and warm fruit wafting through a home. It signals a sense of coziness and relaxation that few other things can match. However, the traditional process of baking a complex dessert can often feel like a chore, especially after a long day of work or during a busy weekend. This is where the Lazy Girl Apple Crisp comes into play. It is the perfect solution for anyone who craves a homemade, high-quality dessert but lacks the time or energy for complicated pastry doughs or intricate decorating techniques.
In this guide, we are going to explore why this specific recipe has become a viral sensation for busy people everywhere. We will look at the history of the dish, the essential components that make it work, and how you can achieve a professional-grade result with very little actual labor. If you have a few apples sitting on your counter and a craving for something sweet, you are already halfway to a world-class dessert.
What is a Lazy Girl Apple Crisp?
A Lazy Girl Apple Crisp is a streamlined version of the classic American apple crisp. The term “lazy girl” refers to a specific style of cooking that prioritizes efficiency and ease without sacrificing the final flavor profile. Unlike a pie, which requires a finicky crust that must be chilled and rolled, a crisp uses a simple “dump and stir” method for the topping.
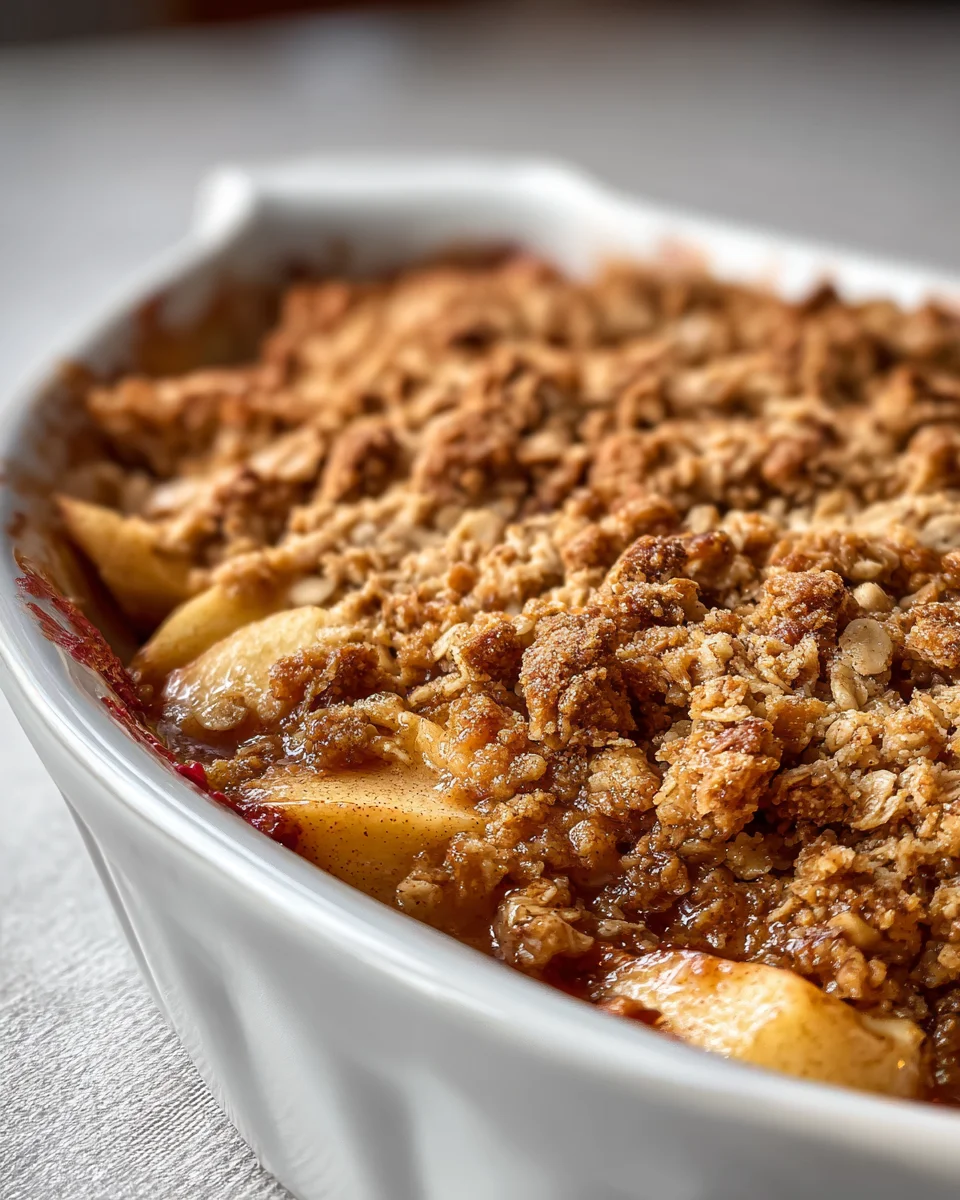
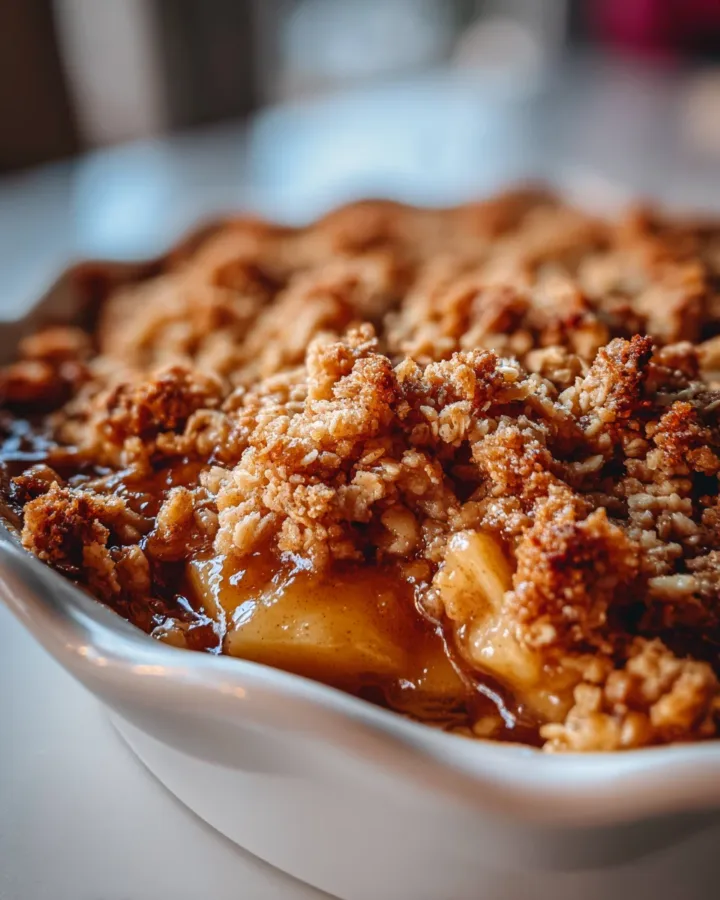
The dish consists of two primary layers: a base of sliced, seasoned apples that soften into a jam-like consistency when heated, and a buttery, oat-based crumble that sits on top. When baked, the topping becomes golden and crunchy, providing a beautiful textural contrast to the tender fruit beneath. It is a rustic, unpretentious dessert that focuses on the natural sweetness of the fruit and the warm spice of cinnamon.
The Origin of the Apple Crisp Recipe
While apples have been used in desserts for centuries, the specific “apple crisp” we know today is a relatively modern invention. It first appeared in cookbooks in the early twentieth century, gaining significant popularity during World War Two. During this time, food rationing made the ingredients for traditional pie crusts—like shortening and white flour—harder to come by. Home cooks turned to oats and brown sugar to create a topping that was both delicious and resourceful.
The modern Lazy Girl Apple Crisp takes this tradition of resourcefulness a step further. It is designed for the contemporary kitchen, where “time” is the most rationed resource of all. It reflects a shift in culinary culture toward “minimalist baking,” where the goal is to get the dish into the oven as quickly as possible so the baker can get back to their life while the heat does all the heavy lifting.
Essential Ingredients with Full Quantities
The beauty of this recipe lies in its simplicity. Most of these items are likely already sitting in your pantry or refrigerator. Because we are using whole, simple ingredients, the quality of your apples will play a significant role in the final taste.
For the Warm Apple Filling
-
Five to six medium apples: You should peel and slice these into even wedges.
-
Two tablespoons of brown sugar: This helps to draw out the natural juices of the fruit.
-
One teaspoon of cinnamon: The essential spice that gives the dish its signature warmth.
-
One teaspoon of vanilla extract: This adds a layer of aromatic complexity to the fruit base.
-
One tablespoon of lemon juice: The acidity prevents the apples from browning and balances the sugar.
For the Buttery Crisp Topping
-
One cup of rolled oats: Use old-fashioned oats for the best texture; quick oats can become too mushy.
-
Three quarters cup of all-purpose flour: This provides the structure for the crumble.
-
One half cup of brown sugar: This caramelizes in the oven to create the “crisp” effect.
-
One half teaspoon of cinnamon: To ensure the spice flavor is consistent throughout the dish.
-
One half cup of melted butter: This binds the dry ingredients and provides a rich, savory finish.
Step by Step Direction and Preparation Method: Lazy Girl Apple Crisp
Follow these steps to ensure your Lazy Girl Apple Crisp comes out perfectly every single time. The goal is to keep the movement fluid and the dishes minimal.
Preparing the Apple Foundation
Before you begin with the fruit, preheat your oven to one hundred seventy five degrees Celsius, which is approximately three hundred fifty degrees Fahrenheit. Take a standard baking dish and lightly grease it with butter or a non-stick spray to ensure easy serving later.
Start by peeling your apples. While some people enjoy the skin, peeling them ensures a much more consistent, melt-in-your-mouth texture. Slice the apples into thin, even pieces—roughly half a centimeter thick. In a large bowl, toss these slices with the brown sugar, cinnamon, vanilla extract, and lemon juice. Stir them until every slice is coated in the spice mixture. Spread the apples evenly across the bottom of your prepared baking dish.
Mixing the Crunchy Topping
The topping is what gives the “crisp” its name, so you want to treat it with care but not overthink it. In the same bowl you used for the apples (to save on washing dishes), combine the rolled oats, flour, brown sugar, and the remaining cinnamon.
Pour the melted butter over the dry mixture. Use a fork or your fingers to stir the ingredients together until they form small, moist clumps. You don’t want a smooth paste; you want a variety of crumb sizes. This variety is what creates the different levels of crunch once the dessert is baked.
The Baking and Finishing Process
Sprinkle the oat mixture evenly over the top of the apples. You don’t need to press it down; let it sit loosely so that the heat can circulate between the crumbs. Place the dish in the center of your preheated oven.
Bake the crisp for thirty five to forty minutes. You are looking for two specific signs of doneness: the topping should be a deep, golden brown, and the apple juices should be bubbling up around the edges of the dish. If the topping is browning too quickly, you can loosely cover the dish with foil for the last ten minutes of baking.
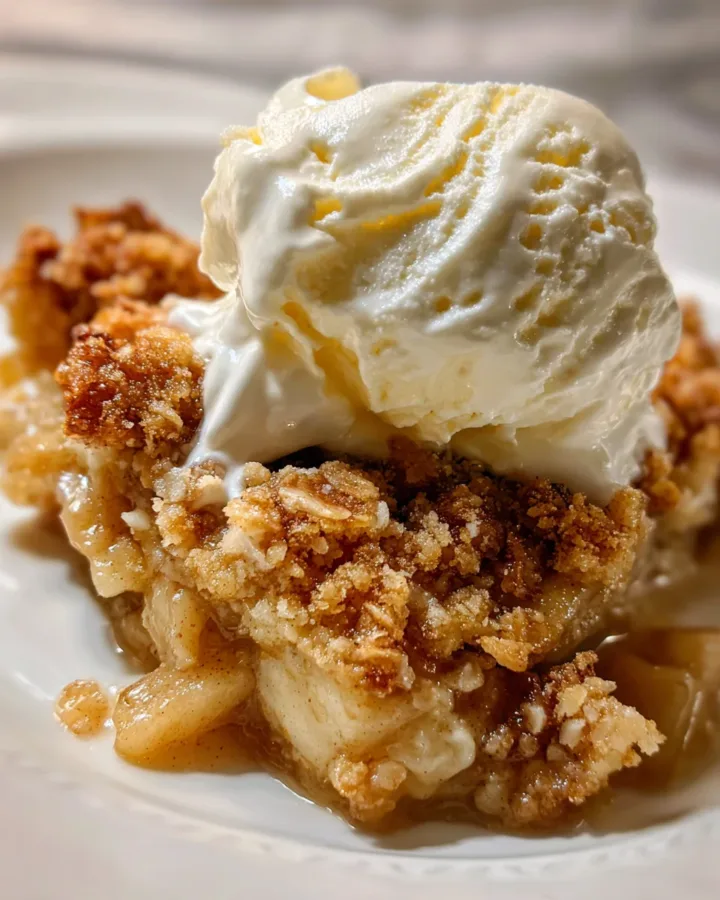
Once finished, remove the dish from the oven and let it cool for at least ten to fifteen minutes. This cooling period is vital because it allows the fruit juices to thicken into a proper sauce. Serve it warm for the best experience.
Creative Variations of the Lazy Girl Apple Crisp
While the standard Lazy Girl Apple Crisp is perfect on its own, it is also a very forgiving recipe that allows for plenty of customization based on what you have in your kitchen.
Adding a Nutty Crunch
If you want to add more depth to your topping, consider mixing in one half cup of chopped pecans or walnuts. The fats in the nuts toast beautifully alongside the oats, giving the dessert a more sophisticated, earthy flavor.
The Berry Apple Fusion
If you don’t quite have enough apples, you can supplement the filling with one cup of fresh or frozen cranberries or blackberries. The tartness of the berries pairs exceptionally well with the sweet cinnamon apples and adds a vibrant pop of color to the dish.
The Truly Lazy Shortcut
For those days when even slicing apples feels like too much work, you can substitute the fresh fruit layer with two cans of high-quality apple pie filling. If you choose this route, you may want to reduce the sugar in the oat topping slightly, as canned fillings are already quite sweet.
Frequently Asked Questions: Lazy Girl Apple Crisp
What are the best apples to use for a crisp?
A mix of sweet and tart apples usually yields the best results. Granny Smith apples are excellent for maintaining their shape and providing tartness, while Honeycrisp or Fuji apples add a wonderful natural sweetness and juiciness.
Can I make this Lazy Girl Apple Crisp gluten-free?
Absolutely. To make a gluten-free Lazy Girl Apple Crisp, simply substitute the all-purpose flour for a gluten-free flour blend or almond flour. Ensure your oats are certified gluten-free as well.
How should I store the leftovers?
You can store any remaining crisp in the refrigerator for up to four days. To revive the crunchy texture of the topping, it is best to reheat it in the oven or a toaster oven rather than the microwave, which can make the oats a bit soft.
Can I use white sugar instead of brown sugar?
You can, but brown sugar is preferred because it contains molasses. This adds a depth of flavor and helps create a chewier, more caramelized topping that white sugar simply cannot replicate.
Is it necessary to melt the butter?
Milling the butter makes the “lazy” method work perfectly because it mixes instantly. Some traditional recipes use cold butter cut into the flour, but for this specific version, melting the butter provides a more consistent, buttery coating for the oats with much less physical effort.
Conclusion: Lazy Girl Apple Crisp
The Lazy Girl Apple Crisp proves that you do not need to spend hours in the kitchen to produce a dessert that tastes like a professional bakery creation. By focusing on the harmony between tart fruit and a buttery, spiced topping, this recipe delivers maximum satisfaction with minimal stress. It is the ultimate “comfort food” for the modern era—simple, honest, and incredibly delicious.
Whether you are serving it at a family dinner or enjoying a bowl by yourself on a quiet evening, the combination of warm apples and crunchy oats is a timeless classic that never fails to please. The next time you find yourself wanting a homemade treat but feeling short on time, remember that a world-class dessert is only a few minutes of prep away. Put on your favorite music, slice a few apples, and let the oven do the rest of the work. You deserve a sweet reward without the hard labor.
Print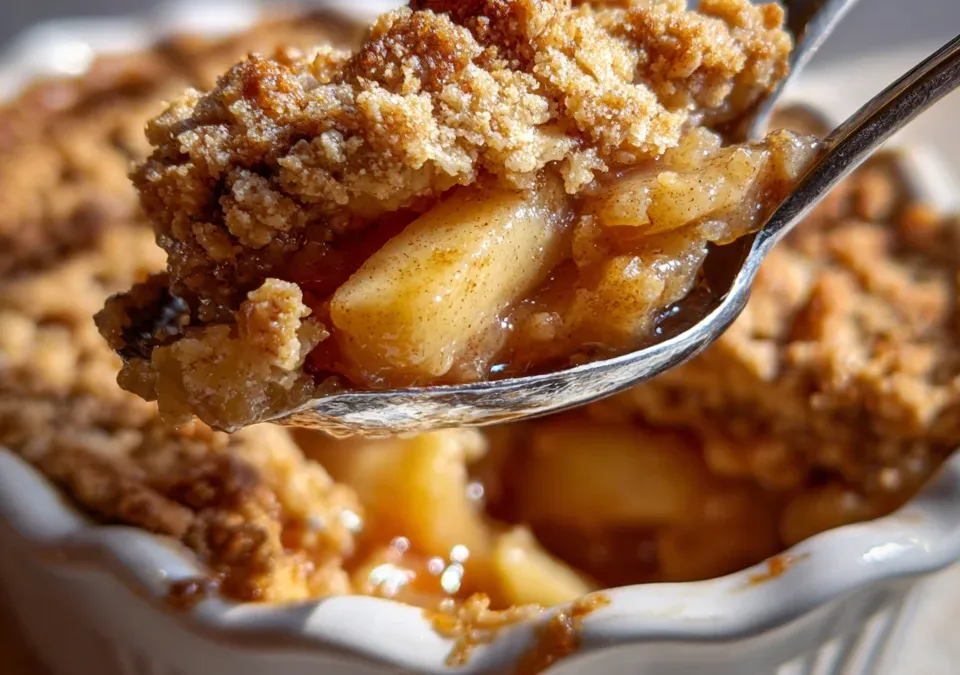
The Ultimate Lazy Girl Apple Crisp Recipe for Effortless Baking
- Total Time: 55 minutes
- Yield: 6 servings 1x
- Diet: Vegetarian
Description
A Lazy Girl Apple Crisp is a streamlined version of the classic American apple crisp. The term “lazy girl” refers to a specific style of cooking that prioritizes efficiency and ease without sacrificing the final flavor profile. Unlike a pie, which requires a finicky crust that must be chilled and rolled, a crisp uses a simple “dump and stir” method for the topping.
Ingredients
Apple Filling
- 5–6 apples, peeled and sliced
- 2 tbsp brown sugar
- 1 tsp cinnamon
- 1 tsp vanilla extract
- 1 tbsp lemon juice
Crisp Topping
- 1 cup rolled oats
- 3/4 cup flour
- 1/2 cup brown sugar
- 1/2 tsp cinnamon
- 1/2 cup melted butter
Instructions
1. Prep the apples
- Preheat oven to 350°F (175°C).
- Toss sliced apples with brown sugar, cinnamon, vanilla, and lemon juice.
- Spread into a greased baking dish.
2. Make the topping
- Mix oats, flour, brown sugar, and cinnamon.
- Stir in melted butter until crumbly.
3. Bake
- Sprinkle topping evenly over apples.
- Bake for 35–40 minutes until golden and bubbly.
4. Serve
- Let cool slightly before serving.
- Best enjoyed warm with vanilla ice cream or whipped cream.
Notes
- Warm, cozy, and incredibly easy — this apple crisp is the perfect last-minute dessert.
- Serve it fresh from the oven with vanilla ice cream for the ultimate comfort treat.
- A simple homemade dessert that tastes like fall in every bite.
- Minimal prep, maximum comfort — exactly the kind of recipe busy days need.
- Sweet cinnamon apples and buttery crumble make this dessert impossible to resist.
- Prep Time: 15 minutes
- Cook Time: 40 minutes
- Category: Dessert
- Method: Baking
- Cuisine: American
Nutrition
- Serving Size: 1 portion
- Calories: 310 kcal
Keywords: Easy Apple Crumble Recipe, Quick Apple Dessert for Beginners, Minimal Effort Apple Crisp, Simple Baked Apple Topping, Five Minute Prep Apple Dessert