Imagine combining the ultimate refreshing summer drink with the velvety texture of a classic dessert. That is exactly what you get with these mango lassi no-bake cheesecake cups. If you are looking for a show-stopping dessert that requires zero oven time, this fusion treat is your answer. It blends the tropical, aromatic brightness of a traditional Indian mango beverage with the rich, tangy indulgence of a cream cheese filling. Perfect for dinner parties, hot summer days, or whenever you want a personal-sized treat, these cups are simple to assemble and completely foolproof.
The beauty of this dessert lies in its simplicity and its ability to transport your taste buds. No-bake desserts are an absolute lifesaver when you want to satisfy a sweet tooth without heating up your entire kitchen. By serving them in individual cups, you also eliminate the stress of slicing a delicate cake, making them incredibly convenient for hosting. Let us dive deep into what makes this flavor combination so spectacular, where it comes from, and exactly how you can recreate it perfectly at home.
Understanding the Magic of This Fusion Treat
When you take your first spoonful, you immediately notice how the distinct tang of the cheese balances the deep sweetness of the fruit. This is not just a standard fruit-flavored dessert. The addition of warm spices and thick yogurt gives it a sophisticated profile that sets it apart from your average sweet treat. It is light yet satisfying, creamy yet refreshing.
What is a Mango Lassi No-Bake Cheesecake Cup?
At its core, this dessert is a creative reimagining of two beloved culinary worlds. It takes the fundamental elements of a classic cream cheese dessert and infuses them with the exact flavor profile of a traditional yogurt-based mango drink. Instead of baking a large cake in a springform pan, you layer a buttery biscuit crust and a whipped, airy mango filling directly into individual glasses or jars.
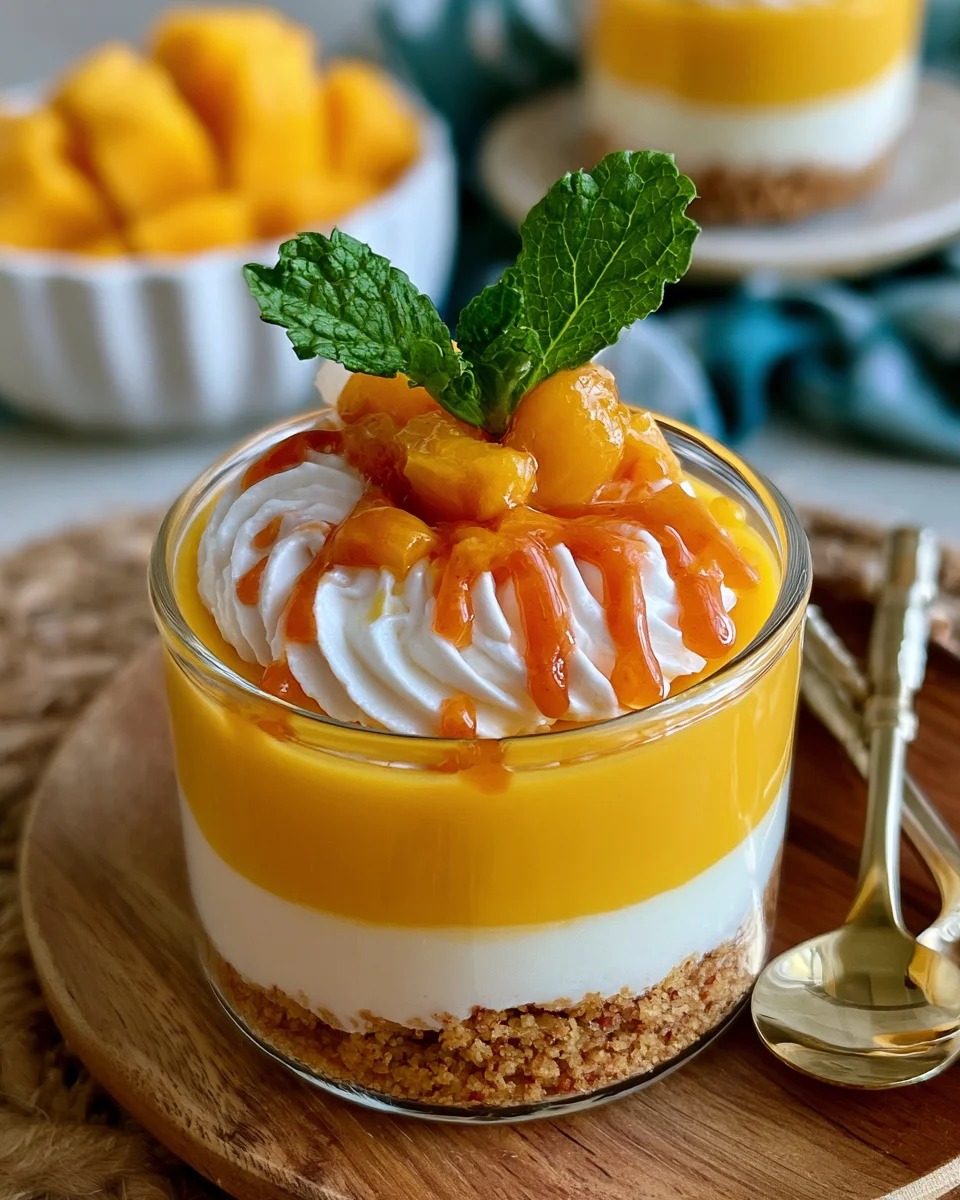
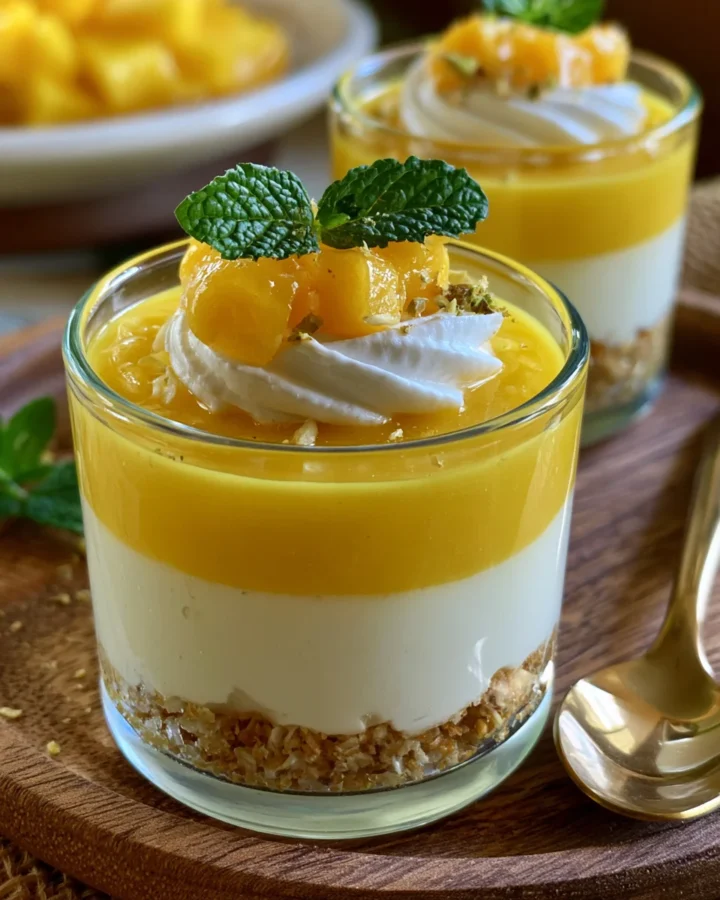
The texture is incredibly smooth, sitting somewhere between a mousse and a traditional chilled cake. Because it relies on refrigeration rather than heat to set, the flavors remain bright, clean, and uncompromised by the baking process. The individual portioning ensures that every single bite contains the perfect ratio of crunchy crust, velvety filling, and fresh fruit topping.
The True Origin of Mango Lassi
To fully appreciate this dessert, it helps to understand the roots of its star flavor profile. The inspiration comes directly from India, specifically the Punjab region, where the traditional yogurt drink known as a lassi has been enjoyed for centuries to combat the intense summer heat. Historically, these drinks were made by blending yogurt with water, salt, or sugar, and local spices in a clay pot.
As mangoes are the national fruit of India and deeply intertwined with its culture and seasons, the pairing of sweet mango pulp with cooling yogurt became an instant, global favorite. Combining this ancient, refreshing beverage concept with the modern Western tradition of a chilled cream cheese cake is a relatively recent innovation born out of the global love for fusion desserts. It celebrates the best of both culinary worlds in a single glass.
Gathering Your Premium Ingredients: mango lassi no-bake cheesecake cups
To achieve the absolute best results, selecting high-quality ingredients is essential. Because this is a no-bake recipe, the natural flavors of each component will shine through vividly, meaning fresh and premium items will make a noticeable difference in the final product.
The Crust Layer Components
The base provides the essential structural foundation and a contrasting crunch to the silky filling.
-
Crushed digestive biscuits or graham crackers: You will need one full cup of finely ground crumbs. These biscuits offer a subtle, nutty sweetness that pairs beautifully with the tropical fruit.
-
Melted butter: Three tablespoons of unsalted butter, melted completely, will act as the glue to hold your biscuit base together.
-
Granulated sugar: One tablespoon is entirely optional, but it helps slightly sweeten the crust if you are using less sugary biscuits.
The Velvety Cheesecake Filling
This is where the signature flavor comes alive, balancing rich dairy with aromatic spices and vibrant fruit.
-
Cream cheese: Two hundred and twenty-five grams or eight ounces of full-fat cream cheese. It must be thoroughly softened to room temperature to ensure a completely lump-free mixture.
-
Plain yogurt: Half of a cup of plain yogurt, with thick Greek yogurt being the absolute best choice here to maintain a sturdy texture without extra liquid.
-
Mango puree: Half of a cup of smooth mango pulp. You can use canned pulp from an Asian grocery store or blend fresh, ripe fruit until completely smooth.
-
Powdered sugar: One quarter of a cup, adjusted slightly depending on how naturally sweet your fruit pulp is. Powdered sugar is crucial here as it dissolves instantly into the cold mixture.
-
Ground cardamom: One quarter of a teaspoon of finely ground green cardamom seeds. This warm, citrusy spice is what gives the dessert its authentic Indian flavor profile.
-
Lemon or lime juice: One teaspoon of freshly squeezed juice to cut through the richness of the dairy and make the fruit flavor pop.
-
Whipped cream: One full cup of heavy cream whipped to stiff peaks, or an equal amount of thawed whipped topping, to fold in at the end for an airy texture.
Gorgeous Toppings for Garnish
The final presentation adds visual appeal and extra layers of texture.
-
Diced ripe mango: Half to one full cup of finely diced fresh fruit to pile generously on top of each finished cup.
-
Finely chopped pistachios or almonds: A handful of raw or lightly toasted nuts to provide a brilliant color contrast and a delightful crunch.
-
Cardamom or saffron: A tiny pinch of either spice dusted over the top for an extra elegant, aromatic touch.
-
Fresh mint leaves: A few vibrant green leaves to garnish the plates or glasses just before serving.
Step-by-Step Preparation and Assembly Method: mango lassi no-bake cheesecake cups
Creating these individual desserts is an easy and enjoyable process. Follow these detailed steps closely to ensure your layers are distinct, neat, and perfectly set.
Step One: Crafting the Perfect Crunchy Base
Begin by preparing your serving vessels. You can use small glass jars, clear plastic cups, or elegant dessert glasses. Having clear containers allows the beautiful contrast between the golden crust and the orange-tinted filling to be fully visible to your guests.
Take your digestive biscuits or graham crackers and place them into a sturdy plastic bag. Use a rolling pin to crush them until they resemble fine sand. Alternatively, you can pulse them in a food processor for a few seconds to achieve an even texture. Transfer the fine crumbs into a medium mixing bowl. Pour the melted butter and the optional sugar over the crumbs.
Using a fork, stir the mixture thoroughly until all the crumbs are evenly moistened and the texture feels like wet sand. Divide this buttery mixture evenly among your six to eight serving cups. Use the flat bottom of a small spice jar or the back of a spoon to gently press the crumbs into a flat, compact layer at the bottom of each glass. Do not press too hard, or the crust will become rock hard when chilled. Place all the cups onto a tray and transfer them to your refrigerator to chill for ten to fifteen minutes while you prepare the next layer.
Step Two: Whipping Up the Mango Lassi Filling
The secret to a flawless filling is ensuring your ingredients are at the right temperature before you begin mixing them together.
Take your softened cream cheese and place it into a large mixing bowl. Using an electric hand mixer or a stand mixer fitted with the paddle attachment, beat the cream cheese on medium speed for a couple of minutes until it is completely smooth, creamy, and free of any lumps. This step is vital; trying to blend cold cream cheese will result in a grainy filling that ruins the mouthfeel.
Once the cream cheese is perfectly smooth, turn the mixer to low speed and add the thick plain yogurt, the vibrant mango puree, the powdered sugar, the ground cardamom, and the fresh lemon juice. Mix gently until all these components are fully incorporated and the color is a beautiful, uniform pale orange. Taste the mixture at this point. If your fruit was slightly tart, you can add an extra tablespoon of powdered sugar if desired.
Now, set the electric mixer aside and grab a rubber spatula. Gently add your whipped cream to the bowl. Using a slow, circular motion, fold the whipped cream into the mango mixture. You want to cut down through the center, sweep around the bowl, and lift the mixture over itself. Do this patiently until no white streaks remain. Folding gently preserves the air bubbles in the whipped cream, ensuring your mango lassi no-bake cheesecake cups turn out light and cloud-like rather than dense and heavy.
Step Three: Assembling and Chilling the Cups
Retrieve your chilled crust cups from the refrigerator. You can now transfer the smooth filling into the cups. For the neatest presentation, transfer the mango cream cheese mixture into a large pastry piping bag fitted with a wide round tip. Pipe the filling smoothly into each cup, leaving about half an inch of space at the top for the garnishes. If you do not have a piping bag, simply use a spoon to carefully drop the mixture into the cups, then use the back of a small spoon to smooth out the top surfaces.
Tap the bottom of each glass gently against your kitchen counter to release any trapped air bubbles and help the filling settle evenly. Cover the tray of cups loosely with plastic wrap to prevent them from absorbing any unwanted refrigerator odors. Slide the tray into the refrigerator and let them chill for at least three to four hours. This resting period allows the cream cheese to firm up and gives the aromatic cardamom time to infuse deeply throughout the entire mixture.
Step Four: Finishing Touches and Decoration
Just before you are ready to serve the dessert, it is time to add the beautiful garnishes. Never add the toppings before chilling, as the fresh fruit can release juices that pool on top of the cream cheese layer over time.
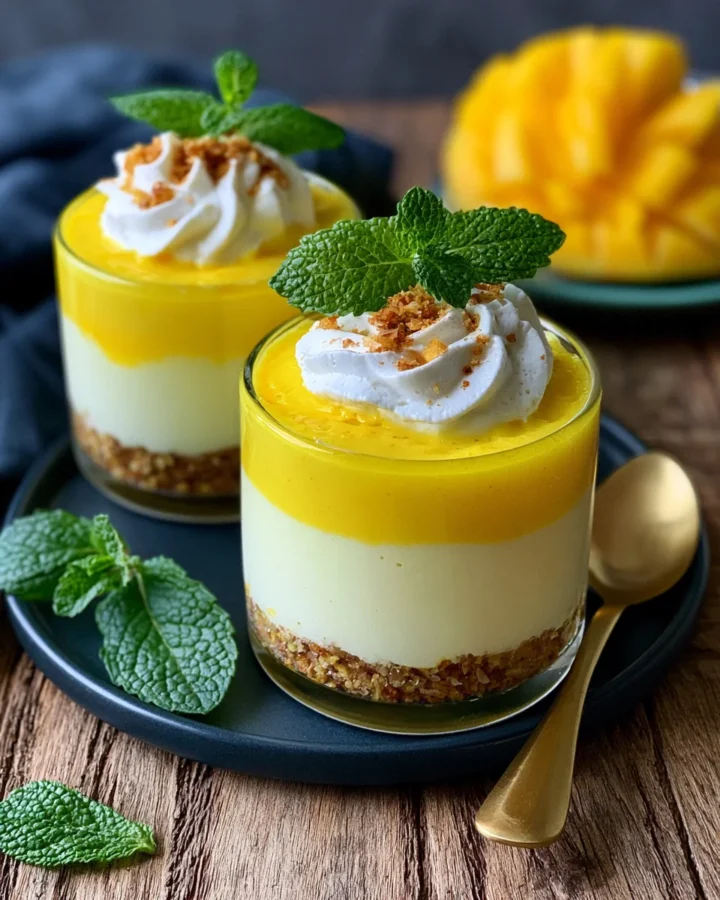
Top each chilled cup with a generous spoonful of finely diced ripe mango. Sprinkle a scattering of chopped pistachios or slivered almonds around the edges for a beautiful green and white color contrast against the bright orange fruit. If you want to make them look truly luxurious, dust a microscopic pinch of ground cardamom or place a couple of saffron strands directly on top of the fruit. Finish each cup with a single, small fresh mint leaf placed right in the center. Serve immediately while perfectly cold.
Creative Recipe Variations to Try: mango lassi no-bake cheesecake cups
One of the best things about this recipe is how adaptable it is to different dietary preferences and flavor twists. You can easily modify the components to suit your personal taste or what you have available in your pantry.
Making a Plant-Based or Vegan Version
If you or your guests avoid dairy, you can easily transform this treat into a vegan masterpiece. Replace the standard cream cheese with a high-quality plant-based alternative, and use a thick coconut-based yogurt instead of dairy yogurt. For the whipped layer, look for a heavy whipping cream substitute made from oats or coconuts, or use the solidified cream from the top of a chilled can of full-fat coconut milk whipped with a little powdered sugar. Ensure your biscuits are dairy-free, and use melted coconut oil or vegan block butter to bind the crust together. The tropical notes of coconut actually complement the mango beautifully.
Elevating the Textures and Spices
For those who want to experiment with different flavor dimensions, try swapping the digestive biscuits for ginger snap cookies or speculoos biscuits. The sharp, fiery kick of ginger pairs incredibly well with the sweet tropical profile of the fruit. You can also infuse a tablespoon of rose water into the cream cheese filling alongside the cardamom to create an incredibly floral, elegant dessert reminiscent of royal Indian sweets. If you prefer a firmer, sliceable texture rather than a spoonable cup dessert, you can dissolve one teaspoon of unflavored gelatin powder in one tablespoon of warm water and thoroughly mix it into the cream cheese filling before folding in the whipped cream.
Frequently Asked Questions: mango lassi no-bake cheesecake cups
Can I make mango lassi no-bake cheesecake cups cups ahead of time?
Absolutely. These convenient individual cups are perfect for meal preparation and making ahead of schedule. You can easily assemble the crust and the filling layers in the glasses up to twenty-four hours before your event. Just keep them covered with plastic wrap in the refrigerator. Wait to add the fresh diced fruit, nuts, and mint toppings until right before you serve them to ensure everything looks pristine, vibrant, and perfectly fresh.
What are the best varieties of mangoes to use for this recipe?
The quality of your fruit will directly dictate the final flavor of your dessert. If you have access to an international market, look for Indian varieties like Alphonso or Himsagar mangoes, which are famous for their intense sweetness, rich orange color, and lack of fibrous strings. If those are unavailable, look for Kent or Ataulfo mangoes at your local grocery store. Ensure they are completely ripe and soft to the touch. If fresh sweet mangoes are out of season, using a high-quality canned mango pulp is an excellent alternative that guarantees great color and sweetness.
How long can I store the leftovers in the refrigerator?
If you happen to have any leftover cups, they can be safely stored in the refrigerator for up to three days. Make sure they are covered tightly with plastic wrap or aluminum foil to keep them fresh. Note that after a day or two, the biscuit crust will naturally absorb some moisture from the filling and lose its initial crispness, becoming soft and cake-like, but the flavors will remain absolutely delicious.
Is it possible to freeze mango lassi no-bake cheesecake cups?
Yes, this dessert freezes surprisingly well. If you want to freeze them, assemble the crust and filling but do not add any of the fresh fruit or nut toppings. Wrap each cup securely in multiple layers of plastic wrap and freeze for up to one month. To serve, transfer the cups to the refrigerator the morning of your event and let them thaw slowly for a few hours before decorating with fresh fruit and serving. The texture will be slightly more dense but still incredibly creamy.
Conclusion: mango lassi no-bake cheesecake cups
Mastering the art of summer entertaining becomes completely effortless when you have recipes like these mango lassi no-bake cheesecake cups in your culinary repertoire. By thoughtfully combining the refreshing, spiced essence of a traditional Indian beverage with the luxurious texture of a chilled cream cheese filling, you create a dessert that is modern, sophisticated, and deeply satisfying. It strips away all the anxiety of traditional baking, leaving you with an easy, reliable method to impress your family and friends. Gather your ripe mangoes, dust off your favorite dessert glasses, and enjoy the process of creating this beautiful tropical treat.
Print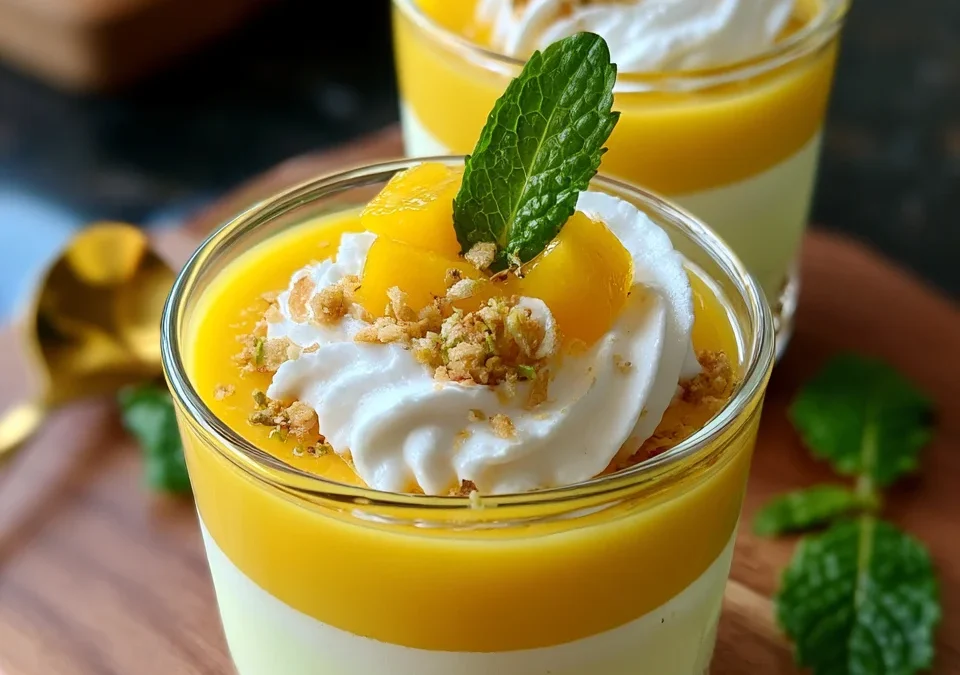
The Ultimate Mango Lassi No-Bake Cheesecake Cups Recipe
- Total Time: 4 hours 20 minutes (including chilling)
- Yield: 6–8 cheesecake cups 1x
- Diet: Vegetarian
Description
At its core, this dessert is a creative reimagining of two beloved culinary worlds. It takes the fundamental elements of a classic cream cheese dessert and infuses them with the exact flavor profile of a traditional yogurt-based mango drink. Instead of baking a large cake in a springform pan, you layer a buttery biscuit crust and a whipped, airy mango filling directly into individual glasses or jars.
Ingredients
Crust Layer
- 1 cup crushed digestive biscuits or graham crackers
- 3 tbsp melted butter
- 1 tbsp sugar (optional)
Mango Lassi Cheesecake Filling
- 225 g (8 oz) cream cheese, softened
- ½ cup plain yogurt (preferably Greek yogurt)
- ½ cup mango puree (fresh or canned)
- ¼ cup powdered sugar (adjust to taste)
- ¼ tsp ground cardamom
- 1 tsp lemon or lime juice
- 1 cup whipped cream (or whipped topping)
Topping
- ½–1 cup diced ripe mango
- A pinch of cardamom or saffron (optional)
- Chopped pistachios or almonds
- Mint leaves for garnish (optional)
Instructions
- Prepare the crust
- Mix crushed biscuits, melted butter, and sugar.
- Divide among serving cups and press lightly into the bottom.
- Chill for 10–15 minutes.
- Make the filling
- Beat cream cheese until smooth.
- Mix in yogurt, mango puree, powdered sugar, cardamom, and lemon juice.
- Fold in the whipped cream gently until combined.
- Assemble
- Spoon or pipe the cheesecake mixture over the chilled crusts.
- Smooth the tops.
- Refrigerate for at least 3–4 hours, or until set.
- Decorate
- Top with diced mango.
- Sprinkle with pistachios and a little cardamom or saffron if desired.
Notes
These Mango Lassi No-Bake Cheesecake Cups are the perfect blend of creamy cheesecake and tropical mango flavor. Light, refreshing, and easy to make, they’re an ideal dessert for warm days, family gatherings, or whenever you’re craving a taste of summer.
- Prep Time: 20 minutes
- Cook Time: 0 minutes
- Category: Dessert
- Method: No-Bake
- Cuisine: Fusion (Indian-Inspired)
Nutrition
- Serving Size: 1 cup
- Calories: 320 kcal
Keywords: no-bake mango lassi dessert cups, individual mango lassi cheesecakes, chilled mango lassi cheesecake jars