Brunch has taken the culinary world by storm, transforming the line between breakfast and lunch into an arena for some of the most creative flavor pairings imaginable. If you have ever found yourself torn between a craving for savory, crunchy poultry and a desire for sweet, fluffy griddle cakes, you are about to discover the absolute pinnacle of comfort food. This ultimate guide to a maple chicken & waffle biscuit sandwich brings together the absolute best elements of Southern soul food and flaky, buttery bakery staples. By fusing a traditional refrigerated biscuit round with a crisp waffle batter shell, you create a unique structural base that perfectly cradles an ultra-crispy, seasoned fried poultry fillet. Drizzled with a silky, rich glaze, this incredible creation offers a multi-layered eating experience that will completely redefine your weekend morning routine.
What is a Maple Chicken & Waffle Biscuit Sandwich?
To truly appreciate the genius of this dish, it helps to understand how it bridges the gap between different classic breakfast items. Essentially, this comfort food masterpiece is a hybrid meal that takes the beloved flavor profile of soul food poultry and sweet griddle cakes and redesigns it into a portable, easy to eat handheld format. Instead of serving standard bone-in poultry pieces over a large, soft griddle cake that requires a knife and fork, this approach uses structured, bite-sized components.
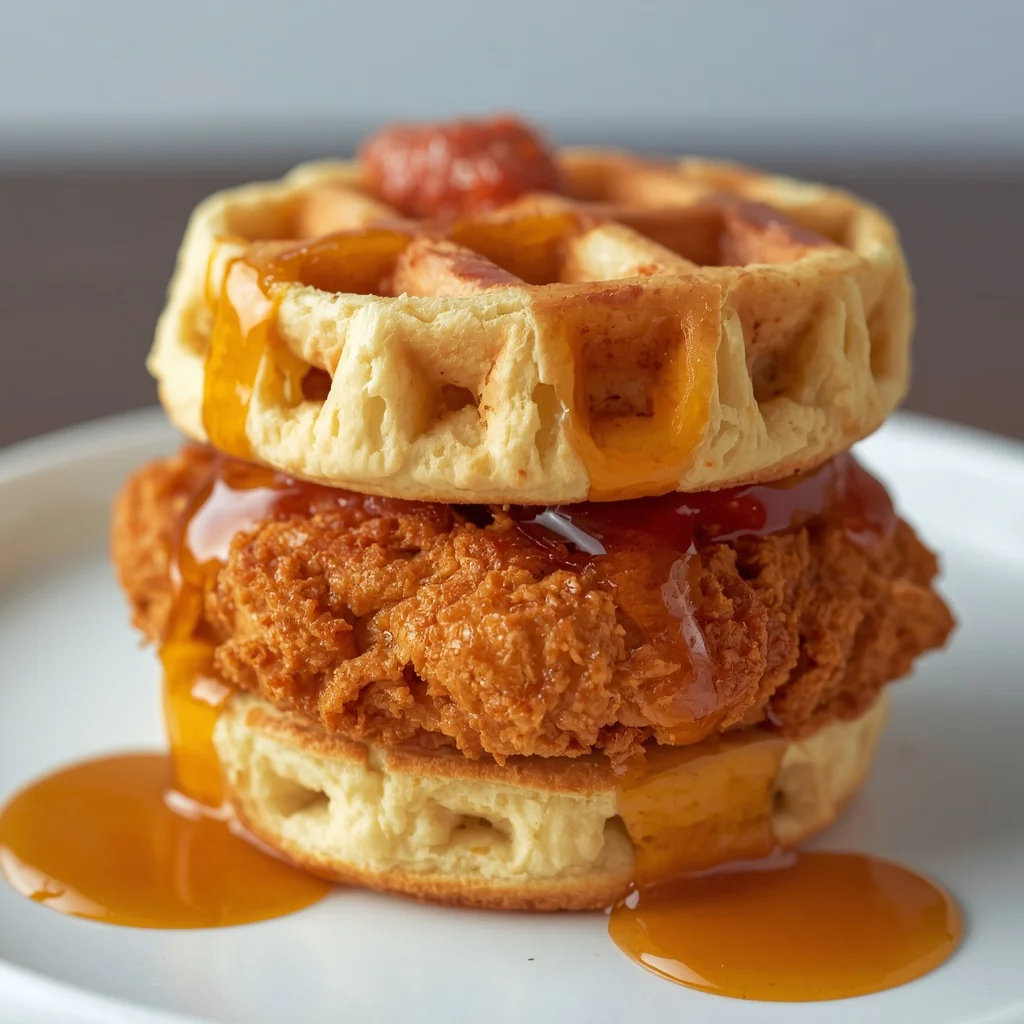
The real innovation lies in the unique bun itself. By coating a standard flaky dough round in smooth batter before placing it into a hot iron grid, you get an outer layer that has all the deep, square pockets of a traditional grid cake, while the inside retains the tender, multi-layered flakiness of a hot bakery biscuit. Packed with an incredibly crunchy, golden fried breast fillet and loaded with a sweet, buttery syrup glaze, this specialized sandwich delivers a flawless balance of textures and flavors in every single bite.
The Surprising History of a Sweet and Savory Pairing
While combining poultry with sweet syrups and griddle cakes might seem like a modern trend dreamed up by trendy city gastropubs, this culinary marriage actually boasts a long and fascinating history that spans multiple centuries and cultures. The earliest recorded pairings of these flavors date all the way back to the American colonial era in the seventeenth century, specifically within the German immigrant communities of Pennsylvania.
Known as the Pennsylvania Dutch, these resourceful cooks frequently prepared roasted poultry served alongside simple, yeast-raised flat cakes, often smothering the entire platter in a rich, sweet gravy to stretch their ingredients and feed large families.
The Rise of the Southern Soul Food Tradition
The dish underwent a massive transformation as it traveled southward and integrated into African American culinary traditions. In the early twentieth century, particularly during the jazz age of the nineteen twenties and nineteen thirties, Harlem, New York became a legendary hotspot for the modern version we recognize today. Famous late-night eateries, such as Wells Supper Club, began serving deep-fried poultry alongside fluffy, sweet grid cakes to crowds of musicians and nightlife patrons who were leaving clubs too late for dinner but too early for standard breakfast.
The combination provided the perfect high-calorie, deeply satisfying fuel for the late-night crowd. Transitioning these historical flavor profiles into a maple chicken & waffle biscuit sandwich represents the next logical step in this delicious evolution, merging traditional soul food heritage with the convenient, buttery goodness of a classic breakfast biscuit.
Gathering the Premium Ingredients for Success: maple chicken & waffle biscuit sandwich
Creating a truly magnificent breakfast sandwich requires selecting ingredients that complement one another in both structural integrity and flavor. Because we are combining a deep-fried crunch with a sweet, fluid glaze, ensuring your pantry is stocked with the proper components is key to avoiding a soggy or bland final product.
For the Ultra-Crispy Chicken Fillets
-
Boneless, skinless chicken breasts: You will need two large pieces, which you will carefully slice horizontally to create four uniform, flat fillets. This shape ensures that the poultry cooks evenly and sits perfectly flat inside your sandwich bun without sliding around.
-
Buttermilk: One full cup of rich buttermilk. The natural lactic acid present in buttermilk acts as a gentle tenderizer, breaking down the dense protein fibers in the breast meat while creating a tangy moisture layer that helps the flour coating stick.
-
Hot sauce: One teaspoon of your favorite vinegar-based hot sauce. This is entirely optional but highly recommended; it will not make the meat overly spicy, but it adds a crucial background acidity that wakes up all the other savory seasonings.
-
All-purpose flour: One cup of standard flour, which forms the primary structural base of our crispy outer breading.
-
Cornstarch: Half a cup of cornstarch. This is the ultimate secret weapon for maximum crunch; cornstarch prevents excessive gluten development, resulting in an incredibly delicate, shatteringly crisp crust that stays crunchy even when drenched in syrup.
-
Seasoning blend: A balanced combination of one teaspoon of vibrant paprika for color, one teaspoon of garlic powder, half a teaspoon of onion powder, half a teaspoon of ground black pepper, and one teaspoon of fine salt to ensure the crust is seasoned beautifully from top to bottom.
-
Vegetable oil: Enough high-smoke-point oil, such as canola or peanut oil, to fill your frying pot roughly two inches deep.
For the Flaky Waffle Biscuits
-
Refrigerated biscuit dough: One standard can containing eight pre-portioned dough pieces. Alternatively, if you prefer baking entirely from scratch, you can use eight homemade southern style dough rounds.
-
Prepared waffle batter: One cup of your favorite batter, mixed according to the package directions or made from your preferred scratch recipe. This will act as a crisp coating for our dough rounds.
-
Melted butter: Two tablespoons of unsalted butter for brushing over the hot buns as soon as they exit the grid iron.
Rich Maple Butter Sauce
-
Pure maple syrup: Quarter of a cup of high-quality, genuine syrup. Avoid artificial pancake syrups made from high-fructose corn syrup here, as real syrup possesses a complex, woody sweetness that pairs beautifully with savory poultry.
-
Unsalted butter: Two tablespoons of real butter to emulsify with the syrup, creating a glossy, rich glaze that clings to the food.
-
Ground cinnamon: A tiny pinch of optional cinnamon to inject a warm, comforting autumnal aromatic note into the sauce.
Optional Creative Toppings
-
Dill pickle slices: Adds a fantastic, sharp, vinegary crunch that cuts through the rich fat of the fried food.
-
Crispy bacon strips: For those who want to double down on the smoky, savory breakfast theme.
-
Sliced cheddar cheese: Sharp cheddar melts beautifully against the hot poultry, adding a creamy, salty element.
-
Hot honey: A spectacular alternative or addition for those who love a spicy, sweet kick.
Step-by-Step Cooking and Assembly Method: maple chicken & waffle biscuit sandwich
Now that your workspace is organized and your ingredients are accurately measured, it is time to begin the rewarding process of cooking. Follow these detailed stages carefully to ensure every component turns out flawlessly.
Stage 1: Marinating and Tenderizing the Poultry
The foundation of a spectacular maple chicken & waffle biscuit sandwich lies in proper meat preparation. Take your two boneless, skinless breasts and place them flat on a clean cutting board. Holding one hand flat on top of the meat, use a sharp chef’s knife to carefully slice horizontally through the middle of the breast, creating two thinner, evenly sized fillets. Repeat this with the second breast so you have four uniform pieces.
In a large mixing bowl, pour in your one cup of rich buttermilk and stir in the optional teaspoon of hot sauce. Drop your four prepared fillets directly into the liquid, making sure each piece is completely submerged. Cover the bowl and let the meat marinate at room temperature for at least thirty minutes. If you have extra time, you can place the covered bowl inside your refrigerator to marinate for up to four hours, allowing the buttermilk to deeply tenderize the meat.
Stage 2: Pressing the Unique Waffle Biscuits
While your poultry is finishing its tenderizing bath, you can turn your attention to creating the innovative sandwich buns. Plug in your electric grid maker and allow it to preheat thoroughly according to the manufacturer instructions. Open your can of refrigerated dough and separate the eight rounds. Place the dough pieces onto a clean surface and use the palm of your hand or a rolling pin to gently flatten each round until it expands slightly in diameter but retains some thickness.
Pour your one cup of prepared smooth batter into a shallow dish. Take one flattened dough round and quickly dip it into the batter, ensuring a thin, uniform coating covers the entire exterior. Carefully place the battered dough piece directly into the center of your hot grid iron.
Close the lid firmly and let it cook for four to six minutes. You are looking for the steam to puff the inside dough into a flaky, layered biscuit while the outer batter cooks into a gorgeous, deep golden-brown grid crust. Use a pair of tongs to lift the hot bun out, immediately brush it with a layer of melted butter, and place it in a warm oven to stay fresh while you cook the remaining pieces.
Stage 3: Frying the Poultry to Golden Crunch
With your buns resting safely in a warm oven, it is time to achieve that perfect, shatteringly crisp crust on your marinated meat. Pour your vegetable oil into a heavy-bottomed pot or a deep skillet until it reaches roughly two inches in depth. Place the pot over medium-high heat and let the oil warm up until it reaches a steady temperature of three hundred and fifty degrees.
While the oil is heating, prepare your dredging station. In a wide, shallow bowl, thoroughly combine your one cup of all-purpose flour, half a cup of cornstarch, one teaspoon of paprika, one teaspoon of garlic powder, half a teaspoon of onion powder, one teaspoon of salt, and half a teaspoon of black pepper.
Remove a poultry fillet from the buttermilk bath, letting any excess liquid drip off for a second, then drop it directly into the seasoned flour bowl. Use your fingers to press the flour firmly onto the meat, ensuring every nook, cranny, and crevice is completely coated in a thick layer of dry dust.
Carefully lower the coated fillets into the hot oil, working in batches if necessary to avoid crowding the pan, which can lower the oil temperature. Fry the meat for five to seven minutes per piece, turning them occasionally. You are waiting for the exterior crust to turn a beautiful, deep mahogany golden-brown and for the internal temperature of the thickest part of the meat to reach a safe one hundred and sixty-five degrees. Lift the crispy pieces out and let them drain on a wire rack or paper towels.
Stage 4: Simmering the Maple Butter Glaze
While the fried poultry is shedding any excess oil on the cooling rack, you can quickly assemble the luxurious, warm glaze that ties the whole meal together. Place a small, clean saucepan over low heat on your stove. Drop your two tablespoons of unsalted butter into the pan, letting it melt slowly until it begins to bubble gently around the edges.
Pour your quarter cup of pure maple syrup directly into the melted butter. If you are using the optional pinch of ground cinnamon, sprinkle it into the liquid now.
Use a small whisk or a silicone spatula to stir the mixture continuously over low heat for about two to three minutes. You want the butter and syrup to warm through completely and merge into a single, glossy, velvety sauce. Be careful not to let the mixture boil or simmer too aggressively, as excessive heat can cause the sugars in the syrup to caramelize too much, turning the smooth glaze into a sticky, hard candy consistency. Keep the sauce warm on the lowest setting until assembly time.
Stage 5: Assembling the Brunch Masterpieces
Now comes the incredibly satisfying moment where all your hard work merges into a spectacular meal. Gather your warm buns from the oven and carefully split each one horizontally across the middle, creating a top half and a bottom half. Place the bottom halves cut-side up onto your serving platter.
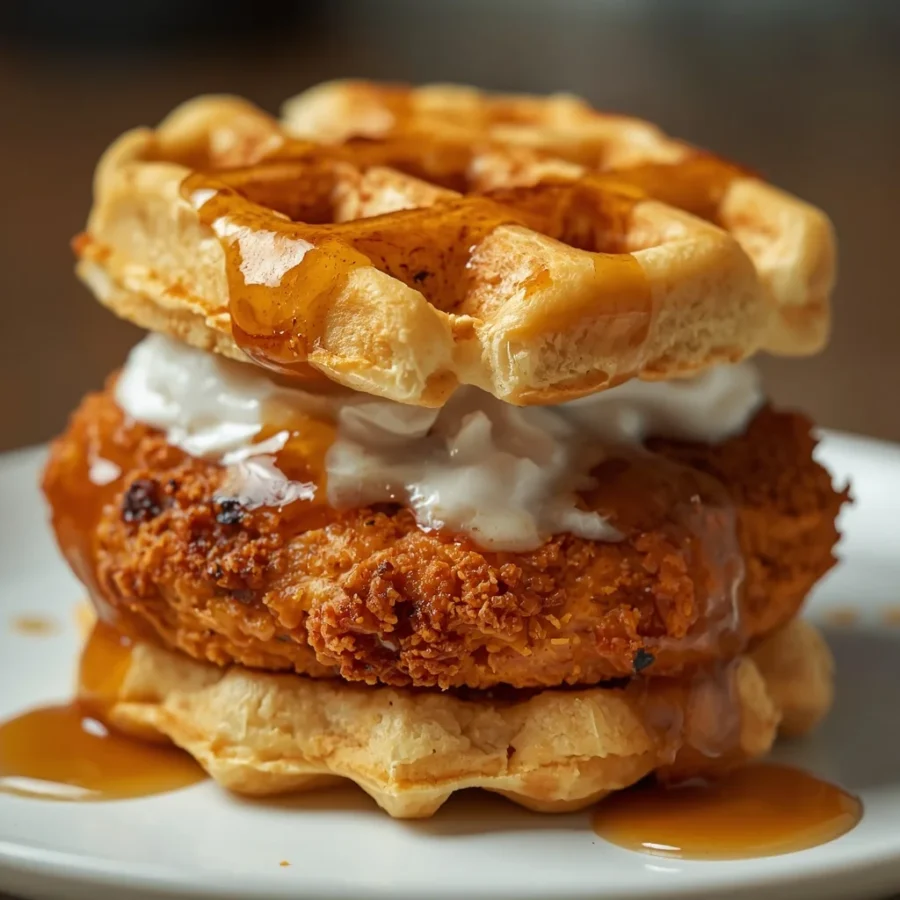
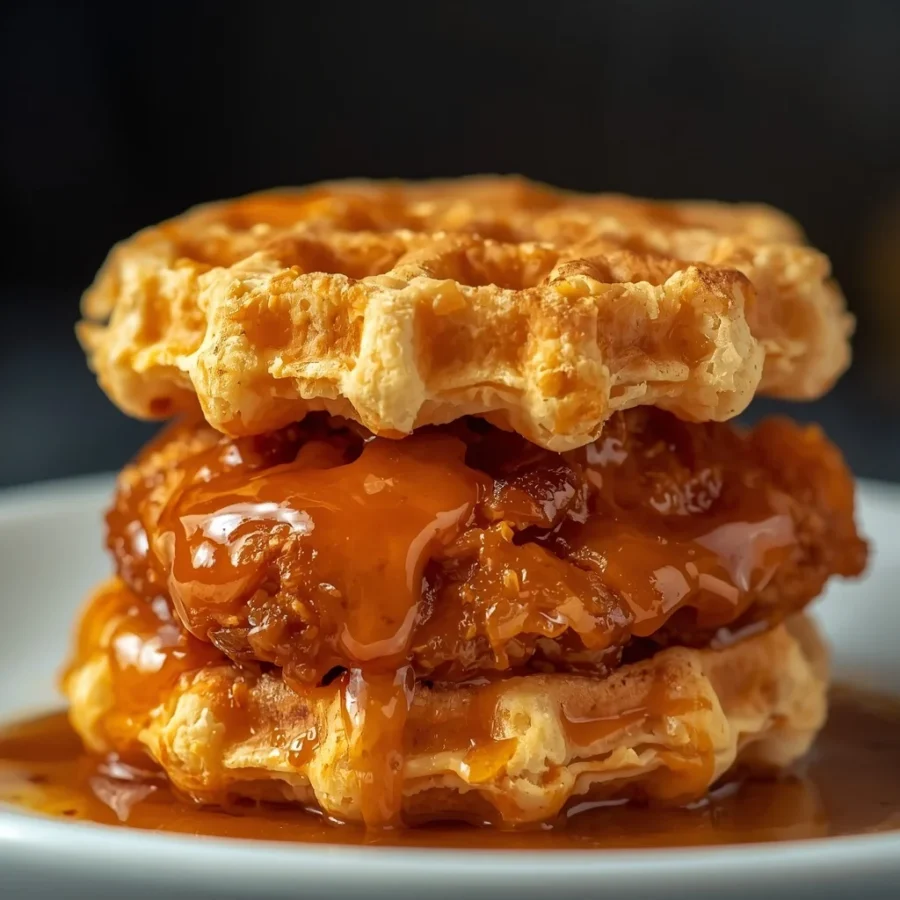
Take a hot, ultra-crispy fried poultry fillet and rest it directly onto the bottom bun layer. If you are using optional toppings, now is the time to add them; lay down a couple of crisp dill pickle slices for acidity, a strip of smoky bacon, or a slice of sharp cheddar cheese that will melt against the residual heat of the poultry crust.
Take your warm saucepan and generously drizzle the glossy maple butter sauce right over the crispy poultry skin, letting it pool beautifully into the square grid pockets of the bun. Top each creation with its matching upper bun half, pressing down just enough to secure the contents. Serve these magnificent sandwiches immediately while the meat is piping hot and the crust is at its absolute peak of crunchiness.
Creative Variations for Custom Flavor Profiles: maple chicken & waffle biscuit sandwich
Mastering this foundational recipe gives you an incredible platform to experiment with different flavor accents to suit your personal palate or accommodate various dietary preferences.
The Ultimate Hot Honey Kick
If you love the exciting contrast of sweet flavors paired with an aggressive spicy punch, you can easily transition this recipe into a hot honey sensation. Omit the cinnamon from your warming saucepan entirely. Instead, stir in a teaspoon of crushed red pepper flakes and half a teaspoon of cayenne pepper directly into your syrup and butter glaze. For an extra layer of complexity, splash a teaspoon of apple cider vinegar into the pot. This creates a bright, fiery, sweet elixir that cuts through the rich fried poultry beautifully and pairs wonderfully with the cooling crunch of dill pickles.
The Lighter Air-Fried Alternative
For those mornings when you want all the comforting flavors of a classic soul food brunch without the heavy feeling of deep-fat frying, you can adapt the poultry method for your countertop air fryer. Follow the marinating and flour-dredging steps exactly as written. Before placing the coated fillets into your air fryer basket, spray both sides generously with a light coating of cooking oil to ensure the flour cooks thoroughly. Air-fry the poultry at four hundred degrees for roughly fifteen to eighteen minutes, flipping the pieces halfway through the cooking window, until the breading is crisp and golden and the interior is fully cooked.
Savory Cheddar and Herb Dough
You can elevate the structural base of your sandwich by infusing savory elements directly into the bun dough. If you are making your biscuit rounds from scratch or using adjustable dough, fold half a cup of finely shredded sharp cheddar cheese and a tablespoon of minced fresh chives directly into the dough before flattening it out. When this cheese-infused dough hits the hot grid iron, the cheese pockets will caramelize against the metal, creating an incredibly flavorful, savory crust that contrasts beautifully with the sweet syrup drizzle.
Pro Tips for Achieving Diner-Quality Results: maple chicken & waffle biscuit sandwich
Paying attention to a few small technical details during the preparation process can elevate your homemade creations into something truly legendary. Keep these expert strategies in mind:
-
Maintain oil temperature consistency: When deep-frying, use a candy thermometer to monitor your oil. If the oil drops below three hundred and fifty degrees when you add the poultry, the breading will absorb excess grease and turn out soggy; if it gets too hot, the outside will burn before the inside cooks through.
-
Avoid double-dipping the buns too heavily: When coating your dough rounds in the smooth batter, keep the layer thin. An excessively thick coat of batter will overflow out of your grid maker and prevent the inner dough from cooking through completely, resulting in a raw, gummy center.
-
Rest the fried meat on a wire rack: Never place freshly fried poultry directly onto a flat plate or solid surface. The residual heat will trap steam underneath the crust, turning your beautifully crisp breading soft and soggy within minutes. A wire rack allows air to circulate completely around the food.
-
Opt for genuine maple syrup: The depth of flavor provided by actual tree-tapped syrup contains subtle notes of caramel, vanilla, and wood that complement the savory spices in the poultry coating in a way that artificial flavored syrups simply cannot replicate.
Frequently Asked Questions: maple chicken & waffle biscuit sandwich
Why did my waffle biscuits turn out doughy or raw in the center?
If the exterior of your sandwich bun looks perfectly cooked and brown but the inside layers remain raw and pasty, it is usually because your grid iron was too hot or you didn’t flatten the dough rounds sufficiently before cooking. High heat cooks the outer batter shell quickly, forcing you to remove the item before the internal heat has a chance to penetrate and bake the thick biscuit core. To fix this, lower your appliance heat setting slightly, make sure to flatten your dough rounds to roughly half an inch of thickness, and extend the cooking time to a slow, steady five or six minutes.
Can I prepare the components of this sandwich ahead of time?
While this meal is undeniably at its absolute best when assembled and eaten fresh out of the frying pot, you can certainly prepare aspects of it in advance to save time on a busy morning. You can slice and marinate your poultry breasts in the buttermilk mixture inside your refrigerator overnight. Additionally, you can whisk up your smooth batter the evening before and store it in a covered container. However, the actual frying of the poultry and the pressing of the dough should be done right before serving to maintain that critical, spectacular contrast between a crunchy exterior and a soft interior.
How do I successfully reheat any leftover sandwiches?
If you have leftover assembled sandwiches, store them in an airtight container inside your refrigerator for up to two days. To reheat them successfully without turning the crust rubbery, avoid using a microwave completely. Instead, disassemble the sandwich layers and place the individual components onto a large baking sheet. Warm them thoroughly in a preheated oven set to three hundred and fifty degrees for roughly eight to ten minutes. This dry, ambient heat will quickly restore the crunch to the fried poultry skin and refresh the flaky texture of the bun.
What are the best side dishes to serve alongside maple chicken & waffle biscuit sandwich?
Because this sandwich is incredibly rich, savory, and sweet all at once, it pairs beautifully with sides that offer a bright, refreshing, or highly textural contrast. A bowl of chilled, tart fresh fruit salad containing berries and citrus cuts through the heavy dairy and fat wonderfully. Alternatively, a side of crispy, shredded potato hash browns or a tangy, vinegar-based cabbage coleslaw can round out the platter perfectly, turning this single handheld item into a complete, balanced, diner-style brunch feast.
Conclusion: maple chicken & waffle biscuit sandwich
Cooking a fresh batch of maple chicken & waffle biscuit sandwich masterpieces is an incredibly rewarding kitchen project that brings the ultimate luxury of a soul food brunch straight to your dining table. By taking the time to slowly tenderize your poultry in a tangy bath, pressing your flaky dough rounds inside a hot grid iron, and emulsifying a glossy, warm maple syrup glaze, you create a handheld culinary experience that easily surpasses anything available at standard fast-food drive-thrus or frozen aisles. This recipe proves that with just a few clever techniques, like utilizing cornstarch for a lighter crust and maintaining steady frying temperatures, you can achieve professional, restaurant-quality textures right in your home kitchen. Gather your premium ingredients, enjoy the rhythmic process of dredging and frying, and share a hot platter of these unforgettable sweet and savory sandwiches with the people you love most.
Print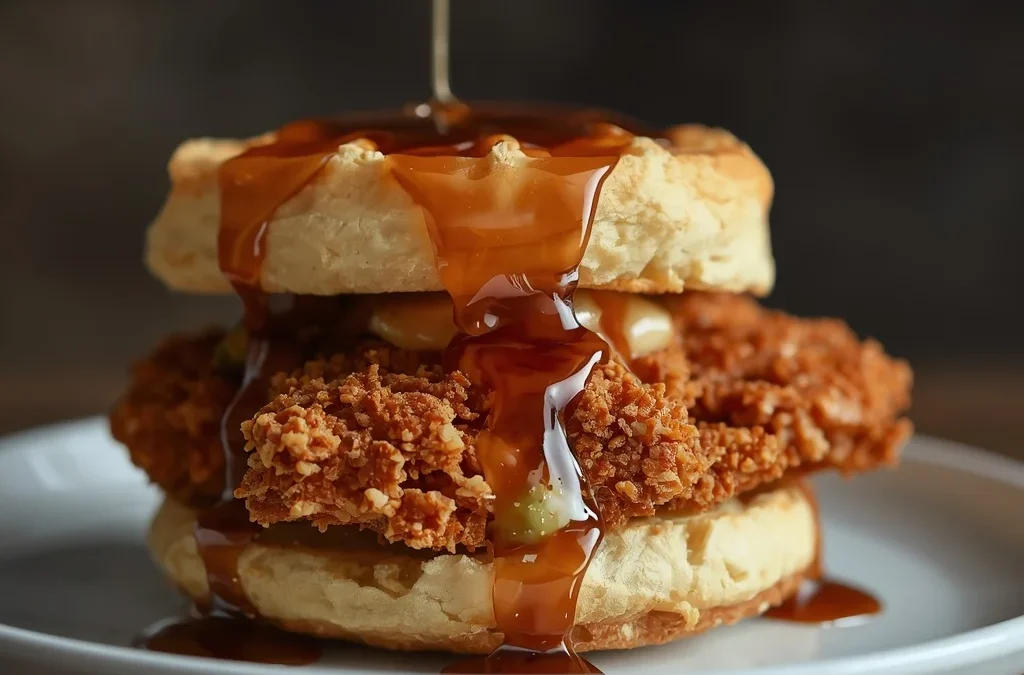
Maple Chicken & Waffle Biscuit Sandwich
- Total Time: 45 minutes
- Yield: 4 sandwiches 1x
Description
To truly appreciate the genius of this dish, it helps to understand how it bridges the gap between different classic breakfast items. Essentially, this comfort food masterpiece is a hybrid meal that takes the beloved flavor profile of soul food poultry and sweet griddle cakes and redesigns it into a portable, easy to eat handheld format. Instead of serving standard bone-in poultry pieces over a large, soft griddle cake that requires a knife and fork, this approach uses structured, bite-sized components.
Ingredients
For the Chicken
- 2 boneless, skinless chicken breasts, cut into 4 fillets
- 1 cup buttermilk
- 1 teaspoon hot sauce (optional)
- 1 cup all-purpose flour
- ½ cup cornstarch
- 1 teaspoon paprika
- 1 teaspoon garlic powder
- ½ teaspoon onion powder
- ½ teaspoon black pepper
- 1 teaspoon salt
- Vegetable oil, for frying
For the Waffle Biscuits
- 1 can refrigerated biscuit dough (8 biscuits) or 8 homemade biscuit rounds
- 1 cup waffle batter (prepared according to package directions or homemade)
- 2 tablespoons melted butter
Maple Butter Sauce
- ¼ cup pure maple syrup
- 2 tablespoons unsalted butter
- Pinch of cinnamon (optional)
Optional Toppings
- Dill pickle slices
- Crispy bacon
- Sliced cheddar cheese
- Hot honey
- Butter
Instructions
1. Marinate the Chicken
- In a bowl, combine the buttermilk and hot sauce.
- Add the chicken fillets and marinate for at least 30 minutes (or up to 4 hours in the refrigerator).
2. Prepare the Waffle Biscuits
- Preheat a waffle maker according to the manufacturer’s instructions.
- Lightly flatten each biscuit round.
- Dip or coat each biscuit with a thin layer of prepared waffle batter.
- Place in the waffle maker and cook for 4–6 minutes, or until golden brown and cooked through.
- Brush with melted butter and keep warm.
3. Fry the Chicken
- Heat about 2 inches of vegetable oil to 350°F (175°C).
- In a shallow bowl, mix the flour, cornstarch, paprika, garlic powder, onion powder, salt, and pepper.
- Remove the chicken from the marinade and dredge thoroughly in the flour mixture.
- Fry for 5–7 minutes per piece, until golden brown and the internal temperature reaches 165°F (74°C).
- Drain on a wire rack or paper towels.
4. Make the Maple Butter Sauce
- In a small saucepan over low heat, melt the butter.
- Stir in the maple syrup and cinnamon, if using.
- Warm gently without boiling.
5. Assemble the Sandwiches
- Split a waffle biscuit in half.
- Place a piece of crispy chicken on the bottom half.
- Add optional toppings such as cheddar cheese, bacon, or pickles.
- Drizzle generously with the warm maple butter sauce or hot honey.
- Top with the remaining waffle biscuit and serve immediately.
Notes
- Prep Time: 20 minutes
- Cook Time: 25 minutes
- Category: Main Course
- Method: Frying
- Cuisine: American
Nutrition
- Serving Size: 1 sandwich
- Calories: 610 kcal
Keywords: fried chicken and waffle biscuit, hot maple chicken biscuit sandwich, homemade chicken waffle breakfast sandwich