Imagine sinking your teeth into a rich, velvety chocolate treat that offers the perfect balance of pillowy soft textures and an incredibly satisfying crunch. If you are looking for a decadent dessert that requires absolutely no baking and practically zero effort, you have found it. This marshmallow rocky road freezer fudge recipe is the ultimate crowd-pleaser, delivering deep cocoa flavors alongside sweet pockets of fluffy goodness and roasted nuts. It is a modern, hassle-free take on a classic confectionery favorite that stores beautifully right in your freezer, meaning a premium homemade sweet treat is always just seconds away whenever a sudden craving strikes.
What makes this particular treat so special is the clever method of preparation. Traditional fudge requires candy thermometers, precise boiling stages, and a lot of stressful timing to ensure the sugar does not crystallize into a grainy mess. This version completely skips that stress by utilizing a rich base that sets up beautifully in the cold. It remains exceptionally smooth, perfectly sliceable, and intensely flavorful without ever turning rock hard. Whether you are prepping for a weekend gathering, building a holiday dessert platter, or simply stocking up your personal midnight snack stash, this simple guide will walk you through creating an elite dessert that easily rivals anything you would buy at a high-end chocolate boutique.
What is This Sweet Marshmallow Treat?
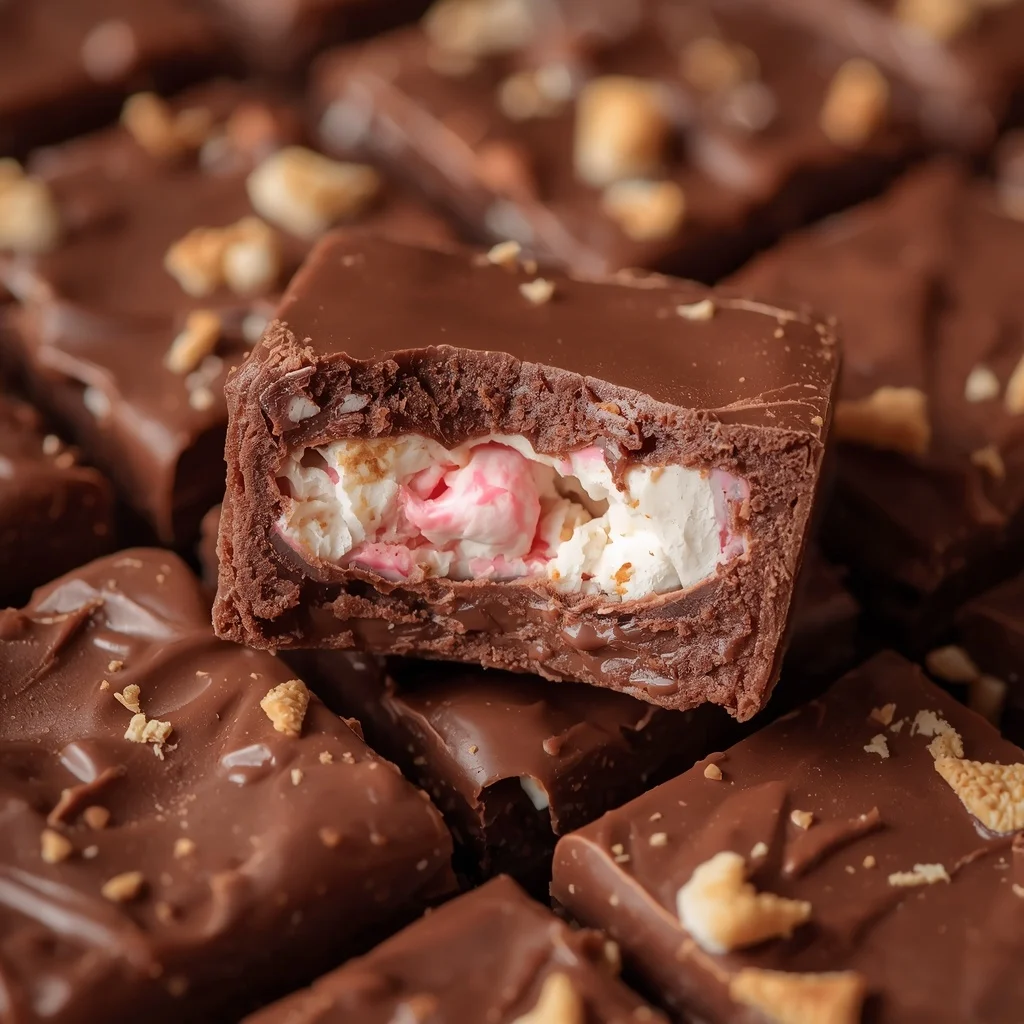
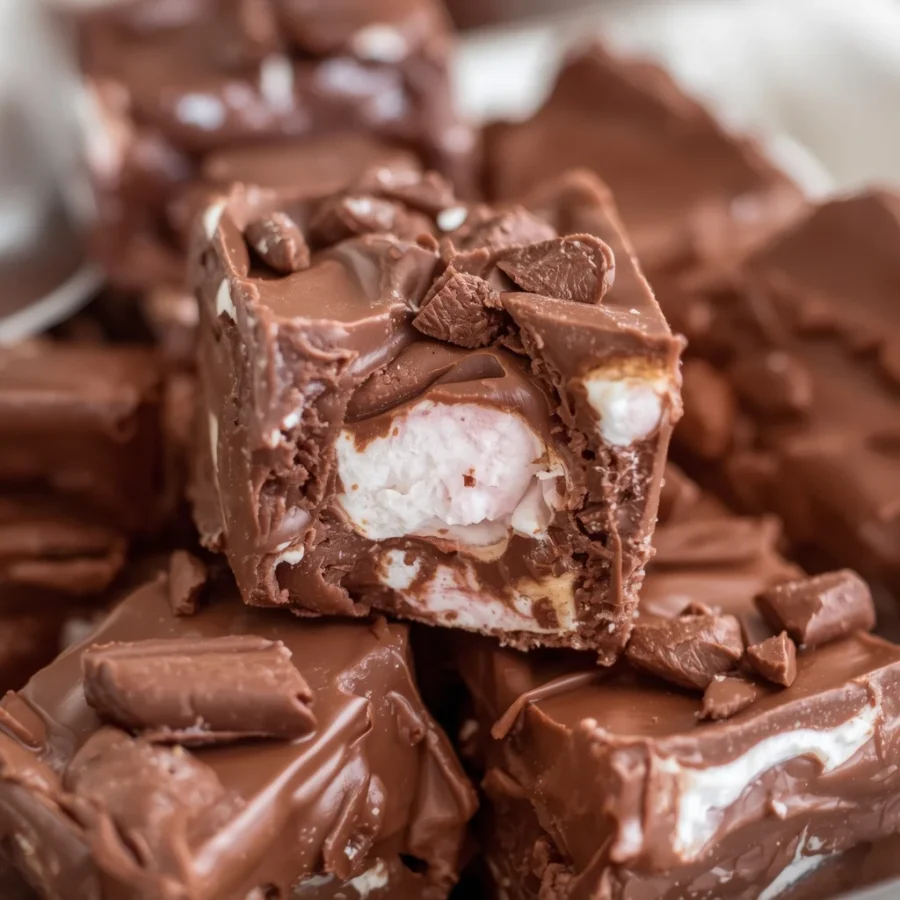
To understand why this dessert is such a game-changer, it helps to break down exactly what you are creating. At its core, this dessert is a premium, no-bake confection that marries the ultra-creamy, melt-in-your-mouth texture of traditional chocolate fudge with the playful, chunky mix-ins of a classic rocky road. By blending high-quality chocolate chips with thick, sweetened condensed milk and a touch of butter, you create an incredibly smooth ganache-like base.
The magic happens when this rich mixture is cooled slightly and folded together with mini marshmallows and chopped roasted nuts. Instead of baking it in a hot oven, you pour the mixture into a lined pan and let the intense cold of your freezer do all the hard work. The result is a dense, fudge-like bar that stays soft enough to bite into comfortably straight from the cold, while holding its shape beautifully at room temperature. It offers an incredible contrast of temperatures and textures that keeps people coming back for a second and third piece.
The Rich History Behind the Flavor Profile: marshmallow rocky road freezer fudge
The fascinating origin of this flavor profile takes us back several decades. While fudge itself became incredibly popular in women’s colleges across the United States during the late nineteenth century, the specific combination known as rocky road has a distinct history of its own. Invented during the late nineteen-twenties around the time of the Great Depression, the flavor combination was created as a way to bring joy to people during incredibly difficult economic times. The name itself was a playful nod to the literal rocky road that folks were traveling through financially and socially.
Originally appearing as an ice cream flavor, the brilliant combination of rich chocolate, fluffy marshmallows, and crunchy walnuts quickly took the culinary world by storm. It did not take long for clever home cooks and professional confectioners to realize that these three elements belonged together in every dessert medium possible, especially in candies and bars. This modern marshmallow rocky road freezer fudge recipe honors that wonderful flavor heritage while adapting the process for modern, busy lifestyles. It removes the fussy stovetop boiling steps of the past and swaps them for a quick, reliable freezing technique that guarantees success for cooks of all skill levels.
Ingredients and Exact Kitchen Quantities: marshmallow rocky road freezer fudge
To achieve the absolute best results, you want to gather high-quality ingredients before starting the melting process. Because this recipe uses just a few components, the quality of your chocolate will directly impact the final flavor of your fudge. Here is exactly what you will need to assemble in your kitchen:
-
Semi-Sweet Chocolate Chips: Two full cups, which amounts to roughly three hundred and forty grams. Opt for a brand that you enjoy eating straight out of the bag, as this forms the flavor foundation.
-
Sweetened Condensed Milk: One standard can, which is fourteen ounces or approximately three hundred and ninety-seven grams. Ensure you are buying condensed milk and not evaporated milk, as they are completely different products.
-
Butter: Two tablespoons of unsalted or salted butter. This adds a beautiful sheen to the finished product and assists in keeping the texture smooth and sliceable.
-
Vanilla Extract: One teaspoon of pure vanilla extract to deepen the chocolate notes and provide a warm, aromatic background flavor.
-
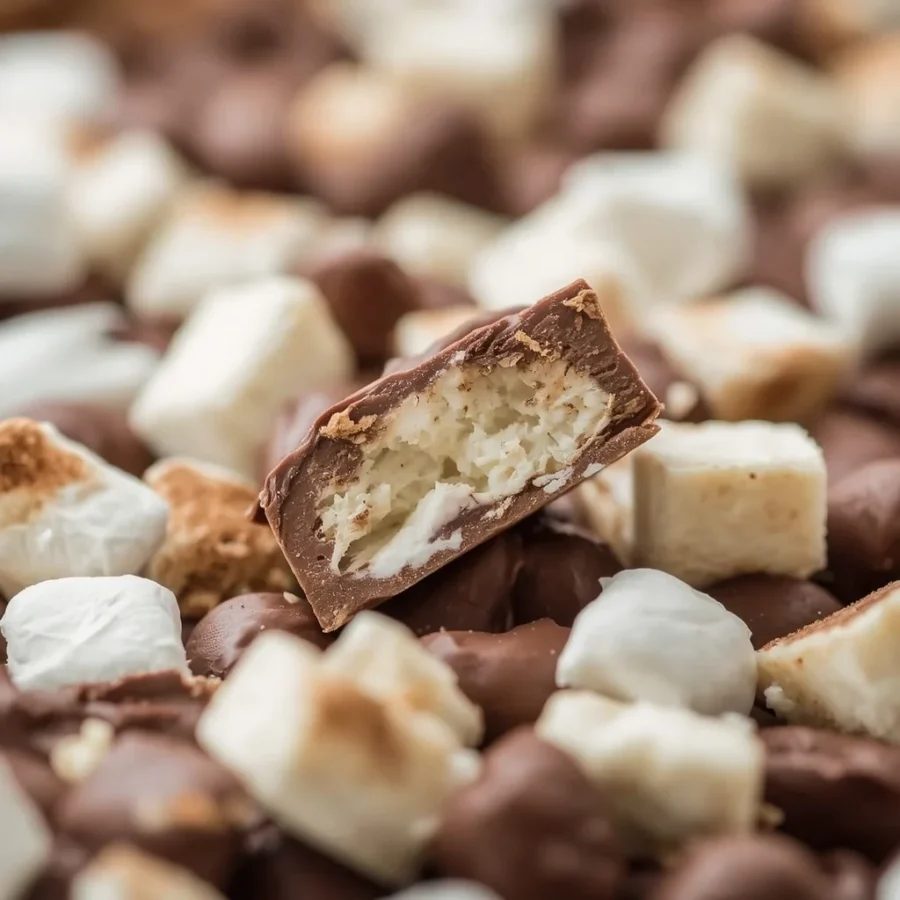
Mini Marshmallows: Two full cups of fresh, soft mini marshmallows. If your marshmallows have been sitting in the pantry and feel a bit stale or hard, grab a fresh bag for the best pillowy texture.
-
Roasted Nuts: One cup of roughly chopped peanuts, almonds, or walnuts. Roasting the nuts beforehand is highly recommended as it coaxes out the natural oils and creates a much more pronounced crunch.
-
Salt: A tiny pinch of fine sea salt. This is entirely optional but highly recommended to balance out the intense sweetness of the condensed milk.
Step-by-Step Direction and Preparation Method: marshmallow rocky road freezer fudge
Getting this dessert together is a quick process, so it is highly beneficial to have all your ingredients measured out and your baking pan fully prepped before you begin applying any heat. Follow these detailed steps for an absolutely flawless batch.
Preparing Your Baking Pan
The very first step is to prepare your workspace. Take an eight-inch square baking pan or a standard loaf pan and line it carefully with a sheet of parchment paper. Make sure to leave a couple of inches of overhang on the sides. This overhang acts as a handy set of handles later on, allowing you to lift the fully chilled block of fudge effortlessly out of the pan without it sticking or breaking apart.
Melting the Chocolate Base
In a large, microwave-safe bowl, combine your two cups of semi-sweet chocolate chips, the entire can of sweetened condensed milk, and the two tablespoons of butter. If you prefer not to use a microwave, you can easily set a heatproof bowl over a saucepan of gently simmering water to create a makeshift double boiler.
If using the microwave, heat the mixture on medium power in short bursts of thirty seconds. Remove the bowl and give it a thorough stir after each interval. It might look a bit chunky at first, but as you stir, the residual heat will continue to melt the chocolate chips. Continue this gentle heating process until the mixture transforms into an absolutely smooth, glossy, and completely melted chocolate liquid.
Cooling and Adding Flavor Enhancers
Once your chocolate base is silky smooth, remove it from the heat source completely. Stir in your one teaspoon of pure vanilla extract and that small pinch of fine sea salt if you are using it. Now comes an incredibly important waiting step: let the chocolate mixture sit quietly on your counter for about five minutes to cool down slightly.
If you try to toss your mini marshmallows into the bowl immediately while the chocolate is boiling hot, they will melt completely, turning your fudge into a streaky, uniform brown mass rather than a textured rocky road. A brief five-minute cooling window ensures the chocolate remains warm enough to pour but cool enough to leave the marshmallows perfectly intact.
Folding in the Mix-Ins
After the brief cooling period, dump your two cups of mini marshmallows and your one cup of chopped roasted nuts directly into the bowl. Using a sturdy rubber spatula, gently fold the ingredients together. Work efficiently to ensure that every single marshmallow and nut piece gets completely coated in the luscious chocolate mixture, distributing them as evenly as possible throughout the bowl.
Pouring and Smoothing the Fudge
Scrape the thick mixture out of your bowl and into your prepped, parchment-lined baking pan. Use the back of your spatula or an offset spatula to push the mixture firmly into the corners of the pan. Smooth out the top surface so it looks relatively flat, though a few bumpy marshmallow tops poking through are exactly what gives this dessert its rustic, appetizing charm.
The Chilling and Slicing Process
Transfer the pan directly into your freezer. Let it sit completely undisturbed for a minimum of two to three hours, or until the entire block feels thoroughly firm to a light touch. Once it has fully set, grab the edges of the parchment paper handles you created and lift the fudge straight out of the pan and onto a sturdy cutting board.
Using a sharp, heavy chef’s knife, slice the block into clean squares. Depending on how large or small you prefer your treats, you can easily cut this into twenty-five to thirty-six bite-sized pieces. To get perfectly clean slices, you can dip your knife blade into hot water and wipe it dry with a towel between each cut.
Exciting Flavor Variations to Try: marshmallow rocky road freezer fudge
One of the absolute best things about mastering this marshmallow rocky road freezer fudge recipe is how incredibly adaptable it is. Once you understand the basic base method, you can start customizing the mix-ins to suit your personal preferences or to match a specific holiday theme.
The Sweet and Salty Twist
If you are a massive fan of desserts that contrast rich sweetness with a distinct savory kick, try sprinkling a generous pinch of flaky sea salt across the top of the fudge right before you place the pan into the freezer. The large salt crystals add a beautiful visual element and provide a wonderful, sharp contrast to the sweet condensed milk with every bite.
The Crunchy Biscuit Addition
For an even more dramatic texture profile, try mixing in a half cup of crushed digestive biscuits or graham crackers along with your marshmallows and nuts. The biscuits mimic the flavor profile of a campfire s’more, adding a distinct, malty crunch that pairs beautifully with the soft marshmallow pockets.
Playing with Chocolate Varieties
You can easily alter the entire flavor profile of the dessert by changing the type of chocolate chips you buy. If you have an intense sweet tooth, swap out the semi-sweet chips for high-quality milk chocolate chips. On the flip side, if you prefer a deeply sophisticated, less sugary treat, use a dark chocolate chip with a high cacao percentage. This creates a remarkably rich flavor that pairs beautifully with a hot cup of black coffee.
Introducing Fruit Elements
To cut through the intense richness of the cocoa, consider adding a half cup of dried tart cherries, dried cranberries, or even chopped dried apricots to the mix. The chewiness of the dried fruit complements the marshmallows, while the natural acidity provides a bright, fruity counter-note that elevates the entire flavor profile.
Frequently Asked Questions: marshmallow rocky road freezer fudge
Why did my marshmallows melt when I added them to the mix?
This almost always happens because the melted chocolate base was still far too hot when the marshmallows were introduced. Remember to let your chocolate mixture cool down on the counter for a solid five minutes after melting. It should still be pourable and warm, but not hot enough to dissolve the sugar structure of the marshmallows.
Can I make marshmallow rocky road freezer fudge completely nut-free?
You can absolutely omit the nuts if you are serving this to anyone with allergies or simply do not enjoy them. To maintain that classic, vital crunch that makes a rocky road so enjoyable, replace the nuts with an equal volume of crushed pretzel pieces, sunflower seeds, or crispy rice cereal.
Do I really need to store this in the freezer?
While it is called freezer fudge because the freezer helps it set up rapidly and keeps it perfectly firm, you can technically store it in the refrigerator as well. However, storing it in the freezer gives it a uniquely dense, chewable texture that is highly addictive. Because of the sugar and fat content, it will not freeze into a solid block of ice, so it remains perfectly edible straight from the cold.
How long will this batch stay fresh?
When kept in a securely sealed, airtight container, this treat will keep beautifully in the freezer for up to three months. If you decide to store it in the refrigerator instead, it will remain fresh and delicious for about two weeks. It is an exceptional make-ahead dessert for busy hosting seasons.
Conclusion: marshmallow rocky road freezer fudge
This marshmallow rocky road freezer fudge recipe proves that you do not need to spend hours over a hot stove or mess around with confusing kitchen gadgets to create an absolutely spectacular dessert. By combining simple, accessible ingredients with a smart, cold-set method, you get a premium treat that delivers on texture, flavor, and visual appeal every single time. It is a wonderfully versatile canvas for your favorite mix-ins, a durable dessert that keeps fresh for months, and an incredibly satisfying project that takes less than twenty minutes of active kitchen prep time. Give it a try for your next gathering, keep a stash ready for your sweet tooth, and enjoy the effortless luxury of gourmet homemade fudge whenever you want.
Print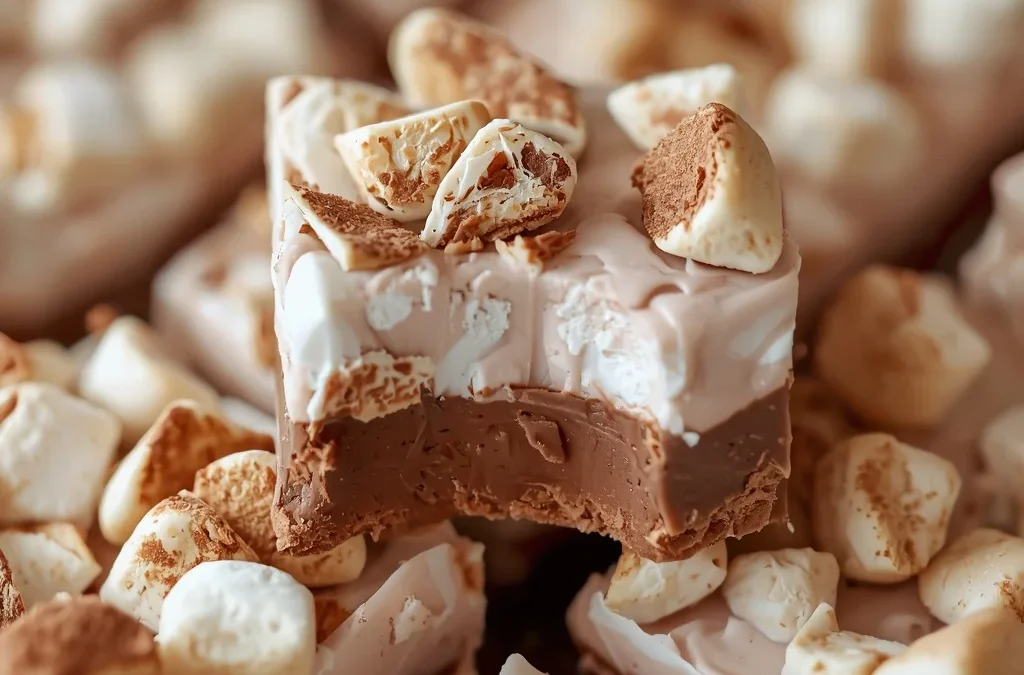
Ultimate Marshmallow Rocky Road Freezer Fudge Recipe
- Total Time: 15 mins
- Yield: 25–36 pieces 1x
- Diet: Vegetarian
Description
To understand why this dessert is such a game-changer, it helps to break down exactly what you are creating. At its core, this dessert is a premium, no-bake confection that marries the ultra-creamy, melt-in-your-mouth texture of traditional chocolate fudge with the playful, chunky mix-ins of a classic rocky road. By blending high-quality chocolate chips with thick, sweetened condensed milk and a touch of butter, you create an incredibly smooth ganache-like base.
Ingredients
- 2 cups (340 g) semi-sweet chocolate chips
- 1 can (14 oz / 397 g) sweetened condensed milk
- 2 tablespoons butter
- 1 teaspoon vanilla extract
- 2 cups mini marshmallows
- 1 cup roasted peanuts, almonds, or walnuts, roughly chopped
- Pinch of salt (optional)
Instructions
- Line an 8-inch (20 cm) square pan or loaf pan with parchment paper.
- In a microwave-safe bowl (or over a double boiler), combine the chocolate chips, sweetened condensed milk, and butter.
- Heat gently, stirring until smooth and fully melted.
- Stir in the vanilla and a pinch of salt.
- Let the mixture cool for about 5 minutes so it doesn’t melt the marshmallows.
- Fold in the marshmallows and chopped nuts until evenly coated.
- Spread the mixture into the prepared pan and smooth the top.
- Freeze for 2–3 hours, or until firm.
- Lift out using the parchment paper and cut into squares.
Notes
Keep your Rocky Road Freezer Fudge in an airtight container in the freezer for up to 3 months, making it a perfect make-ahead treat.
- Prep Time: 10 mins
- Cook Time: 5 mins
- Category: Dessert
- Method: No-Bake
- Cuisine: American
Nutrition
- Serving Size: 1 piece
- Calories: 120
Keywords: no-bake rocky road fudge, frozen marshmallow chocolate fudge, easy rocky road freezer candy