There is something truly magical about a dessert that looks like it belongs in a high-end European bistro but can actually be whipped up in your own kitchen with minimal effort. If you are looking to impress your dinner guests, satisfy a late-night sweet tooth, or accommodate vegetarian dietary restrictions without sacrificing texture, you have landed in the perfect spot. Today, we are diving deep into the art of making a flawless, restaurant-quality no-gelatin raspberry panna cotta.
This stunning, creamy Italian classic traditionally relies on animal-derived gelatin to achieve its signature wobble. However, our plant-based twist utilizes a brilliant ingredient called agar-agar. Not only does this keep the dessert entirely vegetarian-friendly, but it also delivers a clean, delicate set that lets the rich cream and vibrant fruit flavors truly shine. Let us break down everything you need to know to master this exquisite treat from scratch.
What is a No-Gelatin Raspberry Panna Cotta?
To truly appreciate this dessert, we first need to look at what the name actually means. In Italian, panna cotta literally translates to cooked cream. Traditionally, it is a simple mixture of dairy, sugar, and flavorings that is heated, bound together with a setting agent, and chilled in individual molds or glasses.
Our version retains all of that historic indulgence but substitutes traditional setting agents with agar-agar. This sea-vegetable derivative behaves slightly differently than animal gelatin, resulting in a dessert that sets firmly at room temperature but retains a luxurious, melt-in-your-mouth quality when crafted with the right proportions.
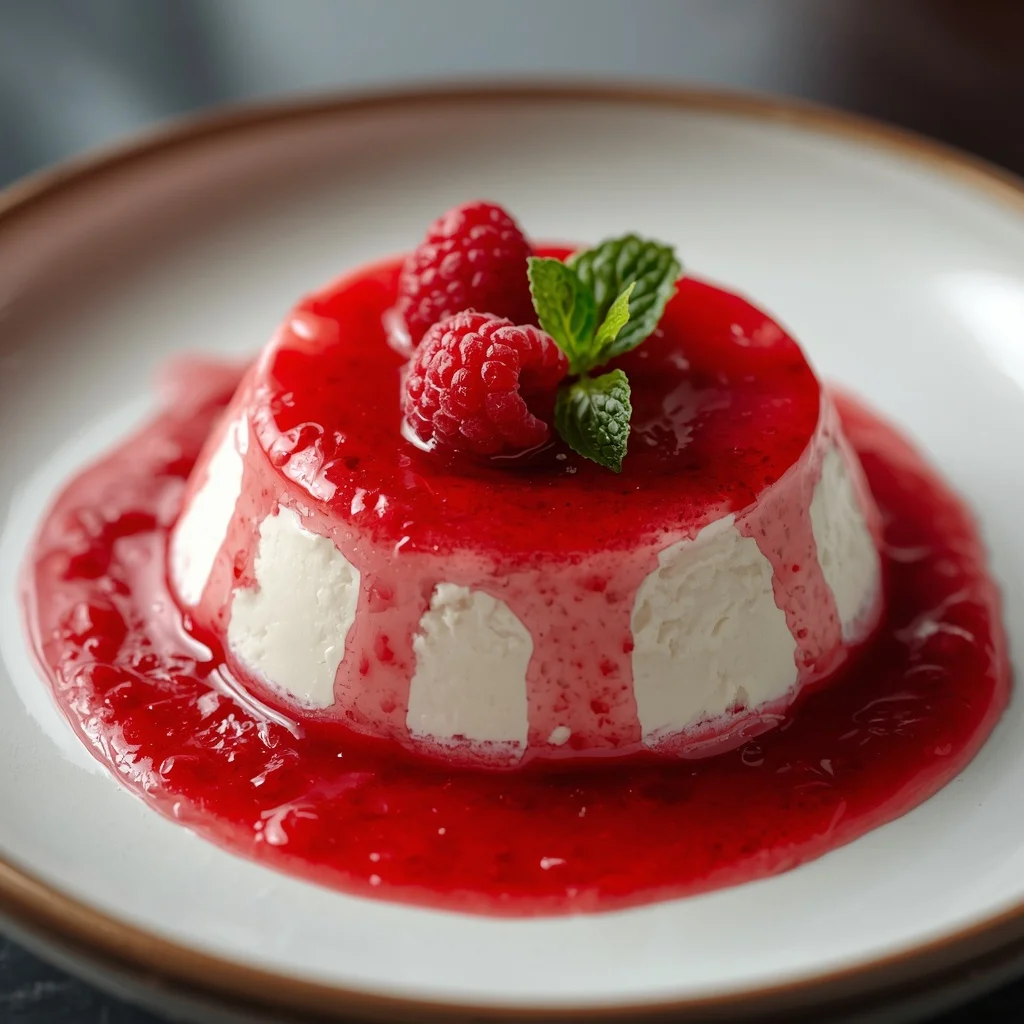
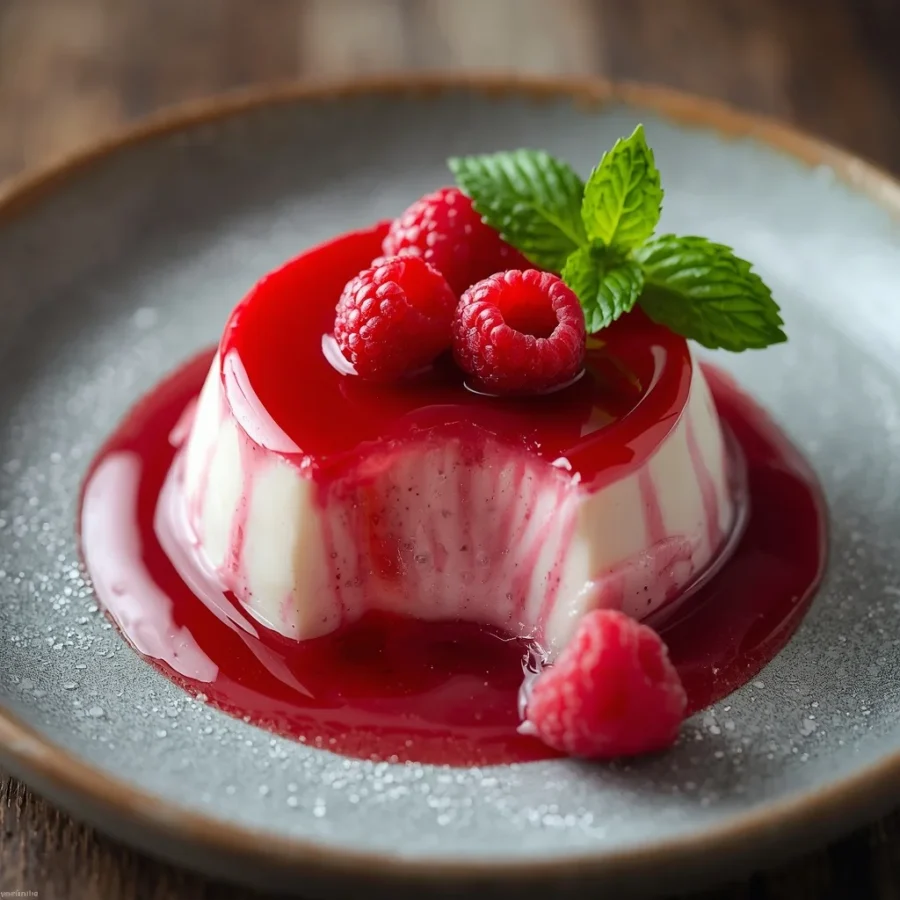
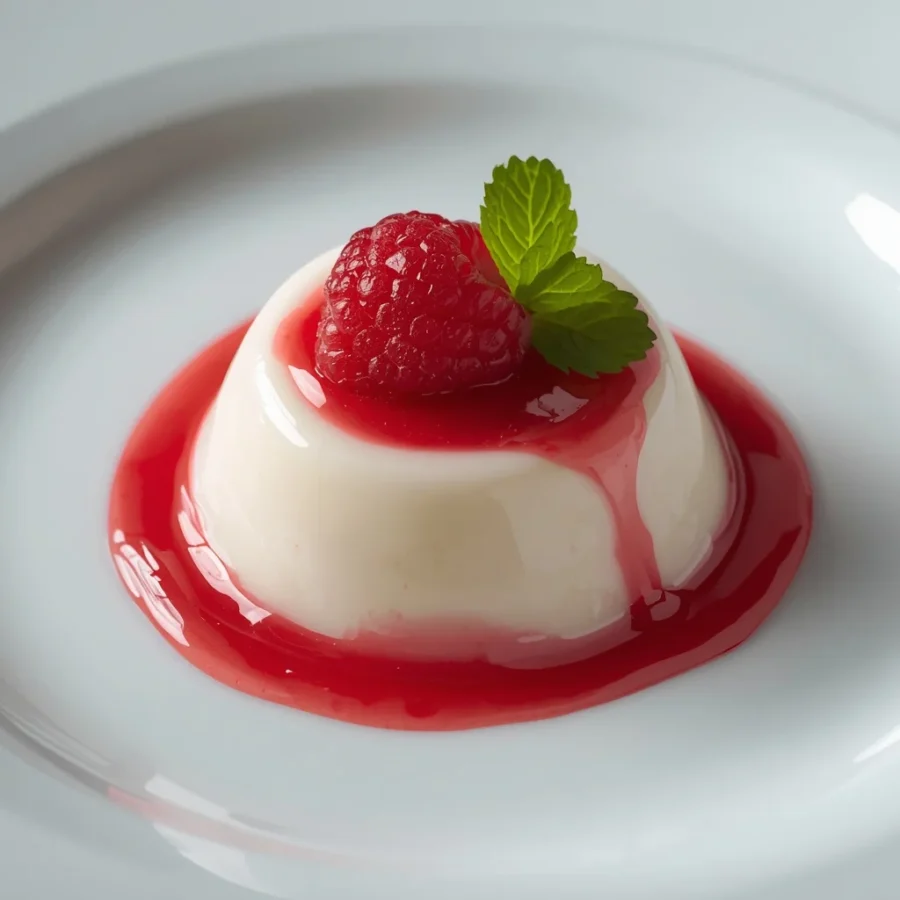
When you top this silky, vanilla-flecked cream base with a bright, tart raspberry coulis, you get the ultimate balance of rich and refreshing. It is a sensory experience where the velvety smooth cream meets the punchy acidity of fresh berries, creating a bite that is nothing short of perfection.
The Fascinating Origin of no gelatin raspberry panna cotta
While our modern no-gelatin raspberry panna cotta leans on contemporary plant-based culinary innovations, the roots of this dessert stretch back through centuries of Italian history.
A Northern Italian Treasure
Panna cotta is widely believed to have originated in the Piedmont region of Northern Italy, an area famous for its rich dairy production and lush pastures. Local lore suggests that a Hungarian woman living in the Langhe region created the first official version in the early twentieth century. However, historical accounts hint that similar variations existed much earlier, where cooks would boil fish bones to extract natural collagen to set heavy creams when sugar was a luxury ingredient.
The Evolution into Modern Dessert Culture
As sugar became more widely available, the recipe evolved into the sweet, vanilla-infused delicacy we recognize today. Piedmont officially registered panna cotta as a traditional food product of the region in the early two thousands.
By replacing traditional gelatin with agar-agar, a plant-derived setting agent that has been used in Asian confectionery for centuries, we are bridging the gap between old-world Italian tradition and modern dietary preferences. It is a beautiful example of how culinary practices adapt over time to become more inclusive without losing their original soul.
Essential Ingredients and Precise Quantities: no gelatin raspberry panna cotta
Achieving the perfect texture with a no-gelatin raspberry panna cotta requires high-quality ingredients used in the correct ratios. Because agar-agar sets more firmly than standard gelatin, following these measurements closely ensures your dessert remains wonderfully creamy rather than rubbery.
For the Creamy Panna Cotta Base
-
Heavy Cream: Two cups (or four hundred and eighty milliliters) of high-fat heavy cream. This forms the luxurious, rich foundation of your dessert.
-
Whole Milk: One cup (or two hundred and forty milliliters) of full-fat whole milk. Mixing milk with the heavy cream prevents the dessert from feeling overly heavy on the palate.
-
Granulated Sugar: One third of a cup (or sixty-five grams) of white sugar. This provides just enough sweetness without overpowering the natural dairy notes.
-
Vanilla Extract: One teaspoon of pure vanilla extract. If you want a more visual gourmet touch, you can substitute this with the scraped seeds of a fresh vanilla bean pod.
-
Agar-Agar Powder: One and a half teaspoons (approximately four to five grams). Make sure you are using pure powder and not a blend for the best setting power.
Vibrant Raspberry Sauce
-
Raspberries: Two cups of either fresh or frozen raspberries. Frozen berries work beautifully here as they break down easily into a rich sauce.
-
Granulated Sugar: Two to three tablespoons of sugar, adjusted based on how naturally sweet or tart your berries happen to be.
-
Lemon Juice: One tablespoon of freshly squeezed lemon juice to brighten the fruit flavors and cut through the richness of the cream.
-
Water: Two tablespoons of filtered water to help kickstart the simmering process.
For the Final Presentation Garnish
-
Fresh Raspberries: A handful of whole, plump berries to sit elegantly on top of each serving.
-
Fresh Mint Leaves: A few vibrant green leaves to add color contrast and an aromatic contrast.
-
Lemon Zest: A light dusting of finely grated lemon zest for an unexpected, citrusy pop.
Step-by-Step Direction and Preparation Method: no gelatin raspberry panna cotta
Do not let the elegant appearance fool you; making a no-gelatin raspberry panna cotta is incredibly straightforward. The secret lies entirely in how you activate the setting agent. Follow these steps carefully to ensure a seamless, lump-free dessert.
+-------------------------------------------------------------+
|                      PREPARATION FLOW                       |
|                                                             |
|  1. WHISK & SIMMER     2. POUR & REFRIGERATE   3. COOK SAUCE|
|  Combine dairy, sugar  Pour into glasses and  Simmer berries|
|  & agar. Boil 2 mins   chill for two hours    and strain    |
|  to activate.          minimum until set.     completely.   |
+-------------------------------------------------------------+
Step One: Activating the Agar-Agar
Unlike animal gelatin, which can lose its setting power if boiled, agar-agar must be brought to a boil to activate its gelling properties properly.
Grab a heavy-bottomed saucepan and pour in your heavy cream, whole milk, sugar, and the agar-agar powder. Whisk the cold mixture thoroughly before turning on any heat to ensure the powder is evenly distributed and does not clump. Place the saucepan over medium heat and bring it to a gentle, rolling boil, whisking frequently so the milk does not scorch the bottom of the pan.
Once the mixture reaches a boil, lower the heat slightly to maintain a gentle simmer. Keep whisking and let it simmer for exactly two minutes. This brief cooking window is absolutely critical; if the agar-agar does not spend enough time at a boil, your panna cotta will remain a liquid soup even after hours in the fridge. After two minutes, remove the pan from the heat and stir in your vanilla extract.
Step Two: Portioning and Chilling
Because agar-agar begins to set much faster than gelatin as it cools, you need to work with a bit of purpose during this stage.
Carefully pour the hot liquid mixture into your chosen serving vessels. You can use glass ramekins, elegant wine glasses, small jars, or even silicone molds if you plan on unmolding the dessert onto plates later. Once poured, let the dishes sit completely undisturbed at room temperature for ten to fifteen minutes. You will notice a slight skin forming fairly quickly.
Once they have cooled down slightly, transfer the dishes to the refrigerator. Let them chill for a minimum of two hours. If you are using molds and plan to flip them onto a plate, giving them an extra hour or two in the fridge will ensure they hold their structural shape perfectly.
Step Three: Simmering the Raspberry Coulis
While your cream base is cooling to perfection in the refrigerator, you can turn your attention to the bright fruit topping.
In a small saucepan, combine your two cups of raspberries, sugar, fresh lemon juice, and water. Place the pan over medium heat. As the mixture heats up, use a wooden spoon or a silicone spatula to gently mash the berries against the side of the pan. Let the mixture simmer beautifully for about five to eight minutes. The berries will break down completely, releasing their natural juices and combining with the sugar to form a gorgeous, glossy sauce.
If you prefer a rustic sauce, you can use it exactly as it is. However, for a truly luxurious, restaurant-grade finish, pour the hot sauce through a fine-mesh sieve into a clean bowl. Use the back of a spoon to press all the pulp through while leaving the seeds behind. Allow this smooth sauce to cool down completely before using.
Step Four: Assembly and Presentation
Now comes the most rewarding part of the entire process: bringing all your elements together.
Take your fully set panna cotta dishes out of the refrigerator. The surface should be firm but yield gently to a soft touch. Spoon a generous layer of the cooled, silky raspberry sauce directly over the top of the white cream base.
Right before you serve, garnish the top with a few strategic fresh whole raspberries, a bright green mint leaf, and a delicate sprinkle of fresh lemon zest if you like. Serve immediately and enjoy the chorus of compliments coming your way.
Creative no gelatin raspberry panna cotta Variations
Once you have mastered the foundational technique of this no-gelatin raspberry panna cotta, you can use it as a canvas for endless flavor experimentations. Here are a few wonderful ways to shake things up based on the seasons or your personal cravings.
Tropical Coconut Mango Twist
For a completely dairy-free and tropical alternative, swap out the heavy cream and whole milk for equal parts full-fat canned coconut cream and coconut milk. Instead of a raspberry topping, simmer down fresh mango purée with a splash of lime juice. This version feels wonderfully summery and light.
Decadent Chocolate and Espresso Infusion
If you are a self-proclaimed chocoholic, you can whisk a tablespoon of high-quality cocoa powder and a pinch of espresso powder into the milk mixture before boiling. Pair this rich, chocolatey base with the standard raspberry sauce, as dark chocolate and red fruit are a match made in culinary heaven.
Herbaceous and Floral Notes
To elevate the sophistication of your dessert, try infusing the cream with dried culinary lavender or a few sprigs of fresh rosemary while simmering. Just remember to strain out the herbs before pouring the liquid into your serving glasses. You can also add a drop of rosewater to the raspberry sauce for an elegant, floral undertone.
Pro Tips for the Ultimate Clean Set: no gelatin raspberry panna cotta
Working with plant-based setting agents can sometimes feel like a science experiment, but keeping a few simple rules in mind guarantees a flawless result every time.
Texture Adjustment: Agar-agar creates a noticeably firmer, cleaner break when cut with a spoon compared to gelatin. If you prefer an ultra-creamy, softer texture that mimics traditional versions closely, simply reduce your agar-agar powder measurement down to one and a quarter teaspoons (roughly three and a half to four grams).
Powder vs. Flakes: This recipe specifically calls for agar powder. If you can only find agar-agar flakes at your local health food store, keep in mind that flakes have a lower concentration. You will generally need to use one full tablespoon of flakes for every single teaspoon of powder called for in a recipe.
The Secret to Unmolding: If you want to unmold your dessert onto a flat plate, lightly oil the inside of your ramekins with a neutral oil before pouring in the hot cream. When you are ready to serve, run a thin knife carefully around the top edge, dip the bottom of the mold into hot water for five seconds, and invert it firmly onto your serving plate.
Frequently Asked Questions: no gelatin raspberry panna cotta
Can I make no gelatin raspberry panna cotta ahead of time?
Absolutely. This dessert is a fantastic candidate for meal prep or entertaining because it stores beautifully. You can make the cream base up to two days in advance. Just keep the individual dishes covered tightly with plastic wrap in the refrigerator so they do not absorb any stray aromas from your fridge. For the freshest look and best contrast, spoon the raspberry sauce on top right before you plan to serve it to your guests.
Why did my panna cotta fail to set properly?
If your dessert is still completely liquid after hours in the fridge, the agar-agar was likely not activated correctly. Remember, agar needs to reach a full boil and simmer for around two full minutes to unlock its gelling properties. If you just warm the liquid or turn off the heat the second it bubbles, it will not set. Simply pour the mixture back into a saucepan, bring it to a proper boil for two minutes, and pour it back into your dishes.
Can I use different types of fruit for the sauce?
Yes, this recipe is incredibly adaptable. If raspberries are not in season or hard to find, you can easily replicate the exact same sauce method using blackberries, blueberries, strawberries, or a mix of all three. Acidic fruits like passion fruit or kiwi also make an incredible flavor contrast to the rich vanilla cream.
Is agar-agar healthy to use?
Agar-agar is a wonderful ingredient derived from red algae. It is naturally low in calories, completely fat-free, and high in fiber. Because it is entirely plant-based, it is an excellent option for vegan, vegetarian, and halal diets, making your cooking accessible to almost anyone sitting around your dining table.
Conclusion: no gelatin raspberry panna cotta
Creating a luxurious, restaurant-worthy dessert at home does not have to involve complicated techniques or animal-derived products. This stunning no-gelatin raspberry panna cotta proves that with a few simple ingredients and the right method, you can achieve a flawless, velvety treat that caters beautifully to everyone. By mastering the quick-boil technique required to activate your plant-based agar-agar, you unlock a reliable, foolproof formula for elegant entertaining. Whether you choose to follow this classic raspberry version to the letter or venture out into your own creative flavor variations, this recipe is bound to become a permanent favorite in your dessert rotation. Gather your ingredients, dust off your favorite serving glasses, and enjoy the effortless process of creating a truly sublime Italian masterpiece.
Print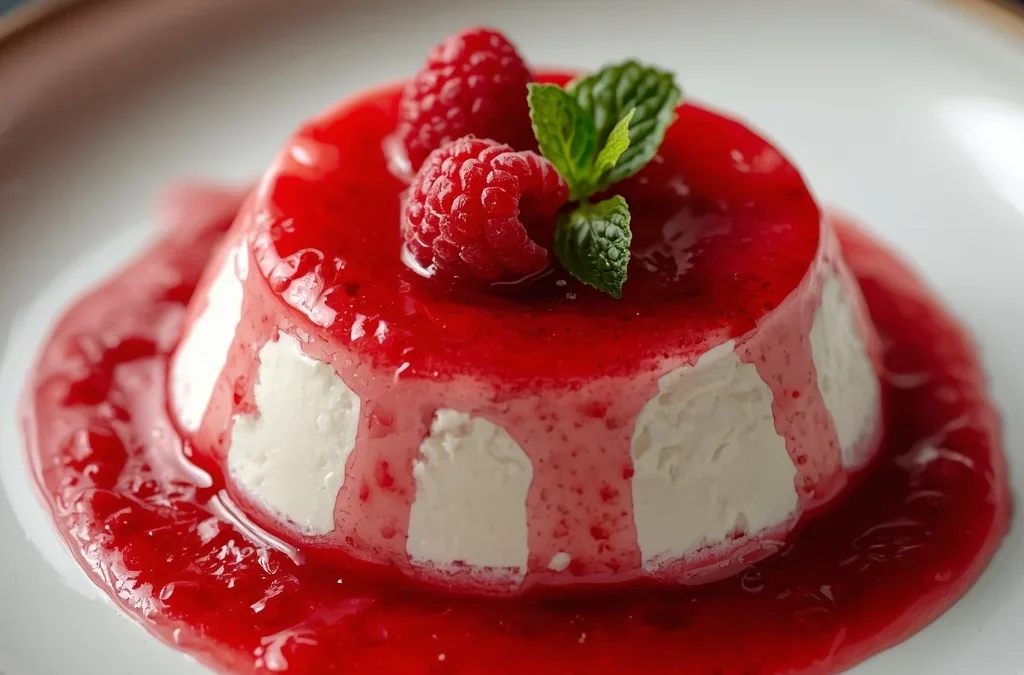
Master the Elegant No-Gelatin Raspberry Panna Cotta Using Agar-Agar
- Total Time: 30 minutes (plus 2 hours chilling)
- Yield: 6 servings 1x
- Diet: Vegetarian
Description
To truly appreciate this dessert, we first need to look at what the name actually means. In Italian, panna cotta literally translates to cooked cream. Traditionally, it is a simple mixture of dairy, sugar, and flavorings that is heated, bound together with a setting agent, and chilled in individual molds or glasses.
Ingredients
For the panna cotta:
- 2 cups (480 ml) heavy cream
- 1 cup (240 ml) whole milk
- ⅓ cup (65 g) sugar
- 1 tsp vanilla extract
- 1½ tsp agar-agar powder (about 4–5 g)
For the raspberry sauce:
- 2 cups fresh or frozen raspberries
- 2–3 tbsp sugar (adjust to taste)
- 1 tbsp lemon juice
- 2 tbsp water
For garnish (optional):
- Fresh raspberries
- Mint leaves
- Lemon zest
Instructions
1. Prepare the panna cotta
- In a saucepan, whisk together the cream, milk, sugar, and agar-agar powder.
- Bring the mixture to a gentle boil over medium heat, whisking frequently.
- Once it reaches a boil, simmer for 2 minutes, continuing to whisk. Agar must be boiled briefly to activate properly.
- Remove from heat and stir in the vanilla extract.
2. Pour and chill
- Pour the mixture into ramekins, glasses, or molds.
- Allow to cool for 10–15 minutes at room temperature.
- Refrigerate for at least 2 hours, or until fully set.
3. Make the raspberry sauce
- Combine raspberries, sugar, lemon juice, and water in a small saucepan.
- Cook over medium heat for 5–8 minutes until the berries break down.
- For a smooth sauce, strain through a fine-mesh sieve to remove seeds.
- Cool completely.
4. Serve
- Spoon the raspberry sauce over the chilled panna cotta.
- Garnish with fresh raspberries, mint, or lemon zest.
Notes
- Prep Time: 15 minutes
- Cook Time: 15 minutes
- Category: Dessert
- Method: Simmering
- Cuisine: Italian
Nutrition
- Serving Size: 1 serving (about 140–150 g)
- Calories: 285 kcal
Keywords: no-gelatin raspberry panna cotta