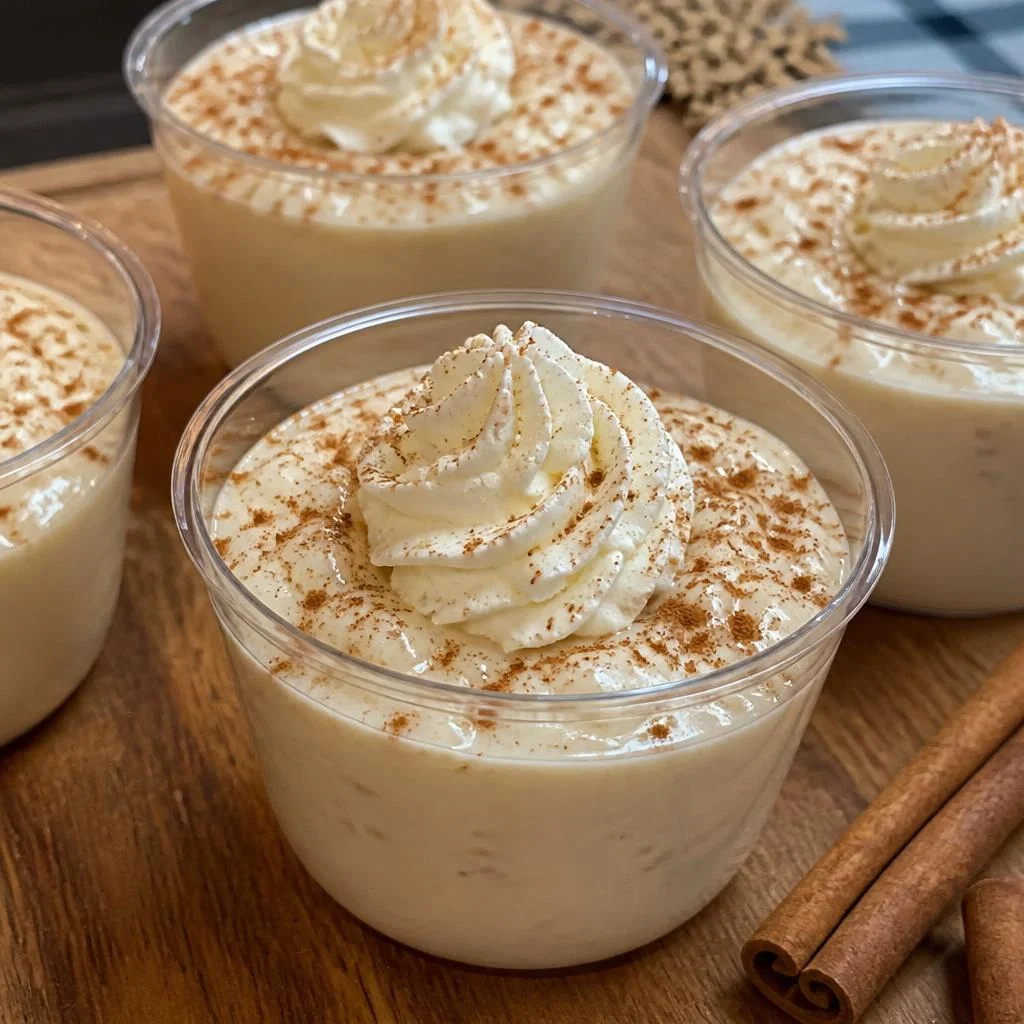
There is something deeply comforting about the warm, aromatic embrace of sweet cinnamon paired with creamy undertones. If you are looking to bring those classic, cozy notes to your dessert table, these non-alcoholic horchata pudding cups are exactly what you need. Taking direct inspiration from the legendary, refreshing Latin American beverage, this dessert transforms a beloved drink into a silky, spoonable treat that everyone at your table can enjoy. By focusing entirely on rich dairy, plant milk, and fragrant spices, we completely bypass the need for spirits while keeping the flavor profile remarkably deep and satisfying. This is a dessert designed to impress without demanding hours of your time in the kitchen.
When it comes to planning gatherings or simply treating your family on a weekday evening, finding a sweet option that feels both nostalgic and fresh can be a challenge. These non-alcoholic horchata pudding cups strike that balance flawlessly, offering a velvety texture that melts in your mouth and leaves behind the lingering warmth of high-quality cinnamon. It is a completely family-friendly option that honors classic flavors while presenting them in a modern, elegant format. Let us dive into everything you need to know to create this velvety masterpiece from scratch, checking out its cultural roots, essential components, and tips for making it perfectly every single time.

What is Horchata Pudding Cups
To truly appreciate these non-alcoholic horchata pudding cups, it helps to understand the texture and flavor goals we are aiming for. This dessert is a chilled, milk-based custard that relies on starch rather than eggs for its structure. The result is an incredibly smooth, clean mouthfeel that lets the individual flavor notes shine brightly. It captures the exact essence of a chilled glass of traditional rice milk punch, but condenses it into a luxurious pudding state that feels like a true indulgence.
Every single spoonful delivers a precise balance of sweetness, spice, and creaminess. The rice milk provides a distinct, authentic grain undertone, while the whole milk contributes a necessary body and richness. Spices like cinnamon run through the entire cup, ensuring that the warmth is not just an afterthought sprinkled on top, but a core component woven directly into the velvet base. It is a refreshing yet comforting dessert that transitions beautifully across different seasons.
Origin of Horchata Pudding Cups
The journey of the flavors inside your non-alcoholic horchata pudding cups is a fascinating historical tale that spans multiple continents and centuries. Long before it became a staple of Mexican taquerias and modern dessert menus, the concept of this refreshing beverage began across the Atlantic Ocean. The word itself traces back to the Latin term for barley, as the earliest versions in the Mediterranean world were made from water infused with grains or nuts to create a cooling, milky drink.
The Mediterranean Roots
In Valencia, Spain, the drink evolved into something called horchata de chufa, which is crafted from ground, sweetened tiger nuts. Tiger nuts are small, edible tubers that yield a incredibly rich, sweet, and nutty milk when soaked and strained. This version remains highly celebrated across Spain to this day, prized for its unique nutritional benefits and deep history. When Spanish explorers and settlers traveled to the Americas, they brought the fundamental concept of this sweetened, spiced grain beverage with them.
The Transformation in the Americas
Because tiger nuts were not readily available in the New World, the recipe adapted brilliantly to local agriculture. In Mexico and Central America, cooks shifted the base from tubers to rice. They soaked uncooked white rice with whole cinnamon sticks, grinding the mixture into a fine paste before straining it and adding sugar and vanilla. This variation became the definitive version known and loved globally today. By turning those exact liquid proportions into a structured custard, this modern recipe honors centuries of adaptation, transforming a historical beverage into a contemporary dessert.
Ingredients and Their Exact Quantities: Horchata Pudding Cups
Creating a perfect custard requires balance between liquids, sweeteners, and thickening agents. To ensure your dessert sets to the ideal consistency without becoming overly stiff or remaining too runny, you will need to gather the following elements. Please note that we are spelling out numbers completely to keep the instructions clear and approachable.
For the Velvet Pudding Base
-
Two cups of high-quality whole milk to provide a rich, creamy foundation
-
One cup of prepared rice milk to infuse that authentic, traditional grain flavor
-
One third of a cup of granulated white sugar for a clean, balanced sweetness
-
Three tablespoons of cornstarch to serve as our reliable, gluten-free thickening agent
-
One quarter of a teaspoon of fine salt to balance the sweetness and elevate the spices
-
One and one half teaspoons of ground cinnamon for that essential, warm spice profile
-
One teaspoon of pure vanilla extract to add depth and a smooth aroma
-
Half of a teaspoon of sweet almond extract, which replicates the complex undertones of classic recipes
-
Two tablespoons of sweetened condensed milk, which introduces a luxurious texture and milky depth
For the Beautiful Garnish
-
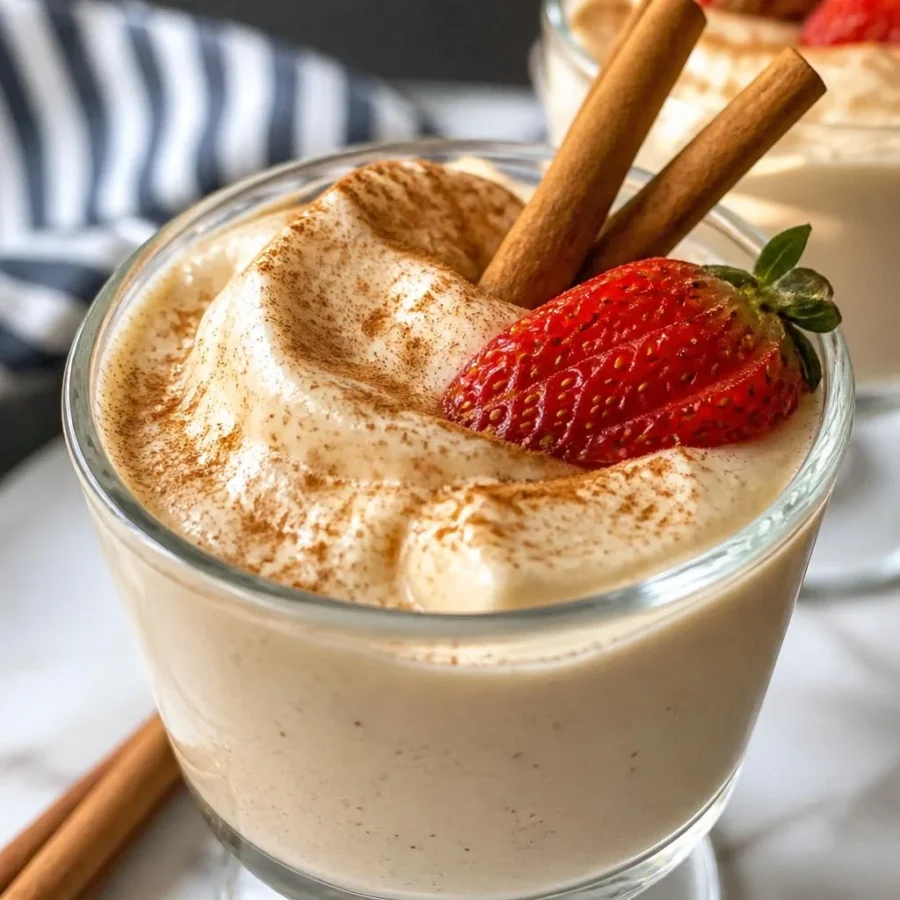
A generous dollop of freshly whipped cream for a light, airy contrast on top
-
A delicate extra dusting of ground cinnamon for visual appeal and immediate aroma
-
Whole cinnamon sticks to insert into each serving glass as an elegant decorative element
-
A small handful of toasted sliced almonds or crushed cinnamon cookies to add a crunch
Step by Step Direction and Preparation Method: Horchata Pudding Cups
Making these non-alcoholic horchata pudding cups is an remarkably straightforward process, but it does require your full attention during the cooking phase. Because starch activates quickly under heat, staying by the stove ensures a completely lump-free, velvety outcome. Follow these directions closely for the best results.
Whisking the Dry Foundation
Begin by taking a clean, medium-sized saucepan and placing it on your workstation before applying any heat. Pour in your measured granulated white sugar, cornstarch, fine salt, and ground cinnamon. Use a wire whisk to stir these dry ingredients together thoroughly. Whisking them while completely dry breaks up any small clumps of cornstarch, ensuring that when the liquids are introduced, they integrate smoothly without forming stubborn pockets of dry flour.
Introducing the Liquids
Slowly and gradually, pour your whole milk and prepared rice milk into the saucepan with the dry mixture. Keep your whisk moving constantly as you pour. This gradual introduction allows the cornstarch to absorb the liquid evenly, creating a completely smooth, opaque liquid base. Once all the milk is integrated and no dry patches remain at the bottom corners of your saucepan, you are ready to move to the stovetop.
Cooking and Thickening the Custard
Place the saucepan over medium heat on your stove. It is absolutely vital that you whisk the mixture constantly during this phase. As the milk heats up, the starch granules will begin to swell and absorb the liquid. If left untended, the starch will settle to the hot bottom of the pan and scorch or form gelatinous lumps.
Continue whisking steadily for about six to eight minutes. You will notice the liquid transitioning from a thin consistency to a thick, glossy cream. Once the mixture begins to bubble gently at the surface, reduce your heat down to low. Keep whisking and let it cook for exactly one more minute to fully cook out the raw starch flavor and ensure a stable set.
Infusing the Final Aromatics
Remove the saucepan completely from the hot burner and place it onto a heat-safe surface. Now is the time to add your delicate flavor extracts and richness builders. Pour in the pure vanilla extract, the sweet almond extract, and the sweetened condensed milk. Whisk vigorously until these final components are completely incorporated into the warm custard. The residual heat will instantly unlock the fragrance of the vanilla and almond, filling your kitchen with an incredible aroma.
Portions and Chilling Protocol
Carefully divide the hot mixture evenly among six individual serving glasses, ramekins, or dessert cups. To prevent a tough, chewy skin from forming on the surface of your desserts as they cool, take pieces of plastic wrap and press them directly onto the warm surface of the pudding inside each cup. Once covered, transfer the cups into your refrigerator. Allow them to chill undisturbed for at least three full hours, or until they are completely cold and firmly set.
Creative Variations to Suit Every Dietary Need
One of the best features of this particular dessert is how easily it adapts to different lifestyle preferences and ingredient availabilities. Because the flavor profile relies so heavily on spices and extracts, you can alter the liquid base without losing that signature profile.
Making a Completely Dairy-Free Version
If you or your guests prefer to avoid dairy, you can easily transform this into a plant-based treat. Replace the two cups of whole milk with an equal amount of unsweetened creamy oat milk or unsweetened almond milk. Combine this with your rice milk as directed. To replace the richness of the sweetened condensed milk, you can either omit it entirely or use an equal amount of sweetened condensed coconut milk, which adds a lovely, tropical complexity to the final product.
Boosting the Spice Intensity
For those who absolutely adore a powerful punch of spice, you can implement a steeping technique before you begin the main cooking process. Pour your whole milk and rice milk into a pan with one or two whole Mexican cinnamon sticks. Heat the milk gently until it is warm, then turn off the flame and let it sit covered for about twenty minutes to draw out the deep oils from the bark. Remove and discard the whole sticks, let the milk cool down slightly, and then proceed with the recipe as written, using this heavily infused spice milk.
Frequently Asked Questions: Horchata Pudding Cups
Can I make Horchata Pudding Cups several days before an event?
Yes, this is an excellent choice for advanced meal preparation. You can prepare these sweet cups up to three full days before you plan to serve them. Simply keep them covered with plastic wrap in the refrigerator to maintain freshness. Wait to add the whipped cream and crunchy garnishes until just before serving so they maintain their ideal textures.
Why did my pudding turn out watery instead of thick?
This usually happens if the mixture was not brought to a sufficient simmer during the cooking process. Cornstarch requires heat to reach its full thickening potential. If you do not let it cook until it begins to bubble gently, the starch bonds will not lock properly. Another rare cause could be over-whisking the mixture too aggressively after it has cooled, which can break the starch chains.
What can I use if I cannot find prepared rice milk?
If rice milk is unavailable at your local grocery store, you can simply substitute an additional cup of whole milk or use a non-dairy alternative like light almond milk. To keep that authentic grain flavor intact, you can also quickly make your own rice water by soaking a handful of raw white rice in warm water for an hour, blending it thoroughly, and straining the liquid through a fine cloth.
Is the almond extract absolutely mandatory for this recipe?
The almond extract is completely optional, but it is highly recommended if you want to capture that authentic, complex flavor found in premium street-style beverages. It adds a subtle, nutty depth that complements the woodiness of the cinnamon beautifully. However, if there are nut allergies in your home, you can leave it out entirely and simply increase the vanilla extract slightly.
Conclusion: Horchata Pudding Cups
Bringing a memorable meal to a close requires a dessert that feels satisfying without being overwhelmingly heavy. These non-alcoholic horchata pudding cups deliver exactly that, offering a beautiful blend of historic spice and modern simplicity. By combining traditional rice milk undertones with a silky custard texture, this recipe creates a universally appealing treat that respects dietary inclusivity while maximizing flavor impact. Whether you stick strictly to the classic dairy blueprint or venture into plant-based alterations, the warmth of the cinnamon and the sweetness of the vanilla ensure a comforting experience in every single spoonful. Gather your ingredients, take your time whisking at the stove, and enjoy the effortless elegance of this refreshing, chilled creation.
Print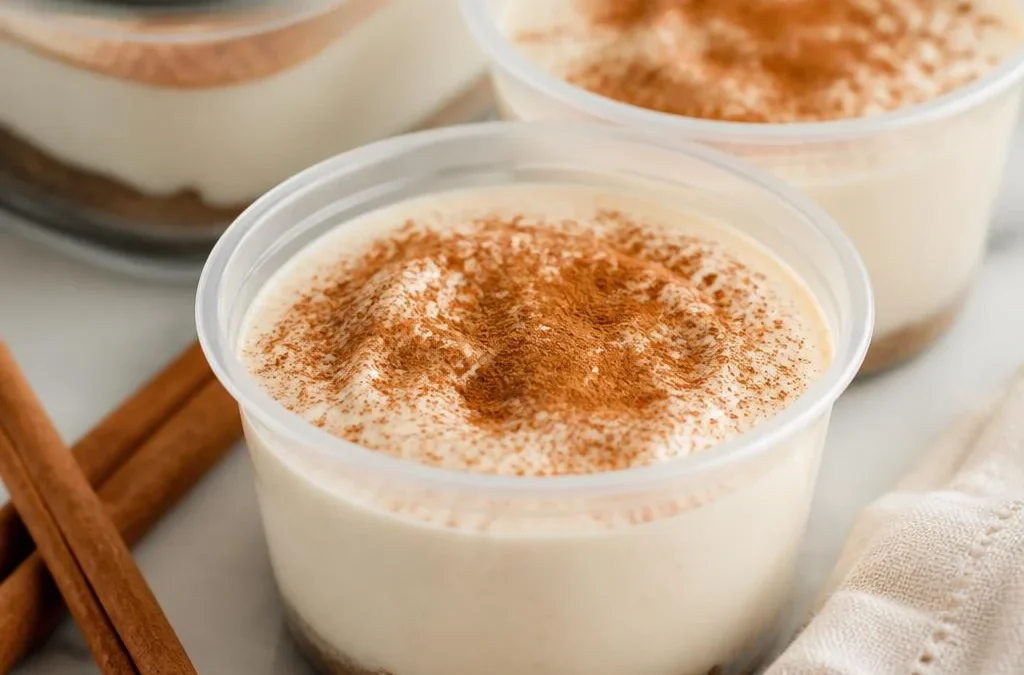
Non-Alcoholic Horchata Pudding Cups Recipe
- Total Time: 3 hours 20 minutes (including chilling)
- Yield: 6 servings 1x
- Diet: Vegetarian
Description
To truly appreciate these non-alcoholic horchata pudding cups, it helps to understand the texture and flavor goals we are aiming for. This dessert is a chilled, milk-based custard that relies on starch rather than eggs for its structure. The result is an incredibly smooth, clean mouthfeel that lets the individual flavor notes shine brightly. It captures the exact essence of a chilled glass of traditional rice milk punch, but condenses it into a luxurious pudding state that feels like a true indulgence.
Ingredients
For the pudding:
- 2 cups whole milk
- 1 cup prepared rice milk (or additional whole milk)
- ⅓ cup granulated sugar
- 3 tbsp cornstarch
- ¼ tsp salt
- 1½ tsp ground cinnamon
- 1 tsp vanilla extract
- ½ tsp almond extract (optional, but adds classic horchata flavor)
- 2 tbsp sweetened condensed milk (optional, for extra richness)
For garnish:
- Whipped cream
- Ground cinnamon
- Cinnamon sticks (optional)
- Toasted sliced almonds or crushed cinnamon cookies (optional)
Instructions
- In a medium saucepan, whisk together the sugar, cornstarch, salt, and cinnamon.
- Gradually whisk in the whole milk and rice milk until smooth.
- Cook over medium heat, whisking constantly, until the mixture thickens and begins to bubble (about 6–8 minutes).
- Reduce the heat and cook for 1 more minute.
- Remove from the heat and stir in the vanilla, almond extract (if using), and sweetened condensed milk.
- Divide the pudding evenly among 6 serving cups.
- Press plastic wrap directly onto the surface of each pudding to prevent a skin from forming.
- Refrigerate for at least 3 hours, or until fully chilled.
Notes
- Prep Time: 10 minutes
- Cook Time: 10 minutes
- Category: Dessert
- Method: Stovetop
- Cuisine: Mexican-Inspired
Nutrition
- Serving Size: 1 pudding cup
- Calories: 220 kcal