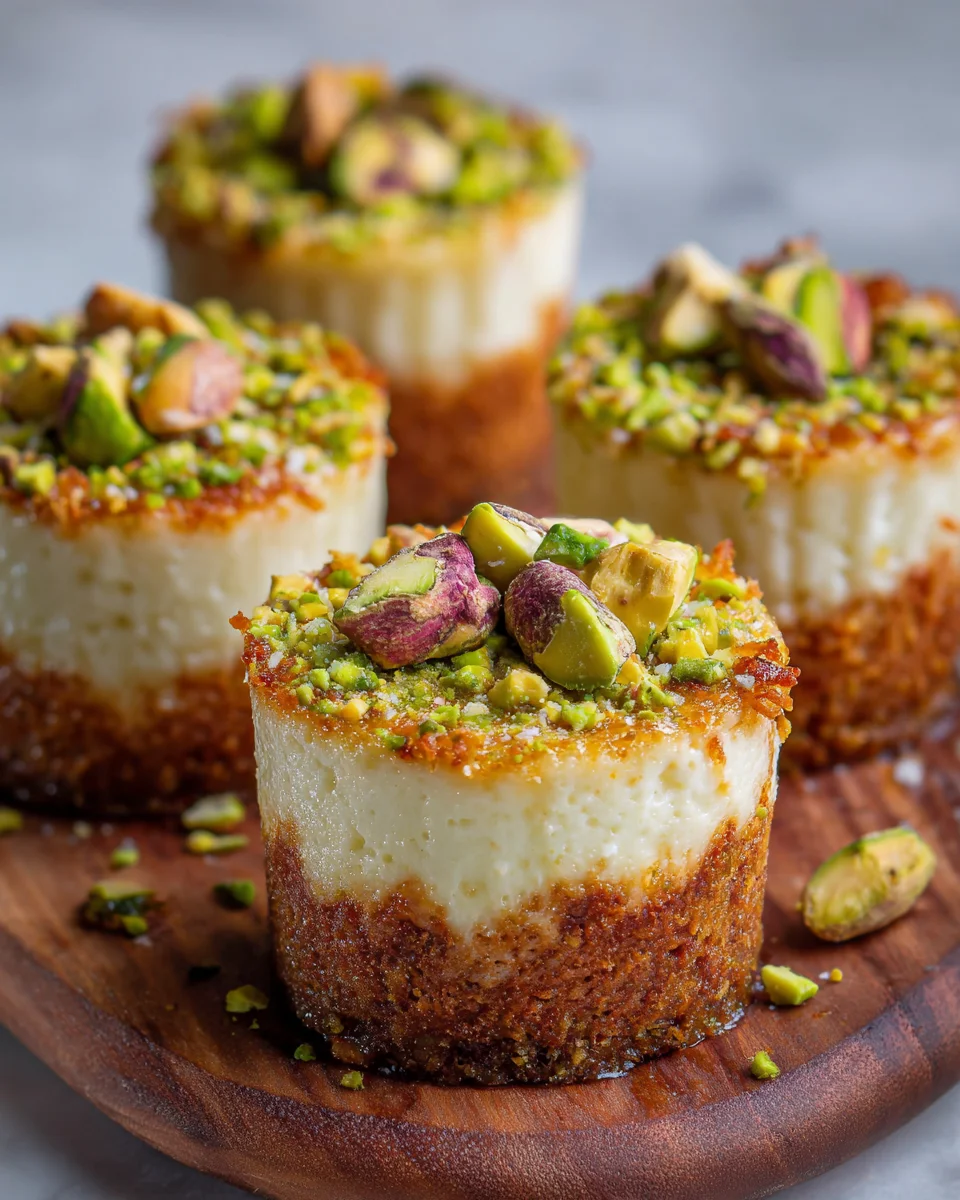
If you are looking for a show-stopping dessert that effortlessly bridges the gap between classic Western baking and traditional Middle Eastern pastry art, you have come to the right place. There is a magnificent global trend sweeping through the culinary world right now that marries intensely rich dairy bases with the undeniable crunch of toasted pastry strands. Today, we are mastering an absolute crown jewel of this fusion movement: Pistachio Kunafa Cheesecake Cups. This beautiful dessert takes the irresistible texture of golden, buttery kataifi pastry and pairs it with an incredibly velvety, nut-infused cream cheese layer. It is a brilliant option for an elegant dinner party, a celebratory holiday gathering, or simply a weekend treat when you want to pamper your senses. Let us dive deep into the story, the science, and the step-by-step methods that will allow you to recreate this gourmet pastry-shop experience perfectly inside your own kitchen.
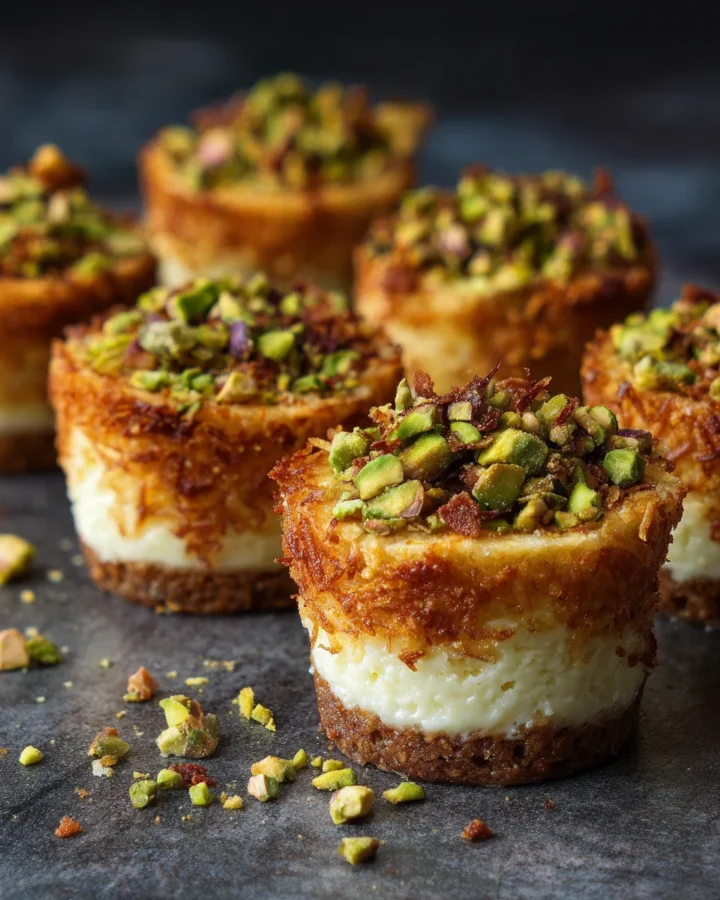
What is a Pistachio Kunafa Cheesecake Cup?
To put it quite simply, this dessert is a sophisticated individual-portion treat that layer three distinct textures and flavors into a single, cohesive bite. The foundation of the dish relies on shredded kunafa pastry, also known in many Mediterranean households as kataifi. This pastry consists of paper-thin strands of dough that, when tossed in rich melted butter and toasted over a steady heat, transform into an incredibly light and crisp element that shatters beautifully when you press a spoon into it.
The middle layer introduces a modern twist by utilizing a classic, ultra-smooth cream cheese filling. Instead of leaving the cheesecake base plain, it is infused with premium pistachio spread, giving it a beautiful pastel green hue and a deeply roasted, nutty undertone. This cream cheese layer is lightened up significantly by folding in freshly whipped heavy cream, which prevents the dessert from feeling overly heavy or dense on the palate. Finally, the top is adorned with a contrasting mixture of chopped nuts, a smooth drizzle of extra cream spread, and leftover crispy pastry shards, making every single cup look like a miniature work of art.
Origin of This Unique Recipe
To understand where this dessert comes from, we have to look at the incredible history of Middle Eastern sweets and how they interact with global dessert trends. Traditional kunafa is a legendary pastry that dates back centuries, with deep historical roots tied firmly to cities like Nablus in Palestine, as well as regions spanning across Egypt, Syria, and Turkey. In its most traditional form, the dessert features layers of shredded kataifi pastry soaked in a sweet, aromatic sugar syrup infused with orange blossom or rose water, sandwiching a melted layer of local, stretchy white cheese such as Nabulsi or Akkawi. It is typically served warm, straight from massive round metal trays, and garnished with a vibrant dusting of bright green nuts.
On the other side of this culinary marriage, you have the classic cold cream cheese cake, which achieved massive commercial popularity across North America and Europe throughout the twentieth century. In recent years, creative pastry chefs across major food capitals like Dubai, London, and New York began experimenting with ways to incorporate the unparalleled textural contrast of Middle Eastern pastries into modern, cold desserts. The result is this current masterpiece, a brilliant fusion that honors the ancient flavor pairings of nuts and pastry while utilizing the silky, tangy luxury of a modern cream cheese filling.
The Irresistible Texture of Pistachio Kunafa Cheesecake Cups
When you serve this dessert, the very first thing your guests will notice is the striking visual contrast within the glass, but the true magic happens during the tasting. Food scientists often speak about the concept of dynamic contrast, which refers to the pleasurable sensation our brains experience when we eat foods that combine vastly different textures simultaneously.
This recipe achieves that balance flawlessly. The crispy, buttery strands of pastry provide a loud, satisfying crunch that prevents the velvety cream cheese from feeling monotonous. At the same time, the natural oils inside the nut spread bring an earthy depth that cuts right through the sweet, tangy notes of the dairy, ensuring that the dessert tastes mature and balanced rather than cloying.
Ingredients and Exact Quantities
Before you begin assembling your dessert station, it is highly recommended to measure out all of your components. Having everything ready to go ensures that your layers remain distinct and that the assembly process flows quickly and cleanly.
For the Crispy Pastry Foundation
-
Two full cups of premium shredded kunafa pastry, finely chopped into small pieces
-
Three tablespoons of high-quality unsalted butter, melted and allowed to cool slightly
-
Two tablespoons of fine granulated white sugar
Silky Nut-Infused Cream Filling
-
Eight ounces of full-fat cream cheese, completely softened to room temperature
-
One-half cup of heavy whipping cream, kept thoroughly chilled until the moment of use
-
One-third cup of powdered sugar, sifted to remove any stubborn lumps
-
One teaspoon of pure vanilla extract
-
One-quarter cup of premium smooth pistachio spread or gourmet nut cream
For the Elegant Finishing Touches
-
One-quarter cup of whole shelled pistachios, finely chopped by hand
-
Two tablespoons of smooth pistachio spread, warmed slightly for easy drizzling
-
A handful of your reserved toasted pastry crumbs for a final garnish
Step by Step Direction and Preparation Method: Pistachio Kunafa Cheesecake Cups
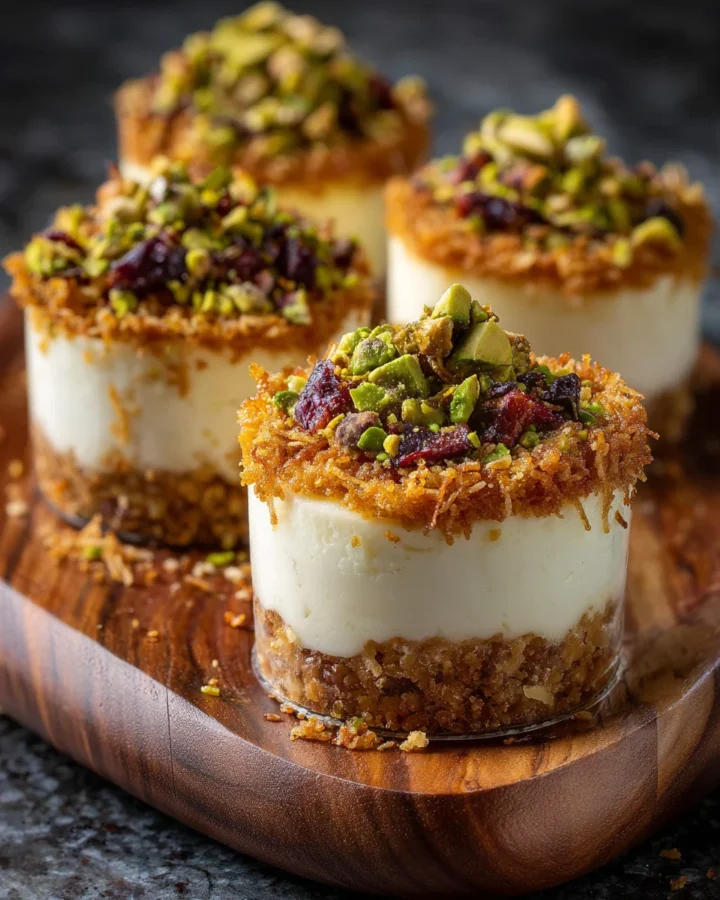
Achieving the perfect balance of a crunchy base and an airy filling requires a small amount of finesse. Follow these detailed production steps to ensure your individual dessert cups turn out flawless.
Step One: Toasting the Shredded Pastry
The journey to a magnificent dessert begins with your pastry strands. Take your two cups of shredded kunafa pastry and use a sharp chef’s knife to chop the long strands into small, manageable pieces roughly one-half inch in length. Place a large, heavy-bottomed skillet over medium heat and add the three tablespoons of melted butter. Once the skillet is warm, drop the chopped pastry directly into the butter.
Sprinkle the two tablespoons of granulated sugar evenly over the top. Using a heatproof spatula, toss the pastry continuously to ensure every single strand is lightly coated in the butter and sugar. Cook the mixture for approximately five to eight minutes, stirring constantly without stopping. You must watch the pan closely, as the delicate pastry can turn from golden to burned in a matter of seconds. Once the strands have achieved a beautiful, deep golden-brown color and feel completely crisp, immediately transfer them out of the hot pan and onto a cool, parchment-lined baking sheet. Spread them out into a flat layer and allow them to cool down completely to room temperature. This cooling step is absolutely vital, as adding warm pastry to your dairy filling will cause the cream to melt and become runny.
Step Two: Beating the Cream Cheese Base
While your toasted pastry is cooling down completely on the counter, you can turn your attention to the luscious core of the dessert. In a large mixing bowl, or the bowl of a stand mixer fitted with the paddle attachment, place your eight ounces of softened cream cheese. It is incredibly important that the cream cheese is truly at room temperature, otherwise, you will end up with small, stubborn lumps that ruin the velvety texture.
Add the one-third cup of sifted powdered sugar, the teaspoon of pure vanilla extract, and the one-quarter cup of premium smooth pistachio spread. Turn your mixer on to medium speed and beat the ingredients together for about three to four minutes. Stop the machine occasionally to scrape down the sides and the bottom of the bowl with a flexible spatula. Continue beating until the mixture is completely uniform, glossy, and boasts a gorgeous, smooth pastel green appearance.
Step Three: Whipping and Folding the Dairy
To give this no-bake filling its signature cloud-like lift, you need to introduce structured air. In a separate, thoroughly chilled glass or metal bowl, pour your one-half cup of cold heavy whipping cream. Using clean beaters, whip the heavy cream on high speed until it forms soft to medium peaks that hold their shape when the beaters are lifted.
Once your cream is perfectly whipped, take a large spoonful of it and drop it directly into your green cream cheese base. Use a rubber spatula to stir it in firmly; this initial addition lightens up the dense cream cheese, making it easier to incorporate the rest. Next, add the remaining whipped cream to the bowl. This time, switch to a gentle folding motion, moving your spatula down through the center, across the bottom of the bowl, and up over the top in a circular path. Fold gently until no white streaks remain, taking great care not to deflate the precious air bubbles you just whipped into the heavy cream.
Step Four: Layering the Individual Cups
Gather your preferred serving vessels, such as elegant glass tumblers, small mason jars, or clear crystal dessert bowls. Take a generous tablespoon of your cooled, crispy pastry and drop it into the bottom of each cup, pressing down very lightly with the back of a small spoon to create a solid, level foundation.
Next, spoon or pipe your green cream filling directly over the pastry layer. For the cleanest presentation, you can transfer your filling into a plastic pastry piping bag with the tip snipped off, allowing you to neatly guide the cream into the cups without smudging the glass sides. If you prefer a multi-layered look, you can repeat this sequence a second time, adding another layer of crispy pastry followed by a second layer of the smooth cream. Leave about one-half inch of space at the very top of each glass for your beautiful decorations.
Step Five: Garnishing and Chilling
To finish your creation, take your remaining two tablespoons of pistachio spread and warm it in a microwave-safe dish for a few brief seconds until it reaches a fluid, pourable consistency. Use a small spoon to create an elegant drizzle pattern over the top surface of each dessert cup.
Sprinkle a generous portion of your one-quarter cup of finely chopped nuts around the edges to create a vibrant green border. Finally, scatter a tiny pinch of your remaining crispy pastry crumbs right in the center for an extra pop of texture. Once decorated, place all of your serving cups onto a tray and transfer them to the refrigerator. Let them chill undisturbed for at least one full hour before you plan to serve them. This chilling window allows the cream cheese to firm up to the perfect scoopable consistency while letting the nutty flavors mature and deepen.
Exciting Variations to Try: Pistachio Kunafa Cheesecake Cups
The beauty of a modern fusion dessert is that it acts as a wonderful canvas for your personal culinary creativity. You can easily alter small components of this recipe to suit different occasions or flavor preferences.
The Aromatic Rose Water Infusion
If you want to lean much closer to the traditional, authentic flavor profiles found in ancient Middle Eastern pastry shops, you can easily introduce floral notes to the dairy layer. When you are beating your cream cheese base, add one-half teaspoon of high-quality food-grade rose water or orange blossom water alongside your vanilla extract. The delicate floral aroma cuts through the richness of the dairy beautifully, providing an incredibly authentic sensory experience that mirrors the traditional syrup-soaked pastries of the Levant.
The Decadent White Chocolate Contrast
For those who love an extra touch of creamy sweetness, white chocolate makes a phenomenal partner for both pistachios and cream cheese. Melt two ounces of premium white chocolate and let it cool slightly, then fold it into your cream cheese mixture right before you incorporate the whipped cream. Because white chocolate contains cocoa butter, it will also help the dessert cups set up a bit firmer in the refrigerator, creating an exceptionally luxurious, mousse-like mouthfeel that feels incredibly decadent.
Frequently Asked Questions: Pistachio Kunafa Cheesecake Cups
Can I use regular phyllo dough if I cannot find kunafa pastry?
While traditional kunafa pastry, or kataifi, is highly recommended because it consists of distinct, thin shredded strands that create a very specific nest-like texture, you can use regular phyllo dough sheets in a pinch. If you must substitute, take several sheets of thawed phyllo pastry, stack them together, and use a sharp knife to slice them into incredibly thin, hair-like ribbons. From there, you can proceed with chopping them and toasting them in the butter and sugar as described in the primary instructions.
How long will these dessert cups keep fresh in the refrigerator?
When stored properly, these dessert cups will remain perfectly safe and delicious in the refrigerator for up to three days. However, it is worth noting that as the dessert sits, the moisture from the cream cheese filling will slowly begin to migrate into the crispy pastry layers. For the absolute best sensory experience where the pastry feels completely crunchy and shatters against your spoon, it is ideal to enjoy the cups within twelve to twenty-four hours of assembly.
Is it possible to make this recipe completely dairy-free?
You can certainly create a plant-based version of this dessert by utilizing modern dairy alternatives. Swap out the traditional butter for a high-quality vegan block butter to toast your pastry strands. For the filling, look for a firm, oil-based vegan cream cheese alternative and pair it with a plant-based whipping cream substitute, such as a coconut-based cream or an oat-based heavy whipping fluid. Ensure your nut spread does not contain any added milk solids, and you will achieve a spectacular dairy-free treat.
My pastry went soggy after a few hours, what caused this?
The most common cause of premature sogginess is assembling the cups while the toasted pastry is still slightly warm from the skillet. If the pastry retains any residual heat when it touches the cool cream filling, it creates a tiny amount of steam trapped inside the glass, which instantly softens the crisp strands. Always ensure your toasted strands are completely cold to the touch before you begin the layering process.
Can I freeze Pistachio Kunafa Cheesecake Cups for longer storage?
It is not recommended to freeze these assembled cups. While the cream cheese filling itself would freeze relatively well, the freezing and thawing process introduces a significant amount of moisture into the cup. When the dessert thaws, that moisture will completely ruin the texture of your toasted pastry layer, turning your beautifully crisp foundation into a soft, soggy layer. It is much better to make them fresh and enjoy them cold from the fridge.
Conclusion: Pistachio Kunafa Cheesecake Cups
Combining the ancient, time-tested crunch of Middle Eastern pastry with the smooth, comforting luxury of a cold cream cheese base yields a dessert that is truly greater than the sum of its parts. These wonderful treats demonstrate that you do not need to spend hours hovering over a hot oven to create a dessert that looks and tastes like it came straight from a gourmet patisserie showcase. By taking care to toast your pastry strands to a perfect amber hue, softening your dairy completely for a lump-free base, and folding your whipped cream with a gentle hand, you can confidently deliver a world-class dessert experience. Enjoy sharing these cups with your favorite people, and savor the magnificent contrast of cream and crunch in every single spoonful.
Print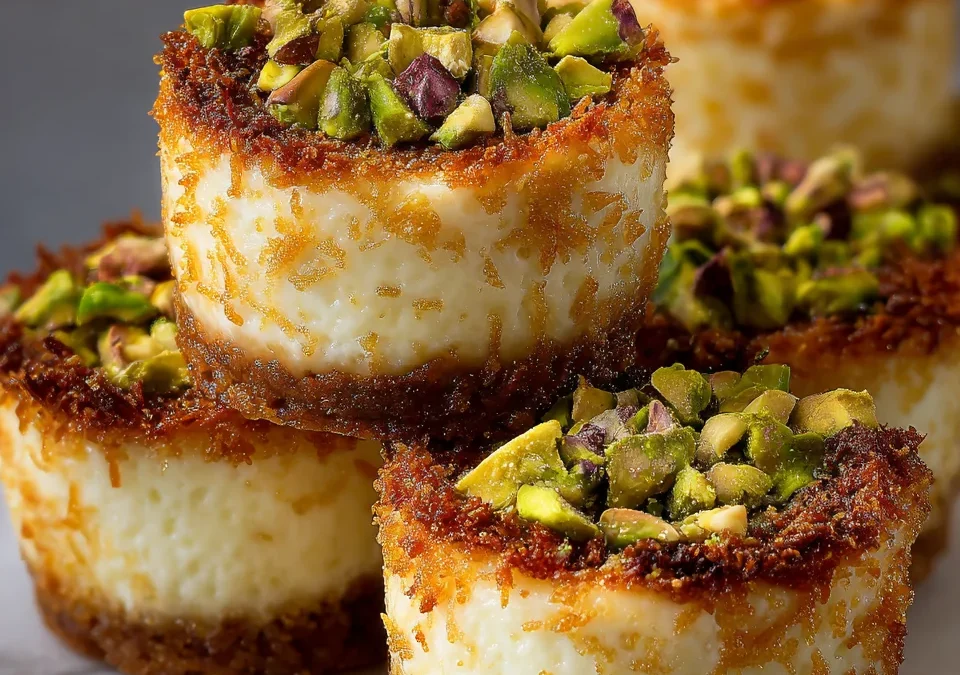
Pistachio Kunafa Cheesecake Cups
- Total Time: 35 minutes
- Yield: 6 dessert cups 1x
- Diet: Vegetarian
Description
To put it quite simply, this dessert is a sophisticated individual-portion treat that layer three distinct textures and flavors into a single, cohesive bite. The foundation of the dish relies on shredded kunafa pastry, also known in many Mediterranean households as kataifi. This pastry consists of paper-thin strands of dough that, when tossed in rich melted butter and toasted over a steady heat, transform into an incredibly light and crisp element that shatters beautifully when you press a spoon into it.
Ingredients
Kunafa Layer
- 2 cups shredded kunafa (kataifi pastry), chopped
- 3 tbsp butter, melted
- 2 tbsp sugar
Cheesecake Filling
- 8 oz cream cheese, softened
- 1/2 cup heavy cream
- 1/3 cup powdered sugar
- 1 tsp vanilla extract
- 1/4 cup pistachio spread or pistachio cream
Pistachio Topping
- 1/4 cup chopped pistachios
- 2 tbsp pistachio cream
- Crushed kunafa for garnish
Instructions
In a pan over medium heat, toast the kunafa with melted butter and sugar until golden and crisp. Let cool completely.
Beat cream cheese, powdered sugar, vanilla, and pistachio cream until smooth.
In a separate bowl, whip the heavy cream until soft peaks form, then fold it into the cream cheese mixture.
Add a layer of toasted kunafa into serving cups.
Pipe or spoon cheesecake filling on top. Repeat layers if desired.
Top with chopped pistachios, extra pistachio cream, and crispy kunafa crumbs.
Refrigerate for at least 1 hour before serving for the best texture and flavor.
Notes
- Prep Time: 25 minutes
- Cook Time: 10 minutes
- Category: Dessert
- Method: Layering
- Cuisine: Middle Eastern Fusion
Nutrition
- Serving Size: 1 cup
- Calories: 390 kcal
Keywords: No Bake Kunafa Cheesecake, Pistachio Kataifi Dessert Cups, Middle Eastern Fusion Cheesecake
