
If you are looking for a dessert that captures the imagination and satisfies a sweet tooth, look no further than these delightful Shark Sorbet Cookies. There is something inherently joyful about themed baking, especially when it involves the king of the ocean. This recipe is not just a treat for the palate; it is a creative project that brings a splash of the sea right into your kitchen. Whether you are hosting a summer pool party, a child’s birthday celebration, or simply want to surprise your family with something unique, these cookies offer a refreshing twist on the classic ice cream sandwich.
In this guide, we will explore everything you need to know to master this playful dessert. We will delve into what exactly these cookies are, where the inspiration comes from, and the specific steps required to ensure your sharks look as good as they taste. Baking should always feel like an adventure, and with this Shark Sorbet Cookies recipe, you are definitely steering into exciting waters. Get ready to dive into a world of buttery dough, zesty fruit fillings, and charming decorations that will make these the star of any dessert table.
What is the Shark Sorbet Cookies Recipe?
At its heart, this Shark Sorbet Cookies recipe is a creative fusion of a soft, sugar-based cookie and a cold, refreshing fruit sorbet. Think of it as a sophisticated, ocean-themed version of a sandwich cookie. Unlike traditional ice cream sandwiches that use heavy dairy, the use of sorbet keeps things light and tangy. This makes it a perfect choice for warm weather when you want something cooling but still substantial enough to feel like a real treat.
The “shark” element comes into play through both the physical shape of the cookie and the artistic decorations applied at the end. By using blue-tinted glazes and clever icing techniques to create sharp teeth and watchful eyes, you transform a simple baked good into a character. It is a multi-textured experience, offering the snap of a well-baked cookie followed by the smooth, icy melt of the sorbet.
The Origin of This Shark Sorbet Cookies recipe
The inspiration for this specific dessert stems from the growing popularity of “character food” and themed snacks that dominate social media and modern bakeries. Sharks have long been a favorite subject in pop culture, symbolizing both power and a sense of mystery. By turning this formidable predator into a cute, edible treat, bakers have found a way to make the ocean theme accessible and fun for all ages.
The concept of the sandwich cookie itself dates back many decades, but the substitution of sorbet for cream or ice cream is a more modern evolution aimed at lighter refreshment. By combining the aesthetic of “Shark” characters—often seen in animated films and maritime lore—with the cooling properties of sorbet, this recipe has become a go-to for anyone wanting to celebrate sea life in a delicious way. It represents a shift in baking where the visual storytelling is just as important as the flavor profile.
Necessary Ingredients and Specific Quantities
To ensure your Shark Sorbet Cookies turn out perfectly, you need to gather high-quality ingredients. Measuring everything accurately is the first step toward baking success. Please note that for the best results, all refrigerated items like butter and eggs should be at room temperature before you begin the process.
For the Cookie Base
-
Two cups of all-purpose flour: This provides the structure for your cookies, ensuring they are sturdy enough to hold the filling.
-
One half cup of softened butter: Using real butter is essential for that rich, melt-in-your-mouth texture.
-
Three quarters cup of white sugar: This adds the necessary sweetness and helps the cookies brown slightly.
-
One large egg: The egg acts as a binding agent, holding the dough together during the rolling and cutting process.
-
One teaspoon of vanilla extract: This adds a classic aromatic depth that complements the fruity sorbet.
-
One half teaspoon of baking powder: A small amount of lift ensures the cookies are not too dense.
-
A small pinch of salt: Salt is vital in baking to balance the sugar and enhance the overall flavor.
Refreshing Filling
-
One cup of fruit sorbet: Blue raspberry is a fantastic choice for the ocean theme, but lemon or lime also provides a wonderful citrusy contrast.
For the Creative Decorations
-
Blue icing or glaze: This will serve as the primary color for the shark’s body.
-
White icing: Essential for piping those iconic, sharp shark teeth.
-
Chocolate chips or edible eyes: These will bring your shark characters to life.
Step by Step Direction and Preparation Method: Shark Sorbet Cookies recipe

Follow these instructions carefully to create a batch of cookies that are as impressive to look at as they are to eat. The process is broken down into manageable phases to help you stay organized in the kitchen.
Phase One: Creating the Cookie Dough
Start by taking a large mixing bowl and adding your softened butter and sugar. Cream these together using a hand mixer or a sturdy spoon until the mixture is light, pale, and fluffy. Once you have achieved that consistency, crack in the egg and pour in the vanilla extract. Continue to mix until everything is fully incorporated.
In a separate medium bowl, whisk together the all-purpose flour, baking powder, and the pinch of salt. It is important to mix the dry ingredients first to ensure the leavening agent is evenly distributed. Slowly add the dry mixture to the wet ingredients, mixing at a low speed. You want to stop as soon as a cohesive dough forms. Over-mixing at this stage can lead to tough cookies, so be gentle.
Phase Two: Shaping and Baking
Lightly flour a clean surface and roll out your dough to a thickness of about one quarter of an inch. If you have a shark-shaped cookie cutter, now is the time to use it. If not, do not worry; you can use a simple circular cutter or even the rim of a glass to create round cookies that you can later decorate with shark features.
Preheat your oven to one hundred and eighty degrees Celsius. Place your shapes onto a baking sheet lined with parchment paper, leaving about an inch of space between them. Bake for ten to twelve minutes. Keep a close eye on the oven; you want the edges to be just barely golden. Once finished, remove them from the oven and allow them to cool completely on a wire rack. Putting sorbet on a warm cookie will result in a messy disaster, so patience is key here.
Phase Three: Adding the Sorbet Filling
Once the cookies are cold to the touch, take your fruit sorbet out of the freezer. It should be soft enough to scoop but still firm. Place a small, rounded scoop of sorbet onto the flat side of one cookie. Quickly take a second cookie and press it gently on top to create a sandwich. Because sorbet melts much faster than traditional frosting, you should work with only one or two sandwiches at a time.
Phase Four: Final Decorations
This is the part where your Shark Sorbet Cookies really take shape. Spread a thin layer of blue icing over the top cookie. While the icing is still slightly tacky, use a small piping bag filled with white icing to draw small triangles along the “mouth” area to represent teeth. Place two chocolate chips or edible eyes near the top to finish the face. Once decorated, immediately place the cookies back into the freezer to set.
Creative Variations of the Shark Theme
The beauty of this Shark Sorbet Cookies recipe is how easily it can be adapted to suit different preferences or available ingredients. If you want to change things up, consider these fun variations:
The Great White Version
Instead of using blue icing, you can leave the cookies their natural golden color or use a light grey glaze to mimic the look of a Great White shark. Pair this with a bright red strawberry sorbet filling for a “chum” effect that kids find hilarious and exciting.
Tropical Shark Bites
For a more tropical flavor profile, use coconut-flavored cookies and fill them with mango or pineapple sorbet. You can add a sprinkle of shredded coconut to the blue icing to represent sea foam. This version is particularly popular at adult gatherings where a more nuanced fruit flavor is appreciated.
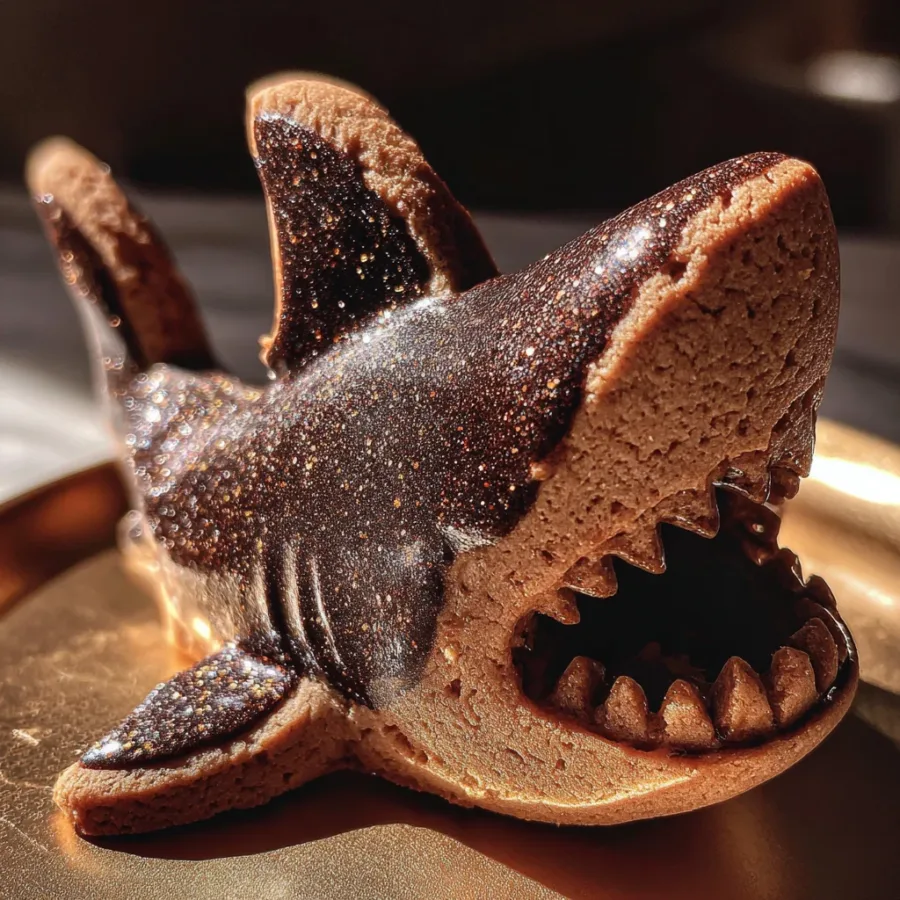
Deep Sea Chocolate Sharks
If you are a chocolate lover, you can add two tablespoons of cocoa powder to the cookie dough. This creates a dark “deep sea” background. Use a white chocolate drizzle for the decorations to make the shark features pop against the dark cookie base.
Frequently Asked Questions: Shark Sorbet Cookies recipe
How long do Shark Sorbet Cookies stay fresh?
Because these contain sorbet, they must be stored in the freezer. When kept in an airtight container, they will stay fresh and delicious for up to one week. However, for the best texture, it is recommended to eat them within forty-eight hours of assembly.
Can I use store-bought cookie dough?
Yes, if you are short on time, a store-bought sugar cookie dough will work. Just ensure you bake them until they are firm enough to handle the weight of the sorbet. Homemade dough usually provides a better structural integrity for sandwiching.
My sorbet is melting too fast, what should I do?
The trick is to chill your cookies in the freezer for thirty minutes before you even add the sorbet. Working with cold cookies helps slow down the melting process. Also, try to assemble the sandwiches in small batches, returning each one to the freezer immediately after it is put together.
What is the best way to serve these at a party?
Since these are frozen treats, it is best to bring them out right when they are ready to be eaten. You can serve them on a chilled platter or even nestled in a tray of ice to keep them firm while guests help themselves.
Pro Tips for Perfect Results: Shark Sorbet Cookies recipe
To truly elevate your baking and ensure your Shark Sorbet Cookies are the best they can be, keep these professional tips in mind:
-
Texture Balance: Ensure your cookies are baked long enough to be crisp. A soft, underbaked cookie will turn soggy once it comes into contact with the moisture from the sorbet.
-
Consistent Sizing: When cutting your dough, try to ensure all cookies are the exact same size and shape. This makes the sandwiching process much easier and more visually appealing.
-
Icing Stability: If you are making your own icing, ensure it is thick enough to hold its shape. A runny icing will slide off the cookie and ruin the shark’s features.
-
Flavor Pairing: Match your sorbet to your icing. For example, a blue raspberry sorbet pairs wonderfully with a vanilla-flavored blue glaze.
Conclusion: Shark Sorbet Cookies recipe
In conclusion, creating a batch of Shark Sorbet Cookies is a wonderful way to bring a sense of playfulness and creativity into your kitchen. By following this Shark Sorbet Cookies recipe, you have learned how to balance the delicate requirements of a baked cookie with the icy freshness of fruit sorbet. This dessert proves that with a little bit of imagination and the right ingredients, you can turn a simple snack into an ocean-inspired masterpiece. These treats are sure to leave a lasting impression on anyone lucky enough to try them, offering a perfect blend of sweetness, crunch, and cool refreshment. Now that you have all the tools and knowledge, it is time to put on your apron, gather your ingredients, and start baking your way to a shark-themed success. Enjoy the process of decorating and the even greater joy of sharing these unique cookies with your loved ones.
Print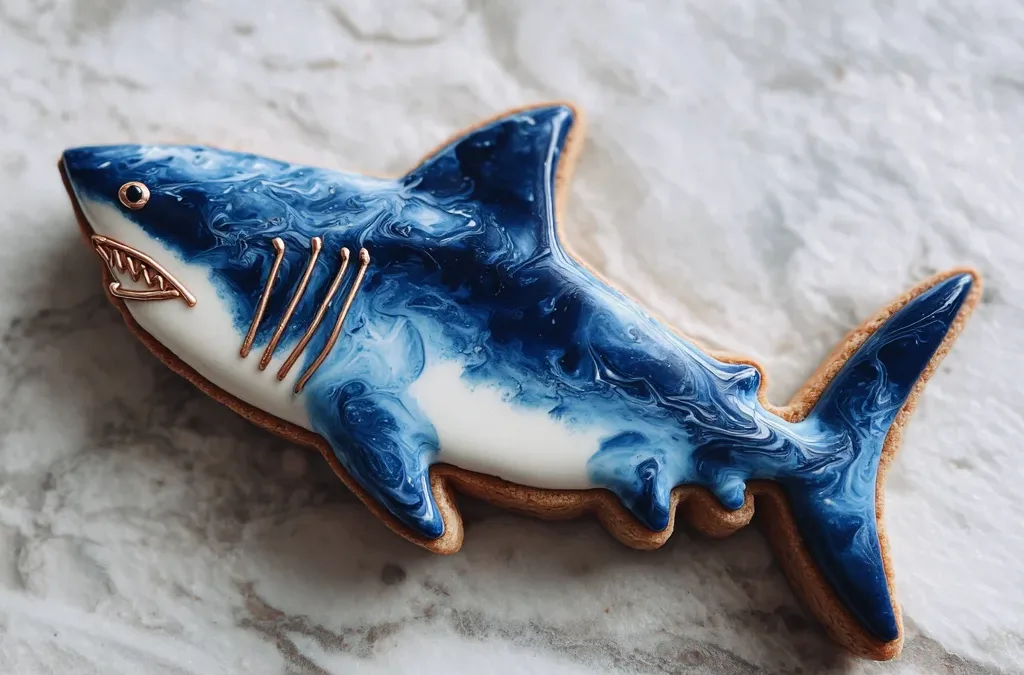
The Ultimate Shark Sorbet Cookies Recipe for a Fun Ocean Adventure
- Total Time: 32 minutes
- Yield: 8–10 cookie sandwiches 1x
- Diet: Vegetarian
Description
At its heart, this Shark Sorbet Cookies recipe is a creative fusion of a soft, sugar-based cookie and a cold, refreshing fruit sorbet. Think of it as a sophisticated, ocean-themed version of a sandwich cookie. Unlike traditional ice cream sandwiches that use heavy dairy, the use of sorbet keeps things light and tangy. This makes it a perfect choice for warm weather when you want something cooling but still substantial enough to feel like a real treat.
Ingredients
For the cookies:
- 2 cups all-purpose flour
- ½ cup butter (softened)
- ¾ cup sugar
- 1 egg
- 1 tsp vanilla extract
- ½ tsp baking powder
- Pinch of salt
For the sorbet filling:
- 1 cup fruit sorbet (blue raspberry or lemon works great)
For decoration:
- Blue icing or glaze
- White icing (for teeth)
- Chocolate chips or edible eyes
Instructions
- Make the cookie dough
Cream butter and sugar until fluffy. Add egg and vanilla, mix well. In another bowl, combine flour, baking powder, and salt. Gradually mix into the wet ingredients. - Shape and bake
Roll out the dough and cut into shark shapes (or circles if you don’t have cutters). Bake at 180°C (350°F) for 10–12 minutes until lightly golden. Let cool completely. - Add sorbet filling
Scoop a small amount of sorbet onto one cookie and sandwich with another. Work quickly so it doesn’t melt. - Decorate like sharks
Use blue icing for the top, add white icing teeth, and place chocolate chips as eyes to create a shark face.
Notes
These fun Shark Sorbet Cookies, inspired by the playful idea of a Shark, are perfect for summer parties and kids’ events. You can experiment with different sorbet flavors and decorations to create your own ocean-themed treats. For best results, keep them chilled until serving so the sorbet stays firm and refreshing.
- Prep Time: 20 minutes
- Cook Time: 12 minutes
- Category: Dessert
- Method: Baking
- Cuisine: Fusion
Nutrition
- Serving Size: 1 cookie sandwich
- Calories: ~180 kcal