There is something deeply satisfying about baking your own bread from scratch. The way the yeast wakes up, the rhythmic kneading or stretching, and that unmistakable aroma filling your kitchen can instantly turn an ordinary day into a cozy haven. But what if you could take that sensory journey a step further and transform your next loaf into a literal masterpiece?Enter the vibrant world of Sun-Dried Tomato & Feta Focaccia Art. This unique culinary trend turns a classic, pillowy Italian flatbread into an edible canvas where you get to paint with garden-fresh ingredients. By arranging bright vegetables, tangy cheeses, and fragrant herbs on a fluffy bed of dough, you can create gorgeous, colorful floral scenes that taste every bit as incredible as they look. It is a fantastic project for weekend bakers, families, or anyone wanting to impress guests at their next dinner party.
In this comprehensive guide, we will explore the story behind this beautiful baking trend, walk through every step of crafting your own dough, and share the best secrets to designing a gorgeous edible garden.

What Exactly is Sun-Dried Tomato & Feta Focaccia Art?
To understand this visual treat, we first have to look at the foundation itself. Focaccia is a traditional Italian yeast bread known for its thick, airy texture, distinct finger-dimpled surface, and a generous coating of rich extra virgin olive oil. It is crispy on the outside, incredibly tender on the inside, and acts like a sponge for flavor.
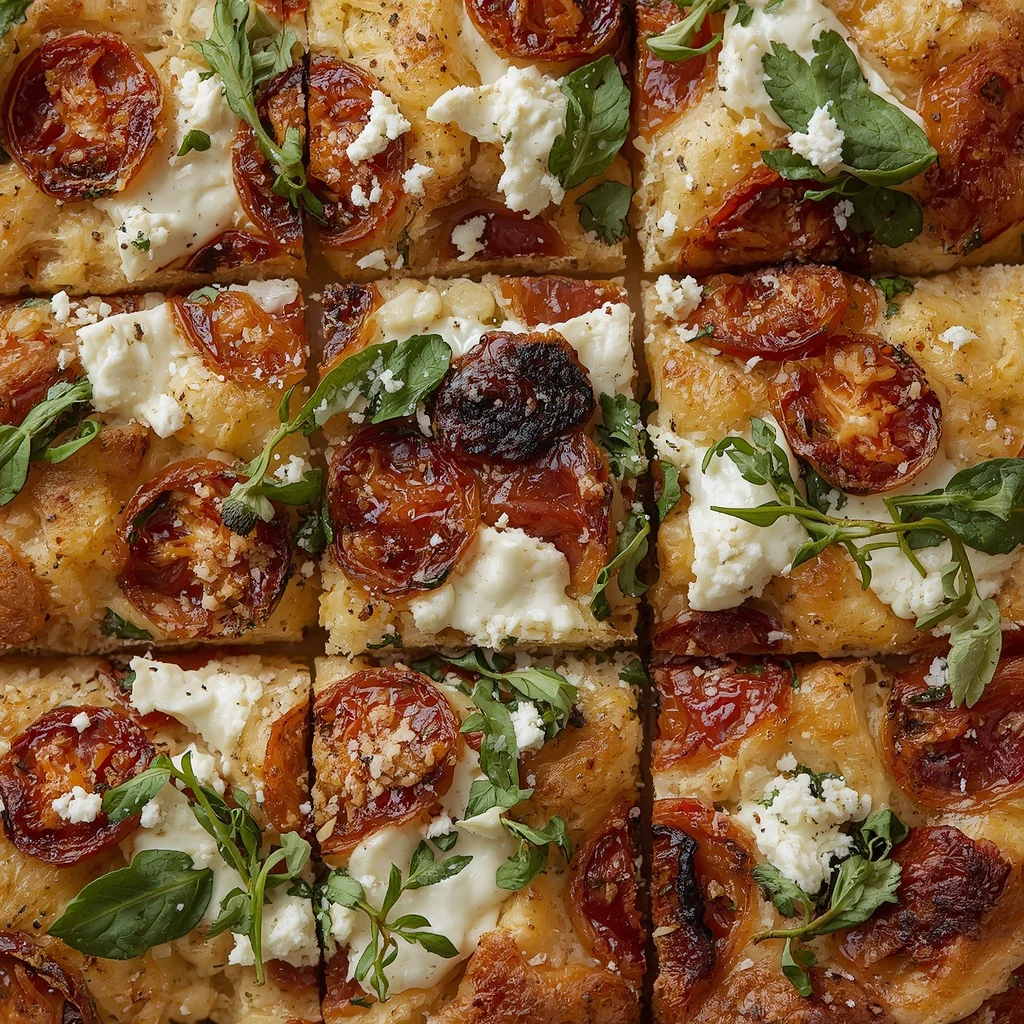
The Sun-Dried Tomato & Feta Focaccia Art concept takes this classic canvas and elevates it with an artistic layout of toppings. Instead of casually scattering your ingredients across the top, you deliberately arrange them to mirror natural scenery.
For instance, you might use slender rosemary sprigs to mimic flower stems, thin slices of red onion to create elegant blossoms, and strips of sweet bell peppers to build vibrant petals. Adding rich, concentrated sun-dried tomatoes provides deep crimson hues, while crumbles of salty feta cheese look like small blossoms or clouds scattered across a savory landscape. It is the perfect marriage of rustic baking and creative expression.
The Fascinating Origin of Sun-Dried Tomato & Feta Focaccia Art
While flatbreads have been baked across the Mediterranean for thousands of years, the specific phenomenon of styling them into intricate gardens gained massive global popularity relatively recently. The concept truly took off across social media platforms, capturing the hearts of millions of home bakers who were looking for a creative outlet.
Historically, the roots of focaccia stretch back to the ancient Etruscans or Greeks, though it is most famously associated with the Liguria region of Northern Italy. The classic version focused entirely on the purity of excellent olive oil, water, flour, yeast, and sea salt.
The modern twist of turning the bread into visual art allowed people to celebrate the seasons. Bakers began using whatever grew in their backyards to illustrate seasonal shifts directly on their food. Pairing sun-dried tomatoes with feta bridges the gap between traditional Italian textures and bold, sunny Mediterranean flavors, making this specific variation an absolute favorite worldwide.
Ingredients You Need for This Edible Masterpiece
To create an exceptional loaf of Sun-Dried Tomato & Feta Focaccia Art, you need high-quality ingredients that balance texture and flavor. Below are the precise measurements divided into the base dough and your artistic decorative toppings.
The Bread Base
-
Bread Flour: Four cups, which is approximately five hundred grams. Using bread flour rather than all-purpose flour guarantees a high protein content, which provides that quintessential chewy, open crumb structure.
-
Instant Yeast: Two and one-quarter teaspoons, equivalent to seven grams. This allows for a steady, reliable rise.
-
Salt: Two teaspoons, or ten grams, of fine sea salt to properly season the dough structure from within.
-
Warm Water: One and one-half to one and two-thirds cups, roughly three hundred and seventy-five to four hundred milliliters. The water should feel comfortably warm to the touch to activate the yeast without killing it.
-
Olive Oil: Two tablespoons for the internal dough mixture, plus plenty extra for coating the baking pan and drizzling over the top.
The Decorative Canvas Toppings
-
Sun-Dried Tomatoes: One-half cup of sun-dried tomatoes, thoroughly drained of excess oil and neatly sliced into strips or rounds to form beautiful flower petals.
-
Feta Cheese: One hundred and fifty grams, or five ounces, of high-quality feta cheese, crumbled gently to serve as flower centers or snowy accents.
-
Fresh Rosemary Sprigs: Several long, sturdy pieces to act as your primary flower stems and branches.
-
Fresh Thyme or Oregano: A few small sprigs to give the appearance of delicate garden moss or small leaves.
-
Red Onion: One small onion, cut into thin vertical wedges or cross-sections to mimic large, sweeping blossoms or whimsical flower layers.
-
Kalamata Olives: Optional, pitted and halved to provide contrasting dark tones for flower centers or stones along a garden path.
-
Bell Peppers or Zucchini: A few thin slices of varied colors to form broad leaves and colorful geometric petals.
-
Extra Virgin Olive Oil: A generous pool for your hands, the pan, and a beautiful final shine over the crust.
-
Flaky Sea Salt: A final handful to sprinkle generously before baking for a delightful, crunching texture.
-
Freshly Ground Black Pepper: To add a subtle, warming bite across your finished garden layout.
Step-by-Step Direction and Preparation Method: Sun-Dried Tomato & Feta Focaccia Art

Creating this bread requires patience and a gentle touch. Follow these steps carefully to ensure your dough rises beautifully and your artwork stays intact during baking.
Step 1: Mixing and Hydrating the Dough
Start by selecting a large mixing bowl. Combine your four cups of bread flour, instant yeast, and fine sea salt, giving them a quick whisk to distribute everything evenly. Pour in your warm water alongside the two tablespoons of olive oil.
Using a sturdy wooden spoon or a silicone spatula, stir the ingredients from the center outward. The mixture will quickly transform into a very sticky, shaggy wet mass. Ensure there are no pockets of dry flour hiding at the bottom of the bowl.
Because this is a high-hydration dough, you do not need to perform traditional, heavy counter kneading. Just ensure it is cohesive, wrap the bowl tightly with plastic wrap or a damp kitchen towel, and let it rest undisturbed at room temperature for one and a half to two hours. You will know it is ready when the volume has completely doubled and the surface is dotted with tiny, fragile gas bubbles.
Step 2: Preparing the Baking Pan and Shaping
Pour a very generous pool of extra virgin olive oil into a nine-by-thirteen-inch baking pan, using your fingers to coat the entire bottom and all four side walls. This heavy layer of oil essentially frys the bottom of the crust while it bakes, making it spectacularly crispy.
Gently tip your risen, puffy dough out of the bowl and straight into the prepared pan. It will feel incredibly soft and airy.
Dip your fingers into olive oil, then use the pads of your fingers to gently coax and stretch the dough outward toward the corners of the pan. Do not force it or flatten it with a rolling pin; you want to preserve every bit of internal air possible. If the dough feels tight and continuously snaps back toward the center, simply walk away and let it rest for twenty to thirty minutes. This relaxes the gluten strands, allowing you to easily finish stretching it to the edges afterward.
Step 3: Dimpling and Arranging Your Focaccia Art
Now comes the magic part of the process. Pour another tablespoon or two of olive oil across the top of the dough.
Using both hands, press your fingers straight down into the dough until you feel the cold metal bottom of the baking pan beneath. Lift your fingers straight back up and repeat across the entire surface. This classic dimpling technique creates deep pockets that catch the pooling olive oil and prevents the bread from rising into one massive, uneven mound.
Next, open your dishes of prepared toppings and start designing your edible garden:
-
Stems and Grasses: Lay down your long sprigs of fresh rosemary first to establish the vertical lines of your garden landscape.
-
Vibrant Blossoms: Place your sliced sun-dried tomatoes in neat radiating circles around a central core of crumbled feta cheese to build brilliant red flowers.
-
Textured Elements: Scatter thin half-moons of red onion to create the illusion of tulips, and use bright slices of yellow or orange bell peppers for wide, cheerful petals.
-
Ground Cover: Nestle your halved kalamata olives and small thyme leaves around the base of your stems to anchor the entire visual scene.
Once you are thrilled with your design, press every single topping very gently but firmly down into the dough. This step is vital because as the bread rises and expands in the hot oven, it will push toppings upward; anchoring them gently prevents your artwork from sliding out of alignment or falling off the crust entirely.
Step 4: The Final Proof and Baking Process
Let your newly decorated masterpiece rest on the counter for a final proof lasting thirty to forty-five minutes. During this time, the dough will puff up beautifully around your arranged vegetables, cradling them safely in place. While it rests, preheat your oven thoroughly to four hundred and twenty-five degrees Fahrenheit.
Slide your pan onto the center rack of your hot oven. Let it bake undisturbed for twenty to twenty-five minutes.
Keep a close eye on it during the final minutes; you are looking for deep, shimmering golden edges and a beautifully browned underside. If you prefer a wonderfully gooey texture, you can open the oven door during the last five minutes of baking to scatter an extra handful of crumbled feta right over your design, allowing it to soften and warm through gently.
Step 5: The Masterful Finish
Carefully remove the pan from the oven and place it on a heatproof wire rack. The scent of roasted tomatoes, toasted rosemary, and caramelized onions will be incredibly intense.
While the bread is still screaming hot, drizzle a final touch of premium extra virgin olive oil over the top to bring out the vivid colors of your baked vegetables. Dust the surface with a generous pinch of flaky sea salt and a crack of fresh black pepper. Let the bread cool inside the pan for at least ten minutes so the structure sets, then carefully slice into squares and serve while warm.
Creative Variations to Experiment With: Sun-Dried Tomato & Feta Focaccia Art
Once you have mastered the foundational technique of Sun-Dried Tomato & Feta Focaccia Art, you can adapt the flavor profile to match your personal cravings or seasonal availability.
The Green Goddess Variation
If you want to create a lush, forest-inspired landscape, swap out the red tomatoes for vibrant green ingredients. Use thin ribbons of fresh zucchini rolled up to look like rosettes, bright green pumpkin seeds for small leaves, and sliced green olives. Pair this with a base layer of basil pesto swirled directly into the dough before dimpling to give the entire bread a stunning emerald background and a hit of garlicky flavor.
The Sweet and Savory Harvest
For a sophisticated twist that pairs beautifully with a cheese board, try introducing sweet fruits to your canvas. Thinly slice fresh black figs or sweet red grapes to form your flower shapes, and use strips of salty prosciutto folded into delicate ribbons alongside your rosemary stems. Instead of feta, use dollops of creamy goat cheese, and finish the baked bread with a luxurious drizzle of raw honey or a thick balsamic glaze reduction.
The Roasted Garlic and Herb Feast
If you are a true garlic lover, toss a handful of whole, peeled garlic cloves in olive oil and press them deep into the dimples of your dough to act as stepping stones in your garden design. Use chives for delicate flower stalks, and scatter chopped sundried tomatoes alongside parmesan cheese shards. The garlic cloves mellow and sweeten significantly as they bake inside the dough, turning incredibly buttery and spreadable.
Pro-Tips for Picture-Perfect Results
Working with wet dough and fresh produce can sometimes present unique challenges. Keep these practical tips in mind to ensure your baking project goes smoothly:
-
Dry Your Produce Thoroughly: Sun-dried tomatoes packed in oil and fresh vegetables hold a surprising amount of surface moisture. Always pat them dry with a clean paper towel before placing them on your dough. Excess moisture will bleed into the surrounding dough, leaving you with soggy, unbaked pockets right around your beautiful designs.
-
Slice Thinly for Even Cooking: Ensure your onions, peppers, and squashes are sliced as thinly and evenly as possible. If a piece of vegetable is too thick, it will remain raw and crunchy by the time the bread finishes baking, or its weight might cause it to sink completely to the bottom of the pan.
-
Protect Delicate Herbs: Tender herbs like fresh basil or parsley will scorch, turn black, and taste bitter under high oven heat. Stick to hardy, woody herbs like rosemary, thyme, sage, and oregano for the actual baking process. If you want to include basil or microgreens, add them as fresh accents immediately after the bread comes out of the oven.
Frequently Asked Questions About Focaccia Art
Can I make Sun-Dried Tomato & Feta Focaccia Art ahead of time?
Yes, absolutely. In fact, a slow fermentation process creates a much deeper, more complex flavor profile and beautiful air bubbles. After mixing your sticky dough, you can place it directly into the refrigerator covered tightly for up to twenty-four hours. When you are ready to bake, bring the dough out and let it come to room temperature for about an hour before transferring it to your oiled baking pan.
Why did my toppings turn black and burn during baking?
High heat is necessary to give focaccia its signature crispy crust, but it can occasionally scorch exposed vegetables. To prevent burning, make sure your toppings are well-coated in olive oil before the pan goes into the oven. The oil acts as a protective barrier, helping the vegetables caramelize beautifully rather than drying out and charring.
What should I serve alongside Sun-Dried Tomato & Feta Focaccia Art?
While this bread is spectacular enough to be enjoyed entirely on its own as a snack, it pairs magnificently with a wide range of dishes. Serve it warm alongside a fresh arugula salad dressed with lemon vinaigrette, or use it to scoop up rich roasted red pepper soup. It also makes an exceptional base for gourmet sandwiches when sliced horizontally through the middle.
How do I store leftovers so they stay fresh?
If you happen to have any leftover bread, wrap it tightly in aluminum foil or store it in an airtight container at room temperature for up to two days. To revive that incredible texture, avoid the microwave, which will make the bread rubbery. Instead, pop your slices into a toaster oven or a standard oven at three hundred and fifty degrees Fahrenheit for five to seven minutes until the crust is crisp again and the feta cheese is warm.
Conclusion: Sun-Dried Tomato & Feta Focaccia Art
Baking your own Sun-Dried Tomato & Feta Focaccia Art is a wonderful reminder that cooking is a beautiful form of creative expression. By taking a few pantry staples like flour, yeast, and water, and pairing them with a handful of colorful Mediterranean toppings, you can create a centerpiece that feeds both the body and the soul. It breaks the monotony of everyday cooking, turning a simple baking routine into an joyful afternoon of designing and creating. So roll up your sleeves, generously oil your hands, and enjoy the process of watching your custom edible garden rise and turn golden brown in your oven.
Print
Master the Art of Sun-Dried Tomato & Feta Focaccia Art
- Total Time: 2 hours 45 minutes (including rising time)
- Yield: 1 focaccia (about 8 servings) 1x
- Diet: Vegetarian
Description
To understand this visual treat, we first have to look at the foundation itself. Focaccia is a traditional Italian yeast bread known for its thick, airy texture, distinct finger-dimpled surface, and a generous coating of rich extra virgin olive oil. It is crispy on the outside, incredibly tender on the inside, and acts like a sponge for flavor.
Ingredients
Dough
- 500 g (4 cups) bread flour
- 7 g (2¼ tsp) instant yeast
- 10 g (2 tsp) salt
- 375–400 ml (1½–1⅔ cups) warm water
- 2 tbsp olive oil
Toppings
- ½ cup sun-dried tomatoes, drained and sliced
- 150 g (5 oz) feta cheese, crumbled
- Fresh rosemary sprigs
- Fresh thyme or oregano
- Thin slices of red onion
- Kalamata olives (optional)
- Thin slices of bell pepper or zucchini for decorative petals and leaves
- Extra virgin olive oil
- Flaky sea salt
- Freshly ground black pepper
Instructions
- Mix the dough
- Combine flour, yeast, salt, water, and olive oil.
- Stir until a sticky dough forms.
- First rise
- Cover and let rise for 1½–2 hours, or until doubled.
- Prepare the pan
- Generously oil a 9×13-inch baking pan.
- Transfer the dough and gently stretch it toward the corners.
- Rest for 20–30 minutes if it resists stretching.
- Create the art
- Drizzle with olive oil.
- Dimple the dough with your fingertips.
- Arrange toppings to resemble:
- Flowers: sun-dried tomato petals with feta centers.
- Stems: rosemary sprigs.
- Leaves: zucchini or bell pepper slices.
- Small blossoms: olives and crumbled feta.
- Final proof
- Let the decorated dough rest for 30–45 minutes.
- Bake
- Bake at 220°C (425°F) for 20–25 minutes, until golden.
- If desired, sprinkle extra feta during the last 5 minutes for a creamier finish.
- Finish
- Drizzle with more olive oil.
- Add flaky sea salt and black pepper.
- Garnish with fresh herbs before serving.
Notes
- Prep Time: 20 minutes
- Cook Time: 25 minutes
- Category: Bread
- Method: Baked
- Cuisine: Italian
Nutrition
- Serving Size: 1 slice (1/8 of focaccia)
- Calories: 250 kcal
Keywords: Floral Focaccia Bread Art, Decorative Feta Focaccia, Garden Bread Canvas