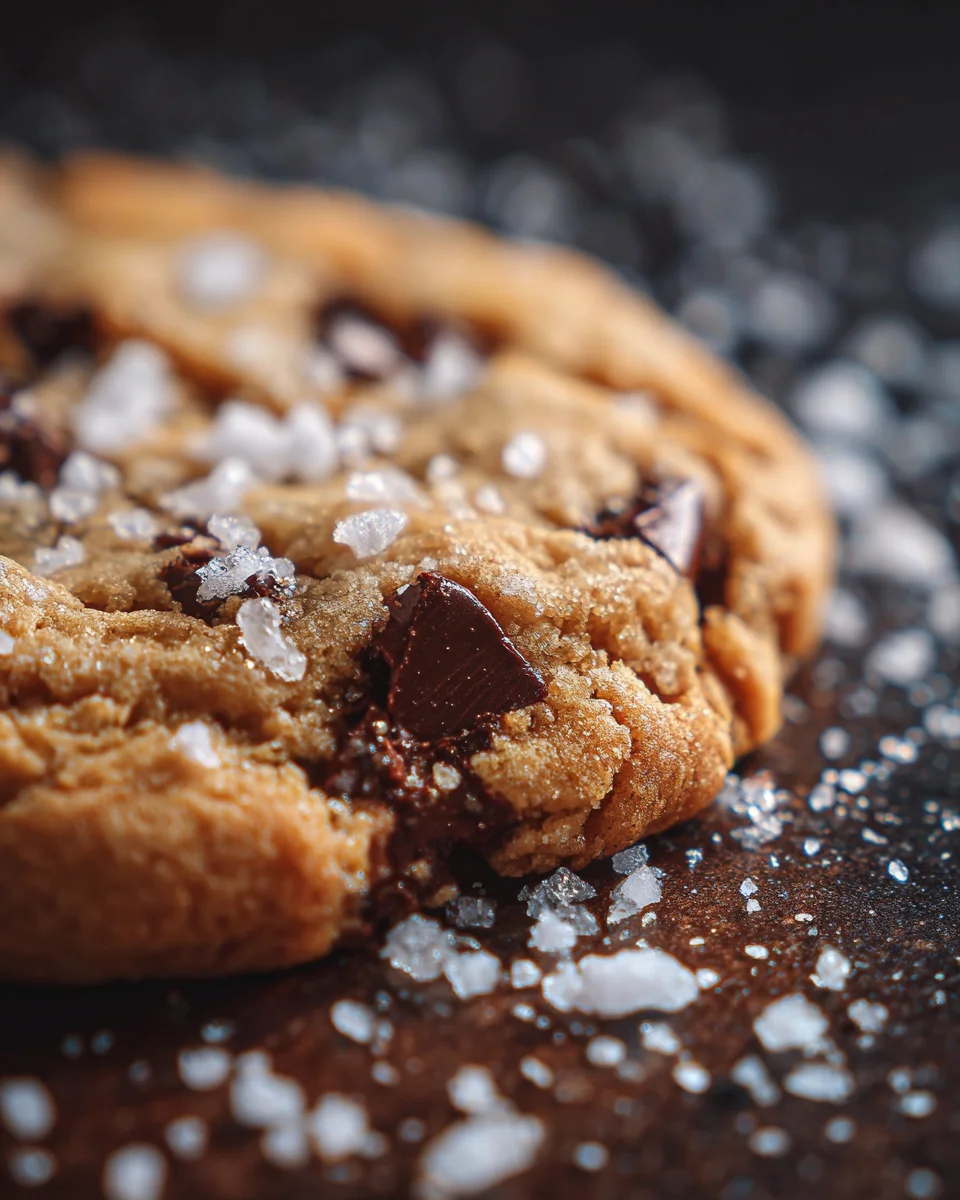
There is something completely magical about a dessert that goes straight from the oven to the table in the very same pan it was baked in. If you have ever craved the rich, decadent center of a bakery-style chocolate chip cookie but wanted it magnified into a shareable masterpiece, you are in for a treat. This warm skillet cookie with flaky sea salt is the ultimate comfort food. It combines crispy, caramelized edges with a molten, gooey center that melts in your mouth. Whether you are hosting a cozy dinner party or looking for a weekend baking project that requires minimal cleanup, this dessert delivers maximum satisfaction with very little effort.
The beauty of baking in cast iron is the unique texture it creates. The heavy metal distributes heat evenly, allowing the outer crust to develop a beautiful golden crunch while keeping the interior incredibly soft. When you top that rich, buttery sweetness with a generous sprinkle of crunchy sea salt, you create a flavor profile that is sophisticated yet deeply nostalgic. Let us dive into everything you need to know to master this stunning dessert in your own kitchen.
What is a Warm Skillet Cookie with Flaky Sea Salt?
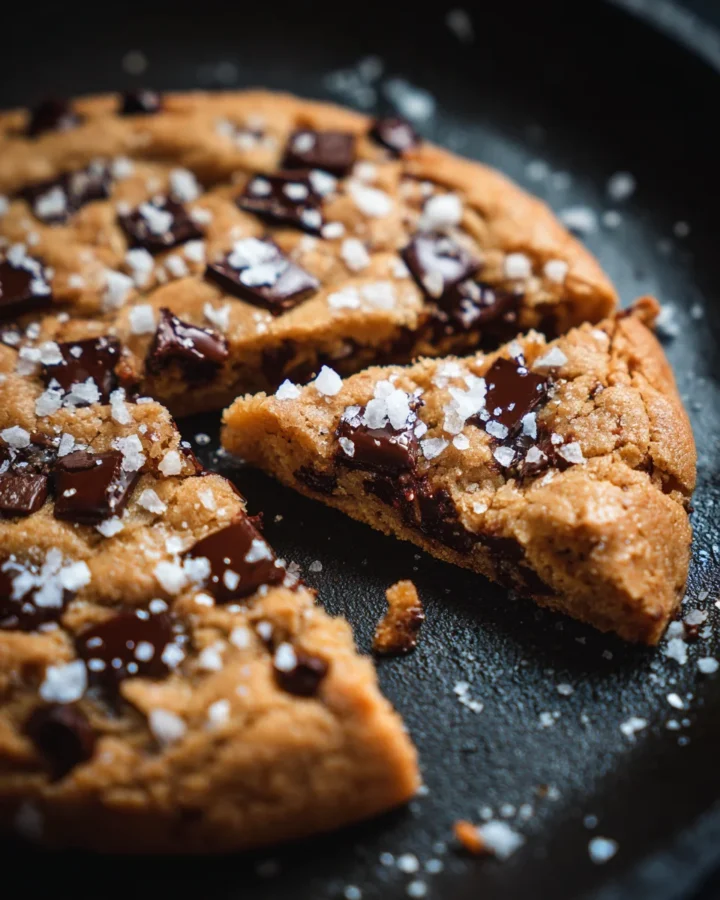
To put it simply, a warm skillet cookie with flaky sea salt is a giant, thick chocolate chip cookie baked directly in a cast iron skillet or an oven-safe frying pan. Often referred to in the culinary world as a pizzookie, this dessert blurs the line between a traditional cookie and a cake. Instead of scooping individual balls of dough onto a baking sheet, the entire batch of dough is pressed into a single pan.
Baking the dough as one large mass changes the texture dynamics completely. In a standard cookie, the heat circulates all around the small dough ball, crisping it up relatively quickly. In a skillet, the deep layer of dough bakes from the outside in. This means the edges get wonderfully caramelized and chewy, while the center remains delightfully underbaked and gooey. It is designed to be eaten warm, preferably with a crowd of friends or family armed with spoons, digging straight into the pan.
The Magic of the Skillet Texture
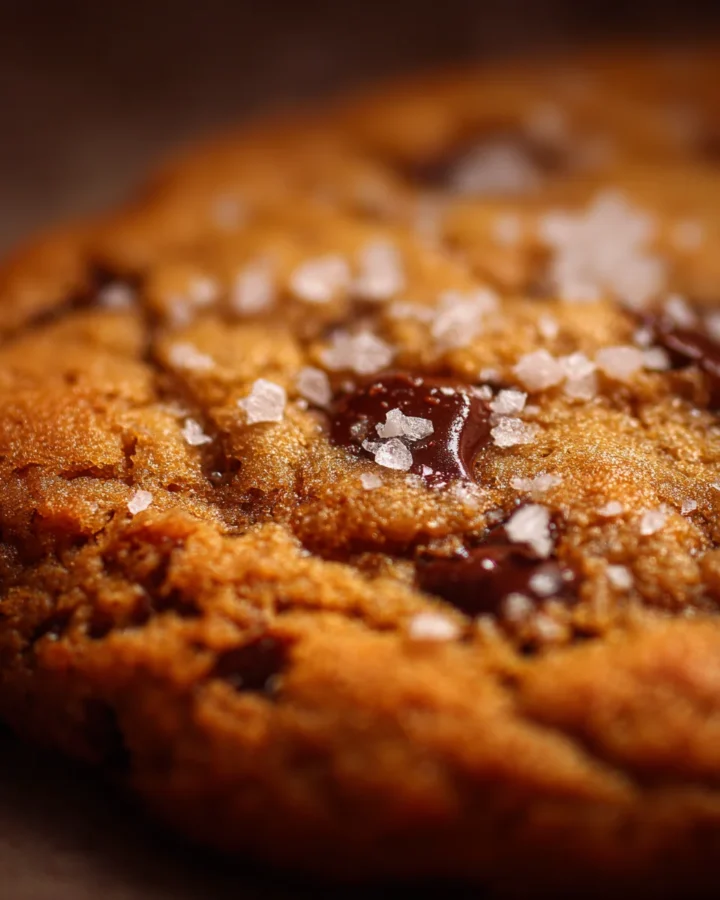
The cast iron skillet acts as a natural heat conductor. As the pan heats up in the oven, it retains an immense amount of thermal energy. This intense heat fries the outer layer of the cookie dough slightly in its own butter, creating a distinct crust that you simply cannot achieve on a thin aluminum baking sheet.
Inside that crust, the flour, sugars, and eggs create a dense, fudgy matrix. Because we pull the skillet out of the oven while the center is still slightly pale and soft, the residual heat of the cast iron continues to gently cook the middle without drying it out. The result is a contrast of textures that keeps you coming back for bite after bite.
Origin of warm skillet cookie with flaky sea salt
While individual chocolate chip cookies have been a staple of American households since the nineteen thirties, the concept of the skillet cookie emerged a bit later as a restaurant novelty. The term pizzookie was popularized by West Coast restaurant chains in the United States, who combined the words pizza and cookie to describe a deep-dish dessert baked in a round pan and served slice-by-slice or shared raw from the middle.
Individual Cookies (1930s) ---> Pizza-Style Pan Baking (1990s) ---> Modern Gourmet Skillet (Today)
The evolution from a commercial restaurant gimmick to a gourmet home-baking staple happened when bakers realized that cast iron skillets yielded a vastly superior crust. By upgrading the ingredients to include high-quality dark chocolate chunks and finishing the dish with hand-harvested flaky sea salt, what was once a simple children’s treat became a sophisticated dessert celebrated by home chefs worldwide.
The Evolution of the Sweet and Salty Flavor Profile
For many decades, American desserts focused almost entirely on pure sweetness. However, as global culinary traditions began to blend, the culinary world rediscovered the power of contrast. Salt is a natural flavor enhancer. When applied correctly to sweet dishes, it suppresses bitterness while bringing out the subtle undertones of vanilla, butter, and molasses. The addition of flaky sea salt to the top of a warm cookie transformed it from a standard sweet treat into a complex, balanced dessert that appeals to mature palates.
Ingredients You Will Need for warm skillet cookie with flaky sea salt
Creating the ultimate warm skillet cookie with flaky sea salt requires simple ingredients that you likely already have in your pantry, but the quality of these ingredients will truly define the final product.
Here is exactly what you need to gather before you start baking:
-
Unsalted Butter: One half cup. Using unsalted butter allows you to control the exact amount of saltiness in the dough, ensuring it does not become overwhelming.
-
Brown Sugar: One half cup. Brown sugar contains molasses, which adds moisture and a deep, caramel-like flavor that keeps the center incredibly chewy.
-
Granulated Sugar: One quarter cup. White sugar helps create those beautifully crisp, caramelized edges around the perimeter of the skillet.
-
Large Egg: One piece. The egg binds the dough together and provides structure, allowing the cookie to rise slightly while maintaining its rich density.
-
Vanilla Extract: One teaspoon. High-quality pure vanilla extract elevates the flavor profile, making the butter and sugar taste richer.
-
All-Purpose Flour: One and one quarter cups. This provides the structural foundation for the cookie. Be sure to measure it accurately so the dough does not become dry.
-
Baking Soda: One half teaspoon. This leavening agent helps the cookie expand slightly, keeping the interior light enough to scoop easily.
-
Fine Salt: One half teaspoon. Mixed directly into the dough, fine salt balances the sweetness from the inside out.
-
Chocolate Chips or Chopped Dark Chocolate: Three quarters cup. High-quality chocolate chunks or chips will create beautiful pockets of molten chocolate throughout the skillet.
-
Flaky Sea Salt: A generous sprinkle for the top. Look for large, delicate salt flakes that provide a clean, crunchy burst of flavor without being intensely bitter.
Step-by-Step Direction and Preparation Method: warm skillet cookie with flaky sea salt
The absolute best part about this warm skillet cookie with flaky sea salt recipe is that you do not need a stand mixer, a hand mixer, or even multiple bowls. Everything happens right in the skillet and a single stirring spoon, making preparation incredibly fast and cleanup a total breeze.
Step One: Preheating and Pan Preparation
Begin by preheating your oven to three hundred and fifty degrees Fahrenheit. While the oven is warming up, prepare your eight-inch cast iron skillet or any similar oven-safe pan. Ensure the skillet is clean and dry. You do not need to grease it excessively, as the high butter content in the dough will naturally prevent it from sticking to well-seasoned iron.
Step Two: Melting the Butter
Place your skillet over low heat on your stovetop. Add the one half cup of unsalted butter to the pan. Allow it to melt slowly, swirling it around occasionally to coat the bottom and the lower sides of the skillet.
[Stovetop: Low Heat] ---> Melt Butter ---> Remove from Heat ---> Cool Slightly
Once the butter is completely melted, remove the skillet from the heat source and set it on a heat-proof surface. Let it cool for a few minutes so it is warm to the touch but not boiling hot, which would cook the egg prematurely in the later steps.
Step Three: Incorporating the Sugars
Add the one half cup of brown sugar and the one quarter cup of granulated sugar directly into the warm butter within the skillet.
Using a wooden spoon or a sturdy silicone spatula, stir the mixture vigorously until the sugars have dissolved into the butter and the mixture looks completely smooth and uniform. The warmth of the butter will help release the molasses in the brown sugar, creating a beautiful aromatic base.
Step Four: Adding the Wet Ingredients
Once the butter and sugar mixture has cooled down slightly more, crack your large egg into the skillet and add the one teaspoon of vanilla extract.
Stir quickly and thoroughly until the egg is completely integrated and the batter becomes glossy and slightly thickened. It is crucial that the pan is not too hot during this step, as you want to blend the egg seamlessly rather than scrambling it.
Step Five: Mixing the Dry Ingredients
Spriggle the one and one quarter cups of all-purpose flour, the one half teaspoon of baking soda, and the one half teaspoon of fine salt directly over the wet batter in the skillet.
Using your spoon, gently fold the dry ingredients into the wet mixture. Stir until just combined and no visible streaks of dry flour remain. Be careful not to overmix at this stage; overworking the flour can develop the gluten, which would make your cookie tough rather than tender and meltingly soft.
Step Six: Folding in the Chocolate
Allow the dough to cool for another minute if it still feels quite warm, then dump in the three quarters cup of chocolate chips or chopped dark chocolate.
Gently fold the chocolate into the dough so that it is evenly distributed throughout the skillet. Saving a few pieces of chocolate to press directly into the top of the dough will create beautiful, photogenic pools of melted chocolate once baked.
Step Seven: Smoothing the Surface
Using your spatula or the back of a spoon, smooth the cookie dough into an even, flat layer across the bottom of the skillet. Push the dough gently toward the edges of the pan so that it bakes uniformly.
Smooth Dough to Edges ---> Bake 18-22 Mins ---> Cool 5-10 Mins ---> Serve Warm
Step Eight: The Baking Process
Place the skillet into the preheated oven on the center rack. Bake for eighteen to twenty-two minutes. Keep a close eye on the oven during the final minutes of baking.
You are looking for the edges to become deep golden brown and slightly pulled away from the sides of the pan, while the very center should still look pale, soft, and slightly underdone. If you overbake the cookie, you will lose that signature molten core.
Step Nine: The Perfect Finish
As soon as you remove the hot skillet from the oven, take your flaky sea salt and sprinkle a generous pinch across the entire surface of the warm cookie.
The heat from the cookie will help the salt flakes adhere to the melting chocolate and the top crust, infusing every single bite with that incredible savory contrast.
Step Ten: Cooling and Serving
Let the skillet cool on a wire rack or heat-safe mat for five to ten minutes. This waiting period is essential, as it allows the cookie dough to set up just enough so that it can be scooped or sliced without completely collapsing, while still retaining its warm, gooey texture. Serve it directly from the pan.
Creative Variations to Try: warm skillet cookie with flaky sea salt
Once you have mastered the classic version of this warm skillet cookie with flaky sea salt, you can begin experimenting with different flavor profiles to suit your personal cravings or the season.
Nutty and Crunchy Additions
If you love texture in your desserts, consider folding in one half cup of chopped walnuts, pecans, or macadamia nuts alongside the chocolate chips. The earthy flavor of toasted nuts cuts through the sweetness of the sugar and pairs beautifully with the coarse sea salt on top.
Sweet Confectionery Twists
For a different kind of sweetness, you can substitute half of the chocolate chips with toffee bits or peanut butter chips. Toffee adds an extra layer of deep caramelization, while peanut butter chips create a classic, salty-sweet combination that everyone loves.
Elegant and Sophisticated Flavors
For a more mature, complex dessert, add one half teaspoon of espresso powder to the dry ingredients. Espresso powder does not make the cookie taste like coffee; instead, it acts as a flavor amplifier for the dark chocolate, making it taste incredibly deep, rich, and sophisticated. You can also experiment with browning the butter in a separate pan before pouring it into the skillet to introduce a nutty, toasted aroma to the entire dish.
Pro Tips for warm skillet cookie with flaky sea salt
Baking in cast iron is highly rewarding, but it does require a little bit of know-how to ensure your desserts turn out perfectly every single time.
Managing Residual Heat
One of the most important things to remember about a cast iron skillet is that it retains heat for a very long time after it is removed from the oven. Because of this, your cookie will continue to cook even while it sits on the counter. If you want an exceptionally gooey center, pull the skillet out of the oven when the middle still looks quite wet. By the time the ten-minute cooling period is over, the residual heat will have finished cooking the center to a perfect, pudding-like consistency.
Choosing the Right Size Pan
This recipe is optimized for an eight-inch skillet. If you only have a ten-inch skillet, you can still bake this recipe, but the dough will spread thinner. As a result, it will bake much faster, and you will lose some of that dramatic contrast between the thick, soft center and the crisp edges. If using a larger pan, reduce your baking time by several minutes and watch it closely to prevent it from drying out.
Frequently Asked Questions: warm skillet cookie with flaky sea salt
Can I make this warm skillet cookie with flaky sea salt without a cast iron skillet?
Yes, absolutely. If you do not own a cast iron skillet, you can use any eight-inch oven-safe frying pan, a cake pan, or even a small pie dish. Keep in mind that materials like glass or ceramic heat up more slowly than cast iron, so you may need to adjust your baking time by a few minutes. Watch for the golden edges as your ultimate visual cue.
How do I store and reheat leftovers?
If you happen to have leftovers, you can scoop them out of the skillet and store them in an airtight container at room temperature for up to three days. To recapture that fresh-from-the-oven magic, simply place a portion on a microwave-safe plate and heat it for fifteen to twenty seconds until the chocolate is melted and the dough is warm again.
What type of chocolate works best for this recipe?
While standard semi-sweet chocolate chips work wonderfully, using a high-quality dark chocolate bar chopped into irregular chunks yields the best results. Chopped chocolate creates large, irregular pools of molten cocoa throughout the dough, offering a much more luxurious texture than uniform chips.
Why is my skillet cookie dry instead of gooey?
A dry skillet cookie is almost always the result of overbaking or using too much flour. Because cast iron retains heat intensely, it is crucial to remove the pan from the oven while the center still looks slightly underdone. Additionally, when measuring your flour, fluff it with a fork and spoon it into your measuring cup rather than scooping directly from the bag, which packs the flour down and adds too much density to the dough.
Conclusion: warm skillet cookie with flaky sea salt
The warm skillet cookie with flaky sea salt is more than just a dessert; it is an interactive dining experience that brings people together around the table. By utilizing a single cast iron pan, you unlock a depth of texture and flavor that individual baking sheets simply cannot replicate. The combination of rich brown sugar, decadent molten chocolate, and the crisp, clean crunch of hand-sprinkled sea salt creates a perfect balance that satisfies every corner of your palate. It proves that you do not need complicated techniques or hours of preparation to create a show-stopping, gourmet dessert. The next time you want to treat yourself or impress your loved ones, fire up your oven, melt some butter in your favorite skillet, and enjoy the ultimate comfort food experience.
Print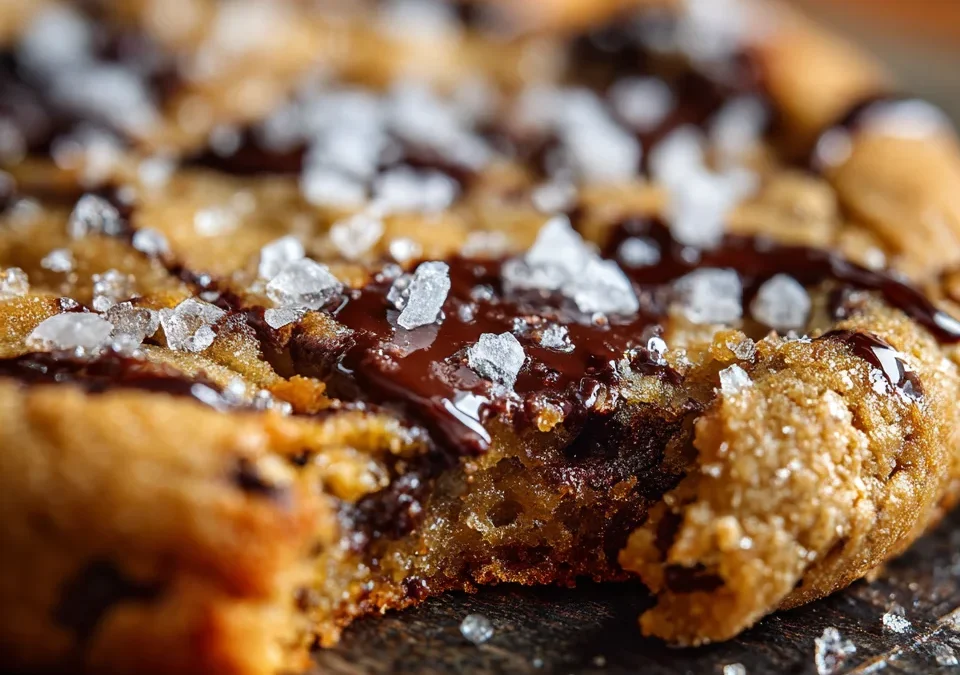
Warm Skillet Cookie with Flaky Sea Salt
- Total Time: 30 minutes
- Yield: 6 servings 1x
- Diet: Vegetarian
Description
To put it simply, a warm skillet cookie with flaky sea salt is a giant, thick chocolate chip cookie baked directly in a cast iron skillet or an oven-safe frying pan. Often referred to in the culinary world as a pizzookie, this dessert blurs the line between a traditional cookie and a cake. Instead of scooping individual balls of dough onto a baking sheet, the entire batch of dough is pressed into a single pan.
Ingredients
- 1/2 cup (115 g) unsalted butter
- 1/2 cup brown sugar
- 1/4 cup granulated sugar
- 1 large egg
- 1 tsp vanilla extract
- 1 1/4 cups all-purpose flour
- 1/2 tsp baking soda
- 1/2 tsp fine salt
- 3/4 cup chocolate chips or chopped dark chocolate
- Flaky sea salt, for topping
Equipment
- 8-inch cast iron skillet or oven-safe pan
Instructions
- Preheat oven to 350°F (175°C).
- Melt the butter in the skillet over low heat. Remove from heat and let cool slightly.
- Stir in brown sugar and granulated sugar until smooth.
- Mix in the egg and vanilla.
- Add flour, baking soda, and fine salt. Stir until just combined.
- Fold in the chocolate chips.
- Spread the dough evenly in the skillet.
- Bake for 18–22 minutes, until the edges are golden but the center still looks slightly soft.
- Sprinkle flaky sea salt on top while warm.
- Let cool for 5–10 minutes before serving.
Notes
- Prep Time: 10 minutes
- Cook Time: 20 minutes
- Category: Dessert
- Method: Baking
- Cuisine: American
Nutrition
- Serving Size: 1 slice
- Calories: 320 kcal
Keywords: cast iron pizzookie with sea salt, warm pan cookie with sea salt flakes, gooey skillet chocolate chip cookie