If you are looking for a snack that hits that perfect sweet spot without leaving you feeling weighed down, you have found it. These Frozen Yogurt Peanut Butter Cups are the ultimate solution for anyone who craves the classic combination of salty nut butter and sweet creaminess but wants something a bit more refreshing. Whether you are prepping snacks for a busy week or looking for a dessert that children and adults alike will adore, this recipe is a total game-changer.
In this guide, we are going to dive deep into everything you need to know about crafting these treats. We will explore where the inspiration for this snack comes from, why it works so well from a nutritional standpoint, and, of course, the exact steps you need to take to ensure they come out perfectly every single time.
What are Frozen Yogurt Peanut Butter Cups?
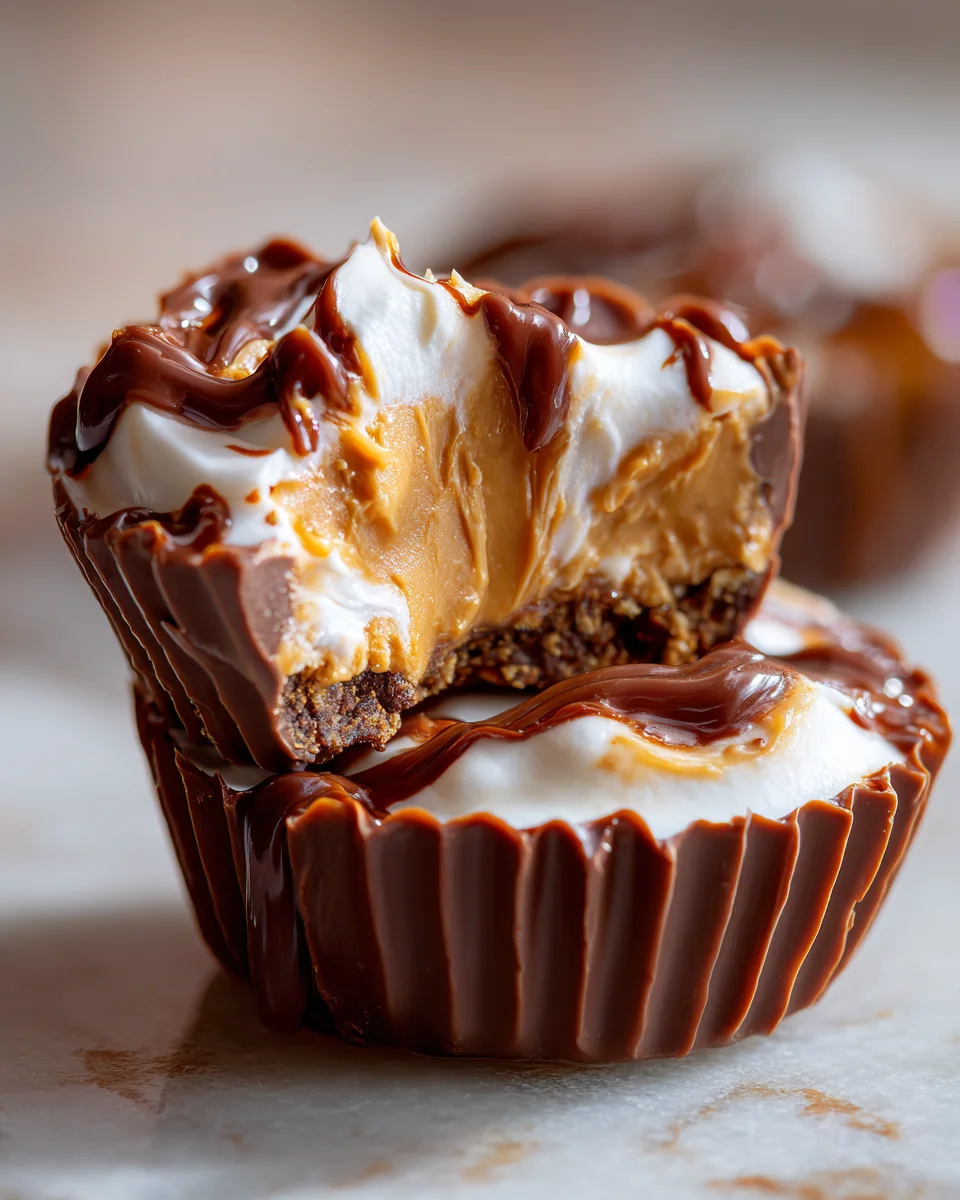
At their core, Frozen Yogurt Peanut Butter Cups are a chilled, bite-sized dessert that reimagines the traditional chocolate peanut butter candy. Instead of a heavy chocolate shell and a sugary interior, these treats utilize the natural tang and thick consistency of Greek yogurt combined with the rich, earthy flavors of high-quality peanut butter.
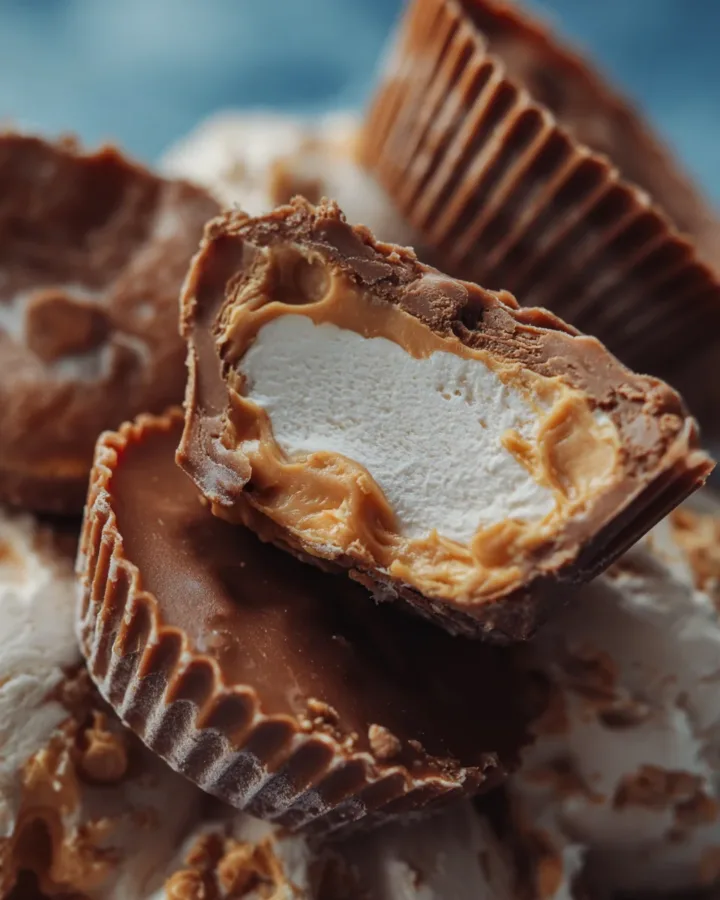
The result is a layered snack that offers a variety of textures. When you take a bite, you first hit the firm, icy layer of sweetened yogurt, followed quickly by the dense, velvety center of peanut butter. It is a satisfying experience that feels indulgent while remaining surprisingly light. Because they are kept in the freezer, they provide a cooling sensation that makes them particularly popular during the warmer months of the year.
The Origin of This Refreshing Treat
While it is hard to pinpoint the exact moment the first person decided to freeze yogurt and peanut butter together, the rise of Frozen Yogurt Peanut Butter Cups can be traced back to the broader movement of healthy snack hacking. For decades, frozen yogurt has been a popular alternative to ice cream, gaining massive popularity in the nineteen eighties and nineties.
As home cooks began looking for ways to recreate their favorite commercial candies using whole-food ingredients, the “cup” format became a natural choice. By utilizing muffin liners and a freezer, people discovered they could mimic the shape of famous peanut butter cups while controlling every ingredient that went into them. This recipe is a testament to modern culinary creativity—taking simple pantry staples and turning them into something that feels like a gourmet confection.
Why You Will Love This Recipe
There are a few reasons why Frozen Yogurt Peanut Butter Cups have become a viral sensation in the world of home snacking. First and foremost is the ease of preparation. You do not need an oven, a stand mixer, or any advanced culinary degrees to master this. If you can stir and spoon, you can make these.
Secondly, the balance of macronutrients is quite impressive. You get protein from the Greek yogurt and the peanut butter, healthy fats from the nuts, and just enough sweetness from the honey or maple syrup to satisfy a sugar craving. It is a functional snack that provides lasting energy rather than just a quick spike and a subsequent crash.
Ingredients You Will Need
To create these delicious Frozen Yogurt Peanut Butter Cups, you only need a handful of items. High-quality ingredients will yield the best flavor, so try to choose products that you already enjoy eating on their own.
The Base and Layers
-
One cup of Greek yogurt: You can use plain Greek yogurt if you prefer to control the sweetness yourself, or vanilla Greek yogurt for an extra layer of floral sweetness.
-
One half cup of peanut butter: This can be smooth or crunchy depending on your texture preference. Natural peanut butter works beautifully here as it pours easily.
-
Two to three tablespoons of honey or maple syrup: This is optional but highly recommended if you are using plain yogurt. It helps balance the natural acidity of the dairy.
-
One half teaspoon of vanilla extract: This adds depth to the yogurt layers and makes them taste more like a traditional dessert.
Equipment and Extras
-
Twelve mini muffin liners: Paper or silicone both work well.
-
Optional toppings: You might want to have some dark chocolate for a drizzle, some crushed peanuts for extra crunch, or even a pinch of sea salt to enhance the peanut flavor.
Step by Step Direction and Preparation Method: Frozen Yogurt Peanut Butter Cups
Creating these Frozen Yogurt Peanut Butter Cups requires a bit of patience because of the freezing time between layers, but the active work time is incredibly short. Follow these steps for the best results.
Preparing Your Workspace
Start by lining a mini muffin tray with your paper liners. If you are using silicone liners, you can simply place them on a flat baking sheet. Having everything organized before you start mixing will make the layering process much smoother.
Mixing the Yogurt Base
In a small mixing bowl, combine your Greek yogurt, your choice of sweetener (honey or maple syrup), and the vanilla extract. Use a whisk or a spoon to stir these together until the mixture is completely smooth. If your yogurt is particularly thick, you may need to stir a bit more vigorously to ensure the honey is evenly distributed.
The First Layer
Spoon a small amount of the yogurt mixture into the bottom of each muffin liner. You want them to be filled about one third of the way up. Once you have filled all twelve, gently tap the tray on the counter to level out the yogurt. Place the tray in the freezer for twenty minutes. This initial freeze is crucial; it creates a solid foundation so the peanut butter doesn’t just sink to the bottom.
Preparing and Adding the Peanut Butter
While the first layer is chilling, prepare your peanut butter. If your peanut butter is very stiff, you can warm it slightly in a microwave-safe bowl for a few seconds until it is easy to stir. You can also mix in a tiny bit of honey here if you like a sweeter center. Once the twenty minutes are up, remove the tray from the freezer and spoon a layer of peanut butter over the yogurt. Return the tray to the freezer for another twenty minutes.
The Final Layer and Setting
Finally, add the remaining yogurt mixture on top of the peanut butter layer, filling the liners to the top. This “sandwiches” the peanut butter in the middle. Smooth the tops with the back of a spoon. At this stage, you should place the tray back into the freezer for at least one hour. For the best consistency, letting them set for two to three hours is ideal.
Creative Variations to Try: Frozen Yogurt Peanut Butter Cups
One of the best things about Frozen Yogurt Peanut Butter Cups is how easy they are to customize. Once you have mastered the basic version, you can start experimenting with different flavors and textures.
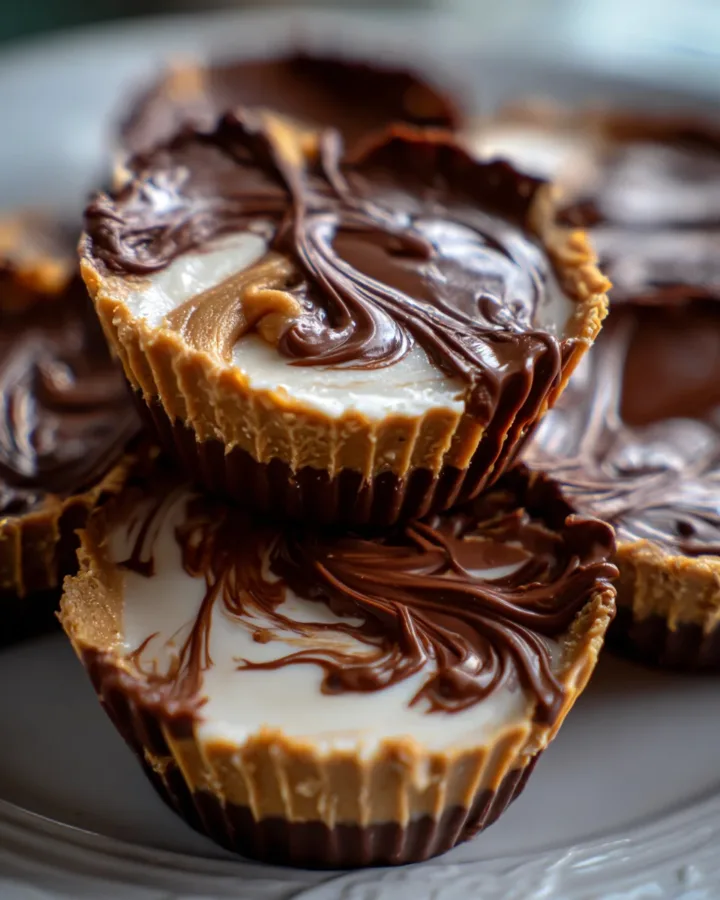
The Chocolate Swirl Version
If you are a true chocolate lover, try swirling a teaspoon of cocoa powder into your yogurt mixture. This turns the outer shell into a chocolate yogurt, making the final product taste remarkably like a frozen candy bar. You can also add mini chocolate chips into the yogurt layers for a bit of crunch.
Different Nut Butters
Not a fan of peanuts? No problem. You can substitute the peanut butter with almond butter, cashew butter, or even sunflower seed butter for a nut-free version. Each different butter will change the flavor profile slightly, with almond butter offering a more subtle, toasted nut flavor.
Fruit Infusions
For a “peanut butter and jelly” vibe, you can add a small teaspoon of raspberry or strawberry jam on top of the peanut butter layer before adding the final yogurt top. You could also press a single fresh blueberry or a slice of strawberry into the top layer of yogurt before freezing.
Tips for Success: Frozen Yogurt Peanut Butter Cups
To ensure your Frozen Yogurt Peanut Butter Cups come out looking and tasting like they were made by a professional, keep these tips in mind.
First, consider using silicone muffin cups. While paper liners work, the frozen yogurt can sometimes stick to the paper as it thaws. Silicone cups allow you to pop the treats out perfectly every time without any tearing.
Second, do not rush the freezing process. It is tempting to layer everything at once, but the distinct layers are what make this snack so satisfying. If you don’t freeze the bottom layer first, the peanut butter will mix with the yogurt, and you will lose that surprise center.
Finally, think about the salt. If you are using unsalted peanut butter, a tiny pinch of sea salt on top of the final yogurt layer before freezing can make the flavors pop. Salt acts as a flavor enhancer for both the chocolate (if you use it) and the peanut butter.
Frequently Asked Questions: Frozen Yogurt Peanut Butter Cups
How long do these keep in the freezer?
You can store your Frozen Yogurt Peanut Butter Cups in an airtight container in the freezer for up to two weeks. For the best flavor and texture, try to consume them within the first seven days. If they stay in there too long, they may start to develop ice crystals.
Can I make Frozen Yogurt Peanut Butter Cups dairy-free?
Absolutely. You can substitute the Greek yogurt with a thick coconut-based yogurt or almond-based yogurt. Just make sure the plant-based yogurt you choose is thick enough to hold its shape; thin yogurts may result in a more “icy” and less “creamy” texture.
Why is my yogurt layer too hard?
Frozen yogurt has a higher water content than ice cream, so it will naturally be firmer when frozen. If you find them too hard to bite into, let them sit at room temperature for about three to five minutes before eating. This allows the yogurt to soften just enough to be creamy.
Is this Frozen Yogurt Peanut Butter Cups suitable for children?
Yes, these are a fantastic snack for kids. They are easy to hold, refreshing, and contain much less sugar than traditional store-bought ice cream novelties. Just be sure to check for any nut allergies if you are serving them to a group.
Conclusion: Frozen Yogurt Peanut Butter Cups
Mastering the art of the Frozen Yogurt Peanut Butter Cups is a simple way to upgrade your snacking game. By combining the tangy richness of Greek yogurt with the savory depth of peanut butter, you create a treat that is as balanced as it is delicious. This recipe proves that you do not need complicated techniques or a long list of ingredients to produce something truly special. Whether you follow the classic instructions or branch out with your own creative variations, these cups are sure to become a staple in your freezer. They are the perfect example of how thoughtful layering and simple ingredients can result in a high-quality, homemade snack that surpasses anything you could find in a box.
Print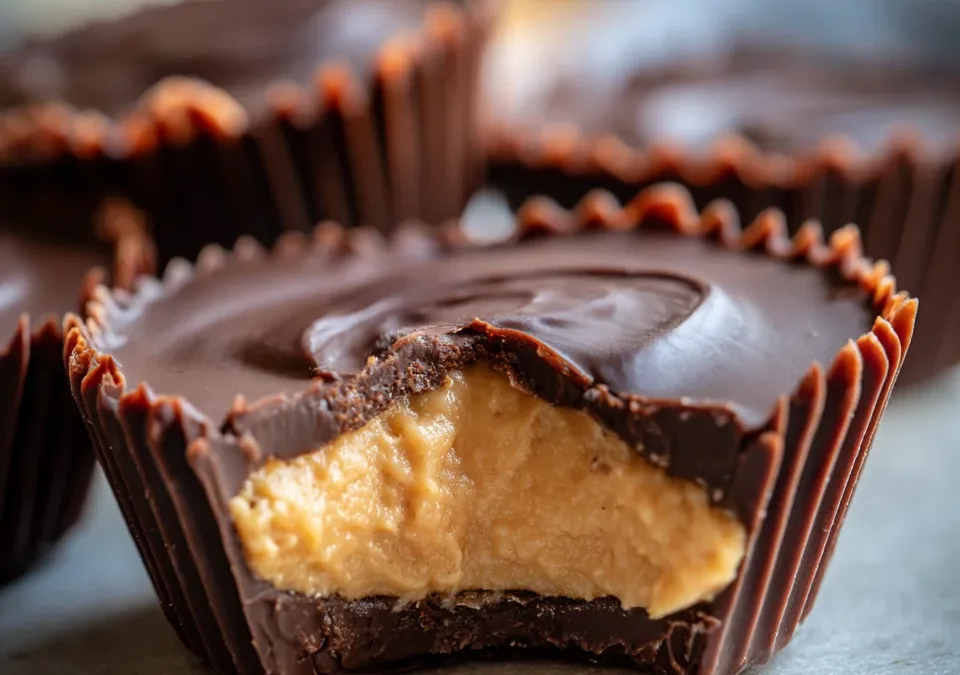
The Ultimate Guide to Making Healthy Frozen Yogurt Peanut Butter Cups
- Total Time: 70 minutes (including freezing)
- Yield: 12 cups 1x
Description
While it is hard to pinpoint the exact moment the first person decided to freeze yogurt and peanut butter together, the rise of Frozen Yogurt Peanut Butter Cups can be traced back to the broader movement of healthy snack hacking. For decades, frozen yogurt has been a popular alternative to ice cream, gaining massive popularity in the nineteen eighties and nineties.
Ingredients
- 1 cup Greek yogurt (plain or vanilla)
- 1/2 cup peanut butter (smooth or crunchy)
- 2–3 tbsp honey or maple syrup (optional, for sweetness)
- 1/2 tsp vanilla extract
- 12 mini muffin liners
- Optional toppings: dark chocolate drizzle, crushed peanuts, or a pinch of sea salt
Instructions
- Line a mini muffin tray with paper liners.
- In a small bowl, mix Greek yogurt, honey, and vanilla extract until smooth.
- Spoon a layer of yogurt into each muffin liner (about 1/3 full). Freeze for 20 minutes.
- In another bowl, mix peanut butter with a little honey if desired. Spoon a layer of peanut butter on top of the frozen yogurt layer. Freeze for another 20 minutes.
- Add a final layer of yogurt on top to cover the peanut butter. Freeze for at least 1 hour, until fully set.
- Optional: drizzle melted chocolate on top or sprinkle crushed peanuts before serving.
Notes
Easy to make, fun to eat, and totally addictive—your freezer just got a whole lot happier!
- Prep Time: 10 minutes
- Cook Time: 0 minutes
- Category: Dessert
- Method: No-bake
- Cuisine: American
Nutrition
- Serving Size: 1 cup
- Calories: 120
Keywords: Healthy Yogurt PB Bites, Frozen Greek Yogurt Snacks, Homemade Yogurt Nut Butter Cups, Low Sugar Frozen Treats