There is something absolutely magical about a dessert that goes straight from the oven to the center of your dining table, still sizzling gently around the edges. If you are looking to elevate your dessert game and treat your loved ones to something spectacular, a Gooey Chocolate Chunk Skillet Cookie is the ultimate answer. This is not just your ordinary sweet treat; it is a giant, shareable masterpiece that perfectly balances crispy, buttery edges with a deeply molten, decadent center. Gathering around a warm cast iron pan with a few spoons and a massive scoop of melting vanilla ice cream creates an unforgettable dining experience that beats individual cookies every single time.
What is a Gooey Chocolate Chunk Skillet Cookie?
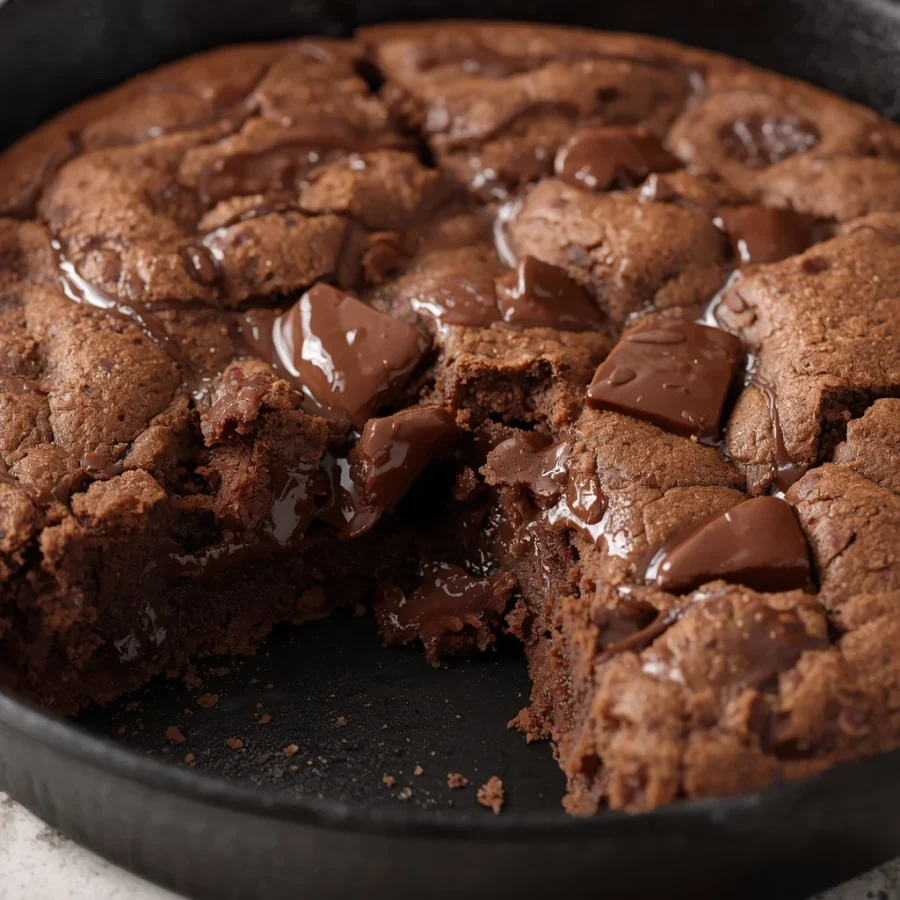
To put it simply, this dessert is a giant, deep-dish version of your absolute favorite chocolate chip cookie, baked directly in a cast-iron skillet. Instead of portioning out small mounds of dough onto a flat baking sheet, the entire batch of dough is pressed evenly into a single pan. This specific baking method alters the entire thermodynamics of the baking process, meaning the cookie bakes from the outside inward. The result is an amazing hybrid dessert that offers the crispy, golden perimeters of a classic baked good alongside an ultra-soft center that resembles a rich brownie or a warm pudding.
The star of this show is undoubtedly the use of large chocolate chunks rather than small, standard baking chips. While standard baking chips are specifically formulated to hold their shape under high heat, large hand-cut chunks melt completely into luxurious, fluid pools of cacao throughout the dough. When you slice or scoop into the warm dessert, these liquid pockets merge with the tender, buttery crumb, creating an incredibly rich mouthfeel that makes standard cookies seem ordinary.
The Power of Cast Iron Baking
Using heavy iron cookware completely changes how heat interacts with your sweet dough. Standard aluminum sheets cause cookies to cook rapidly and uniformly from both the top and bottom, drying out the moisture quickly. Iron, however, acts as an intense heat reservoir that retains energy and transfers it gently into the bottom and sides of the dough.
This slow, deep heat transfer allows the butter and sugars to caramelize intensely against the metal surface, creating a beautiful, crunchy crust. Meanwhile, the top of the dessert remains protected from excessive heat, allowing the interior to stay perfectly underbaked, rich, and wonderfully soft.
Why It Surpasses Individual Baked Goods
Beyond the incredible texture, a large-format dessert brings a sense of joy and community to your table that small individual treats simply cannot replicate. Passing a hot skillet around with a few spoons creates an interactive, fun experience for family and friends.
Furthermore, preparing a single large cookie saves you a tremendous amount of time and effort in the kitchen. There is no need to roll multiple individual balls of dough, line several large baking pans, or monitor consecutive batches in the oven. It is a low-effort, high-reward process that looks effortlessly rustic and stunningly beautiful.
Origin of gooey chocolate chunk skillet cookie
The fascinating concept of baking sweet cookie dough inside a heavy frying pan can be traced back to American home bakers who wanted a faster, more communal way to enjoy classic comfort food. While the exact inventor remains a mystery of home-culinary history, the technique skyrocketed in popularity across American restaurants during the late twentieth century. It was often marketed under the famous, playful name of a pizookie, which is a clever portmanteau combining the words pizza and cookie due to its large round shape and sliced presentation.
Historically, cast-iron cookware was the absolute standard in early American kitchens, prized for its extreme durability and versatility over open flames and wood stoves. Over time, creative home cooks discovered that these sturdy heirloom pans were just as brilliant for baking sweet cakes, cobblers, and giant biscuits as they were for searing savory meats. Bringing the skillet directly to the table pays homage to those traditional, rustic American cooking roots while celebrating a modern love for indulgent, melted chocolate desserts.
From Campfire Cooking to Modern Restaurants
Long before it became a trendy dessert highlighted on social media platforms, skillet baking was a necessity for outdoor trail cooks and campers. Preparing a single large dessert over hot embers in a covered iron pot was infinitely more practical than attempting to bake delicate individual items.
As commercial restaurant chefs searched for ways to reinvent classic comfort foods for modern menus, they adopted this rustic campfire method. They realized that serving a giant, hot cookie directly in its cooking vessel looked spectacular and kept the food hot until the very last bite.
The Evolution of the Cookie Structure
As the recipe moved from traditional baking sheets to deep-dish iron pans, the actual structure of the dough evolved significantly. Early versions were often dry because bakers used standard cookie recipes without modifying the baking times.
Modern culinary development revealed that adjusting the ratio of sugars and slightly underbaking the center was the secret to success. This modern adaptation ensured that the dessert would remain completely molten and spoonable, cementing its status as an iconic dessert worldwide.
Essential Ingredients and Precise Quantities
Achieving the perfect balance of a crunchy rim and a rich, fluid core requires using high-quality components measured with care. Every element in this recipe plays a crucial role in creating the ideal texture and flavor profile.
The Liquid and Sugar Foundation
-
Unsalted Butter: You will need one-half cup of unsalted butter, which must be completely melted and slightly cooled before mixing. Melting the fat coats the flour proteins thoroughly, which limits gluten development and ensures an incredibly tender, dense texture rather than a light, cake-like crumb.
-
Brown Sugar: Pack down one-half cup of rich brown sugar. The natural molasses present in brown sugar adds a deep caramel undertone and introduces essential moisture that keeps the center of the dessert incredibly soft and chewy.
-
Granulated White Sugar: Use one-quarter cup of standard granulated sugar. White sugar is necessary to encourage proper browning and crispiness around the edges of the pan as it bakes.
The Binding and Leavening Agents
-
Large Egg plus One Egg Yolk: Incorporate one large whole egg along with one additional large egg yolk, ensuring both are at room temperature. The extra yolk infuses the mixture with additional fats and natural lecithin, which yields a highly luxurious, velvety consistency in the underbaked center.
-
Vanilla Extract: Add one teaspoon of pure vanilla extract to elevate the flavor profile, perfectly complementing the sweetness of the sugars and the bitterness of the dark cacao chunks.
-
All-Purpose Flour: Stir in one and one-quarter cups of standard all-purpose flour. This specific amount provides just enough structural stability to hold the melted chocolate without making the dough heavy or dry.
-
Baking Soda: Measure out one-half teaspoon of baking soda to help the dough rise slightly, keeping it tender and preventing it from becoming overly dense during the baking process.
-
Salt: Use one-half teaspoon of fine salt to balance the intense sweetness and enhance all the complex flavors present in the butter and sugar.
The Chocolate Mix-Ins and Finishes
-
Chocolate Chunks: Prepare one cup of semi-sweet or dark chocolate chunks. Cutting a high-quality chocolate bar into uneven pieces creates large, melting pools of cacao that spread beautifully through the warm dough.
-
Chocolate Chips: You can optionally include one-half cup of traditional chocolate chips to create extra pockets of gooey texture scattered throughout the dessert.
-
Flaky Sea Salt: Keep a small handful of premium flaky sea salt nearby to sprinkle over the top immediately after baking, adding a professional finish and a crisp counterpoint to the rich sweetness.
Step by Step Direction and Preparation Method: gooey chocolate chunk skillet cookie
Follow these detailed, easy instructions to create a flawless dessert that will impress everyone at your table.
Step One: Preheat the Oven and Prepare Your Pan
Begin by preheating your kitchen oven to three hundred and fifty degrees Fahrenheit. If your oven uses the metric system, set the temperature dial to one hundred and seventy-five degrees Celsius. While the heating element is warming up, take a small piece of butter or a light mist of neutral cooking spray and grease the interior of an eight to ten inch cast-iron skillet. Make sure to coat both the flat bottom and the inside edges thoroughly to prevent the caramelizing sugars from sticking to the metal during baking.
Step Two: Emulsify the Wet Ingredients
In a large glass bowl, pour in your melted unsalted butter, the packed brown sugar, and the granulated white sugar. Take a sturdy hand whisk and beat the mixture vigorously until all the sugar crystals dissolve into the fat, leaving you with a completely smooth, glossy liquid. Once the sugar mixture is uniform, crack in your whole room-temperature egg, add the extra egg yolk, and pour in the pure vanilla extract. Whisk the entire mixture again for about one full minute until the liquid becomes slightly pale and thickened.
Step Three: Introduce the Dry Ingredients Gently
Place a fine-mesh strainer over your bowl of wet ingredients, and add your all-purpose flour, baking soda, and fine salt. Sift the dry components directly into the wet emulsion to eliminate any stubborn flour clumps. Switch from your whisk to a flexible silicone spatula or a large wooden spoon, and begin stirring the ingredients together using a gentle folding motion. Stop mixing the exact moment you no longer see any dry, powdery flour streaks remaining in the bowl, as overmixing will activate the gluten and make your dessert tough instead of tender.
Step Four: Fold in the Cacao Pieces
Pour your dark chocolate chunks and optional sweet chips directly into the thick dough mixture. Using your spatula, gently fold the pieces into the batter a few times until they are distributed evenly throughout the mixture. Reserve a tiny handful of chocolate pieces to press into the surface later for a professional, bakery-ready presentation.
Step Five: Shape and Bake the Masterpiece
Scrape the thick dough out of your mixing bowl and place it directly into the center of your prepared iron pan. Use the back of a clean spoon or your fingertips to press the dough outward into an even layer that reaches all the edges of the pan. Press your reserved chocolate pieces firmly onto the top surface of the dough, then place the pan onto the center rack of your preheated oven.
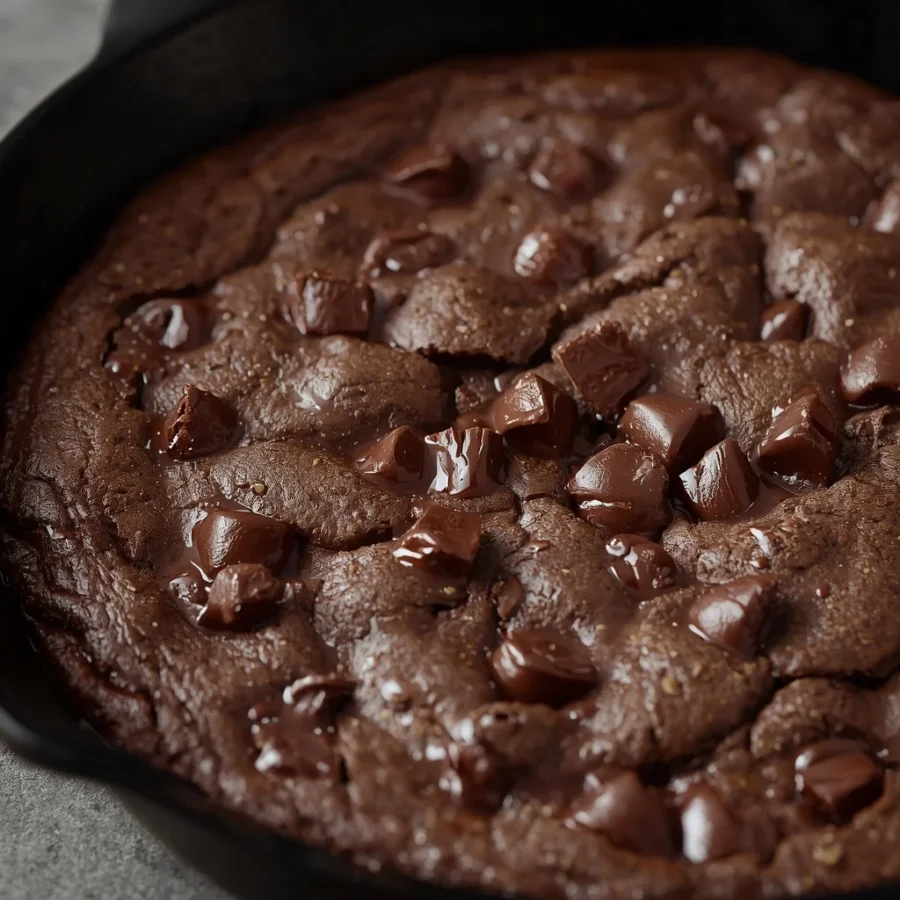
Bake the dessert for exactly twenty to twenty-five minutes. Keep a very close eye on the oven during the final few minutes of baking; you want the outer edges to turn a beautiful golden brown and pull away slightly from the sides of the metal, while the center should still look soft, delicate, and slightly underbaked.
Step Six: The Essential Cooling and Finishing Process
Carefully remove the hot iron pan from your oven using thick, heat-resistant oven mitts, and place it safely onto a heatproof trivet or wire cooling rack. Immediately take a pinch of your premium flaky sea salt and scatter it evenly across the hot, glistening surface of the melted chocolate. Allow the dessert to rest undisturbed inside the pan for ten to fifteen minutes before anyone takes a bite. This resting period is absolutely critical, as it gives the molten starches and boiling sugars just enough time to settle and firm up, ensuring the cookie is stable enough to scoop while remaining spectacularly soft.
Step Seven: Serve Warm for Peak Enjoyment
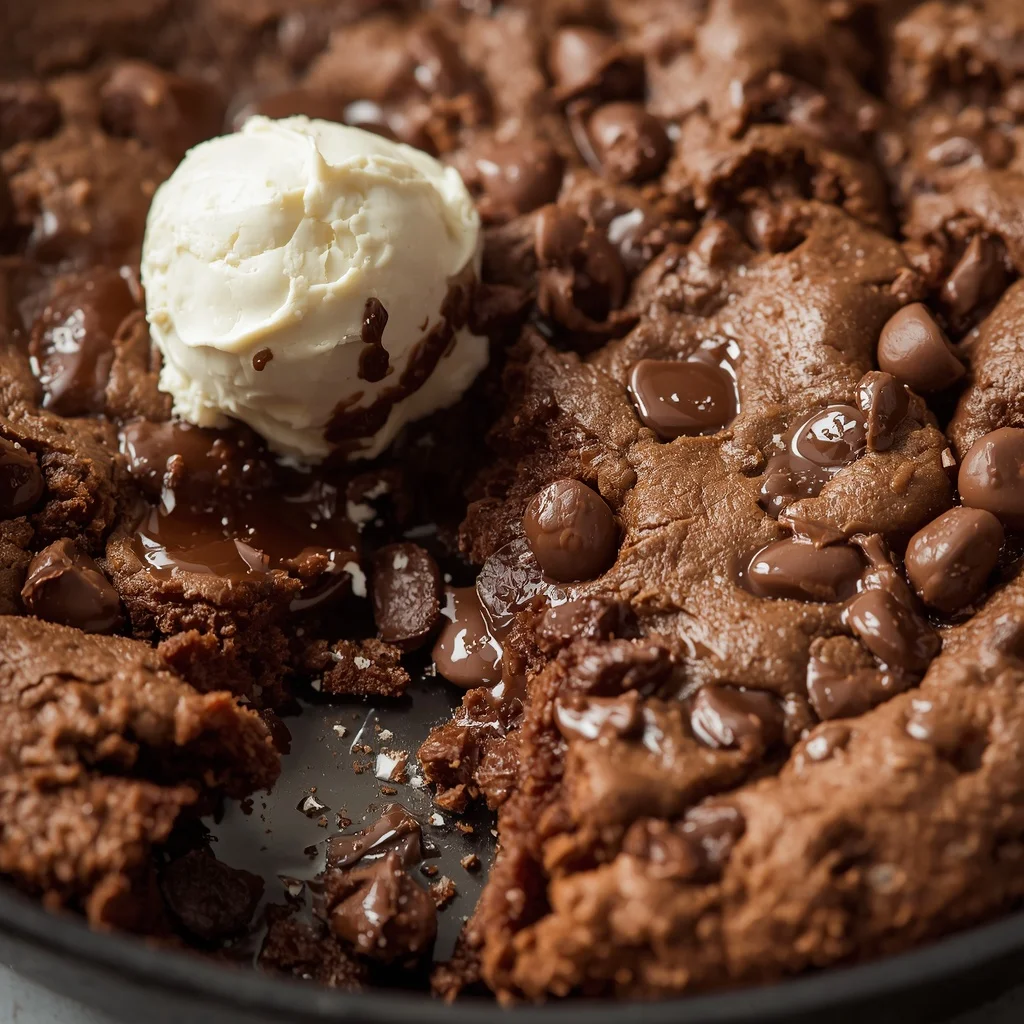
Your masterpiece is now ready to be enjoyed by your eager guests. For the ultimate dessert experience, place a massive, generous scoop of premium vanilla bean ice cream directly onto the center of the warm cookie. The intense residual heat from the iron pan will slowly melt the cold cream, creating a luxurious sauce that flows into the warm chocolate pockets. Hand out several spoons to your family and friends, allowing everyone to dig in straight from the pan, or use a sharp knife to cut neat, triangular wedges for a more traditional plated presentation.
Delicious Recipe Variations to Try: gooey chocolate chunk skillet cookie
Once you have mastered the classic version of this comforting dessert, you can easily experiment with unique ingredients to create a variety of flavor profiles.
The Decadent Nutella and Peanut Butter Swirl
For an incredibly rich twist, you can introduce smooth nut butters directly into the center of your cookie dough before it goes into the oven. Press half of your prepared cookie dough into the bottom of the iron pan to create a base layer. Take one-third cup of creamy peanut butter or rich chocolate-hazelnut spread, warm it slightly until fluid, and pour it evenly over the bottom layer of dough. Top with the remaining cookie dough, sealing the edges carefully to trap the spread inside. As it bakes, the filling transforms into a warm, gooey center that surprises everyone.
The Sweet and Salty Pretzel Caramel Twist
If you love a distinct sweet and savory contrast, consider adding crunchy elements and rich caramel to your dough mixture. Reduce your chocolate chunk measurement by half, and fill the remaining space with one-half cup of roughly chopped salty pretzels and one-half cup of soft caramel baking bits. Fold these components directly into the flour mixture before pressing the dough into your pan. The caramels melt into chewy pockets during baking, while the pretzels maintain a delightful crunch that balances the sweetness.
The Ultimate Triple Chocolate Explosion
True chocolate lovers can transform this recipe into a rich, dark masterpiece by altering the flour base. Replace one-quarter cup of your all-purpose flour with an equal amount of premium Dutch-processed cocoa powder, sifting it into the wet ingredients along with the baking soda. Fold a combination of white chocolate chips, milk chocolate discs, and bittersweet cacao chunks into the dark dough. This variation delivers an intense flavor experience that pairs beautifully with a cold glass of milk.
Frequently Asked Questions: gooey chocolate chunk skillet cookie
Can I make gooey chocolate chunk skillet cookie ahead of time?
Yes, you can easily prepare the cookie dough up to forty-eight hours in advance. Press the raw dough firmly into your greased iron pan, cover the top tightly with plastic wrap, and store it inside your refrigerator until you are ready to bake. When you want to serve the dessert, remove the plastic wrap and place the cold pan directly into your preheated oven, adding three to five minutes to the total baking time to compensate for the cold pan.
What can I use if I do not own a cast-iron skillet?
If you do not own a traditional iron pan, you can easily bake this recipe inside an eight-inch round cake pan, a ceramic pie dish, or a small tart pan. Keep in mind that these alternative materials do not hold heat quite as efficiently as heavy metal, so your edges might not turn out as crunchy, and you will need to monitor the baking time carefully to avoid overcooking the center.
How should I store and reheat any leftovers?
If you happen to have any leftovers, allow the cookie to cool completely before transferring the pieces into an airtight container. Store the container at room temperature for up to three days. To recreate that fresh-from-the-oven experience, place an individual portion on a microwave-safe plate and heat it for fifteen to twenty seconds until the chocolate melts again.
Why did my skillet cookie turn out dry and cake-like?
A dry, cake-like texture is usually the result of overmixing the dough or baking the dessert for too long. Mixing the flour too vigorously develops the gluten network, which creates a tough, bread-like structure. Additionally, remember that the heavy iron pan continues to cook the dough even after it is removed from the oven, so it is vital to take the cookie out while the center still appears soft and underbaked.
Conclusion: gooey chocolate chunk skillet cookie
Baking a Gooey Chocolate Chunk Skillet Cookie is an incredibly simple yet rewarding way to bring joy to your dessert table. By combining basic pantry staples with a heavy iron pan and plenty of rich chocolate, you create a beautiful, rustic treat that consistently outperforms traditional cookies. The contrast of crunchy, caramelized outer edges with a warm, molten center offers a wonderful combination of textures that makes every single bite a true pleasure. Gather your friends, prepare your ingredients, and enjoy the process of sharing a wonderful homemade dessert straight from the skillet.
Print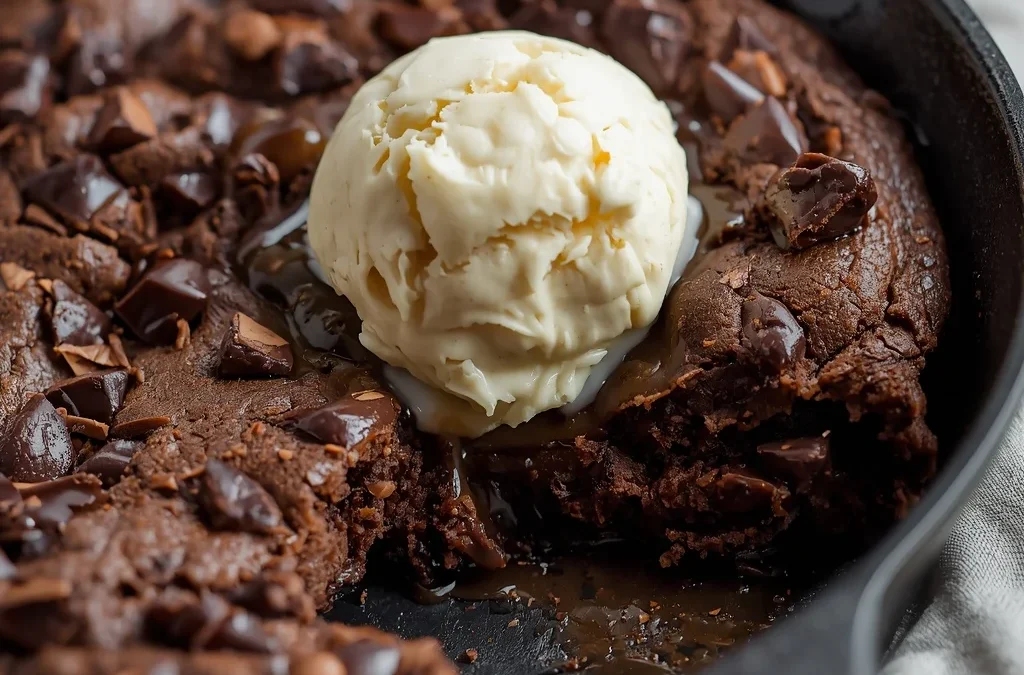
The Ultimate Comfort Dessert: Gooey Chocolate Chunk Skillet Cookie
- Total Time: 40 minutes
- Yield: 6–8 servings 1x
- Diet: Vegetarian
Description
To put it simply, this dessert is a giant, deep-dish version of your absolute favorite chocolate chip cookie, baked directly in a cast-iron skillet. Instead of portioning out small mounds of dough onto a flat baking sheet, the entire batch of dough is pressed evenly into a single pan. This specific baking method alters the entire thermodynamics of the baking process, meaning the cookie bakes from the outside inward. The result is an amazing hybrid dessert that offers the crispy, golden perimeters of a classic baked good alongside an ultra-soft center that resembles a rich brownie or a warm pudding.
Ingredients
- ½ cup (113 g) unsalted butter, melted
- ½ cup brown sugar, packed
- ¼ cup granulated sugar
- 1 large egg + 1 egg yolk
- 1 teaspoon vanilla extract
- 1¼ cups all-purpose flour
- ½ teaspoon baking soda
- ½ teaspoon salt
- 1 cup chocolate chunks (semi-sweet or dark)
- ½ cup chocolate chips (optional for extra gooey pockets)
- Flaky sea salt (for topping, optional)
Instructions
Preheat oven to 350°F (175°C). Lightly grease a cast-iron skillet (8–10 inch).
In a bowl, whisk together melted butter, brown sugar, and granulated sugar until smooth.
Add egg, egg yolk, and vanilla. Mix well.
Stir in flour, baking soda, and salt until just combined. Do not overmix.
Gently fold in chocolate chunks (and chips if using).
Spread dough evenly into skillet.
Bake for 20–25 minutes, until edges are golden but center is still soft and slightly underbaked.
Sprinkle with flaky sea salt. Let rest for 10–15 minutes before serving.
Serve warm directly from skillet—best with a scoop of vanilla ice cream.
Notes
Store leftovers covered at room temperature for up to 2 days. Reheat slightly in the microwave or oven to bring back the gooey texture.
- Prep Time: 15 minutes
- Cook Time: 20–25 minutes
- Category: Dessert
- Method: Baking
- Cuisine: American
Nutrition
- Serving Size: 1 slice
- Calories: Approximately 420 kcal