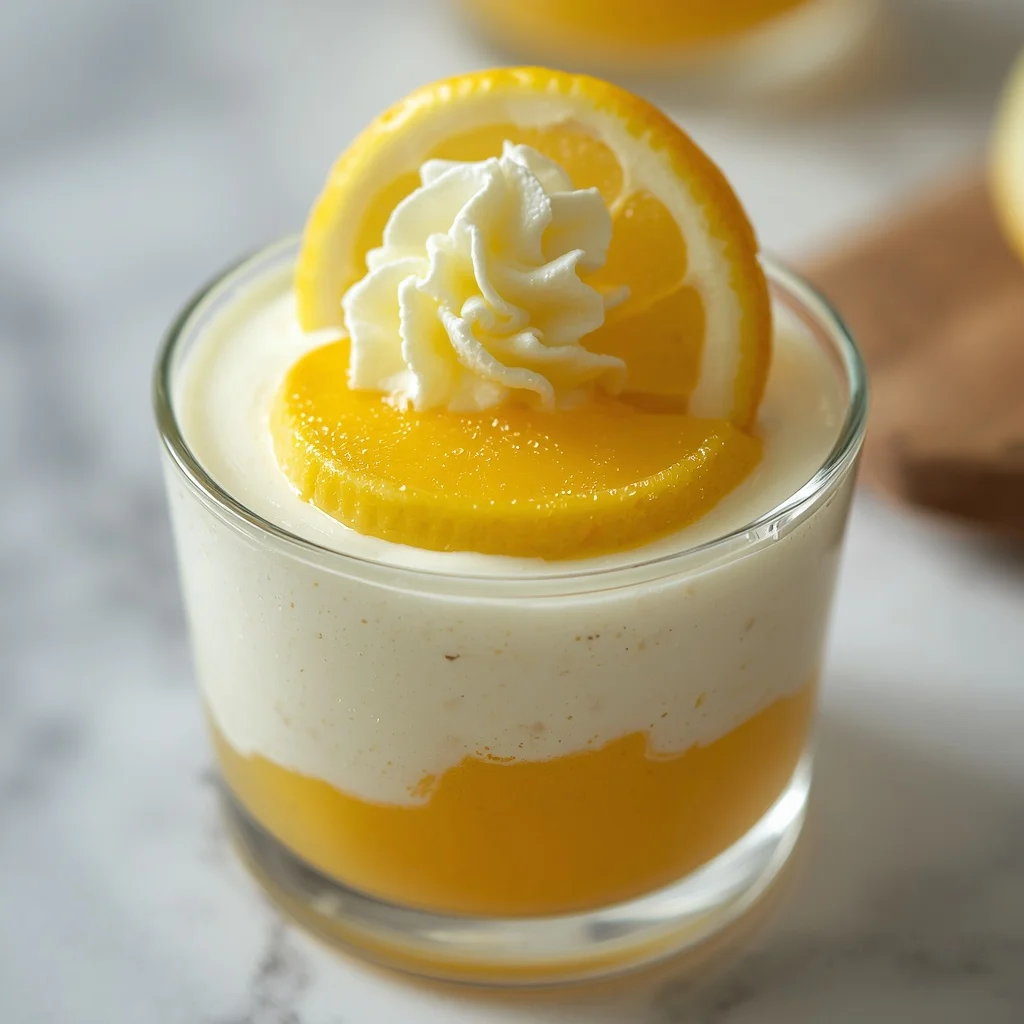
There is something completely magical about a layered treat that manages to be simultaneously rich, light, creamy, and vibrantly tart. If you are searching for the ultimate crowd-pleasing treat that looks spectacular but requires very little effort in the kitchen, this Lemon Lush Dessert is the exact recipe you need to add to your collection. This classic sweet treat features four distinct layers that come together to create a wonderful balance of textures and flavors. Imagine a nutty, buttery shortbread base topped with a velvety layer of sweetened cream cheese, followed by a thick layer of tangy citrus pudding, and finished with a cloud of fluffy whipped topping. It is a absolute showstopper that feels nostalgic yet incredibly refreshing.
When it comes to feeding a crowd at a gathering, family reunion, or backyard dinner party, layered pans are always a massive hit. This specific creation stands out because it provides an incredible contrast between the crisp, baked base and the silky, no-bake elements stacked on top of it. It is the type of treat where one slice is never quite enough, as each bite delivers a wonderful combination of rich dairy and bright, sunny citrus.
What is Lemon Lush Dessert?
This creation is a premium, four-layer chilled treat that belongs to a beloved family of traditional American pan desserts. It is constructed systematically from the bottom up, ensuring that every spoonful offers a complete sensory experience. The foundation is a simple, baked cookie base that incorporates chopped nuts for an earthy depth and a satisfying crunch.
Once that foundation cools down completely, three luscious no-bake layers are spread carefully across the surface:
-
The Cream Base: A smooth combination of softened cream cheese, powdered sugar, and a portion of whipped cream that tastes remarkably like a premium no-bake cheesecake.
-
The Citrus Middle: A thick, vibrant layer made from instant citrus pudding and cold milk, providing the signature bright tang that gives the dish its name.
-
The Billowy Top: A clean layer of whipped topping adorned with fresh citrus peel and thin fruit slices, adding a light airiness to balance out the richness below.
By building this dish in a standard rectangular baking dish, it becomes incredibly easy to slice into neat, beautiful squares. It is a highly practical choice for home cooks because it can be made well in advance, giving the layers plenty of time to set and blend harmoniously in the refrigerator before your guests arrive.
Origin of Lemon Lush Dessert
To discover where this layered masterpiece began, we have to look back at the mid-twentieth century, specifically the era of mid-century American home cooking. During the nineteen sixties and nineteen seventies, food companies began popularizing convenience items like instant pudding mixes and frozen whipped toppings. Home cooks quickly realized that these reliable, innovative ingredients could be combined with traditional baking techniques to create elaborate, multi-layered desserts without spending all day standing next to a hot oven.
These types of creations became known by many different names across various regions, including citrus delight, dream pan, or layered lush. They became absolute staples at church potlucks, community picnics, and holiday dinners because they were highly portable, consistently delicious, and easily customized. Our modern version honors that wonderful tradition of accessible home hospitality while emphasizing quality components, such as utilizing real unsalted butter and fresh citrus zest, to ensure the flavors taste incredibly bright and authentic.
Ingredients with Quantity: Lemon Lush Dessert
Achieving the perfect structural integrity for a layered dessert requires utilizing specific component amounts. Before you begin assembling your layers, make sure you have gathered these exact items.
For the Baked Base
-
One cup all-purpose flour
-
Half cup unsalted butter, melted completely
-
Half cup chopped pecans, which are optional but highly recommended for texture
-
Quarter cup granulated sugar
Cream Cheese Layer
-
Eight ounces cream cheese, brought to room temperature so it is completely softened
-
One cup powdered sugar
-
One teaspoon vanilla extract
-
One cup whipped topping
For the Citrus Pudding Layer
-
Two packages of instant lemon pudding mix, specifically the three and four tenths ounce boxes
-
Three cups cold milk
For the Decorative Topping
-
Two cups whipped topping
-
One tablespoon fresh lemon zest
-
Thin lemon slices for a beautiful presentation, which are optional
Step-by-Step Direction and Preparation Method: Lemon Lush Dessert
Creating this beautiful dessert is an enjoyable and straightforward process. Follow these detailed stages to ensure your layers are distinct, stable, and absolutely beautiful.
Stage One: Baking the Base
Begin by warming your kitchen oven to three hundred and fifty degrees Fahrenheit. While the appliance is heating up, take a standard nine by thirteen-inch baking dish and lightly grease the bottom and sides to prevent sticking.
In a medium-sized mixing bowl, combine the one cup of all-purpose flour, half cup of melted unsalted butter, quarter cup of granulated sugar, and half cup of chopped pecans. Use a fork or a sturdy spoon to mix the ingredients thoroughly until the mixture becomes uniform and crumbly. Dump these crumbs directly into your prepared baking dish. Using your clean fingertips or the flat bottom of a drinking glass, press the crumb mixture firmly and evenly into the bottom of the dish to form a solid crust. Place the dish into your preheated oven and bake for fifteen to eighteen minutes, or until the edges look lightly golden brown. Remove the dish from the oven and set it aside to cool down completely to room temperature.
Stage Two: Beating the Cream Layer
While your baked base is cooling down, you can begin preparing the subsequent layers. In a large mixing bowl, place your eight ounces of softened cream cheese. Use an electric hand mixer to beat the cheese on medium speed until it is completely smooth and free of lumps. Add the one cup of powdered sugar and one teaspoon of vanilla extract to the bowl. Beat the mixture again until it becomes light and fluffy.
Using a flexible silicone spatula, gently fold in one cup of whipped topping. You want to mix this gently so you do not deflate the air in the cream. Once the mixture is uniform, and your baked base is completely cool, drop the cream cheese mixture onto the crust in large dollops. Use an offset spatula to spread it carefully into a smooth, even layer that reaches all the way to the edges of the dish.
Stage Three: Whisking the Pudding
In a separate clean mixing bowl, empty both boxes of the instant citrus pudding mix. Pour in the three cups of cold milk. Use a wire whisk to stir the liquid vigorously for roughly two full minutes. As you whisk, you will notice the chemical reaction occurring as the liquid begins to thicken up into a dense, glossy pudding.
Do not let it sit too long in the bowl; while it is still slightly pourable, transfer it directly onto your cream cheese layer. Spread the pudding evenly over the white cream layer, creating a beautiful contrast of white and bright yellow colors.
Stage Four: Completing the Presentation
Take the remaining two cups of whipped topping and spread it gently over the citrus pudding layer. You want to use a very light hand here so you do not accidentally disturb or mix the pudding into the top layer. Smooth the surface out completely, or use the back of a spoon to create beautiful, artistic swirls.
Sprinkle your one tablespoon of fresh lemon zest evenly across the top of the white cream. If you want to make it look extra fancy, arrange thin slices of fresh fruit elegantly along the center or corners of the pan.
Stage Five: The Chilling Period
Place the completed baking dish directly into your refrigerator. The dessert needs to chill undisturbed for a minimum of four hours, though leaving it in the refrigerator overnight is highly recommended. This extended cold rest allows the gelatinous qualities of the pudding to set completely and permits the crust to soften just enough to make slicing effortless.
When you are ready to serve, use a long, sharp knife to cut the dessert into clean squares. Wipe the blade clean with a wet paper towel between every single cut to ensure your layers stay beautifully defined on the plate.
Variations: Lemon Lush Dessert
One of the absolute best things about this classic Lemon Lush Dessert is how incredibly adaptable it is to different culinary preferences, seasons, and occasions.
The Golden Cookie Crust
If you want to create a completely no-bake version of this dessert during hot summer days when turning on the oven sounds unbearable, you can easily modify the base. Swap out the flour, sugar, and pecans for crushed golden sandwich cookies or classic graham crackers. Mix two cups of these sweet crumbs with five tablespoons of melted unsalted butter, press the mixture firmly into your pan, and place it directly into the freezer for fifteen minutes to set before adding the cream cheese layer.
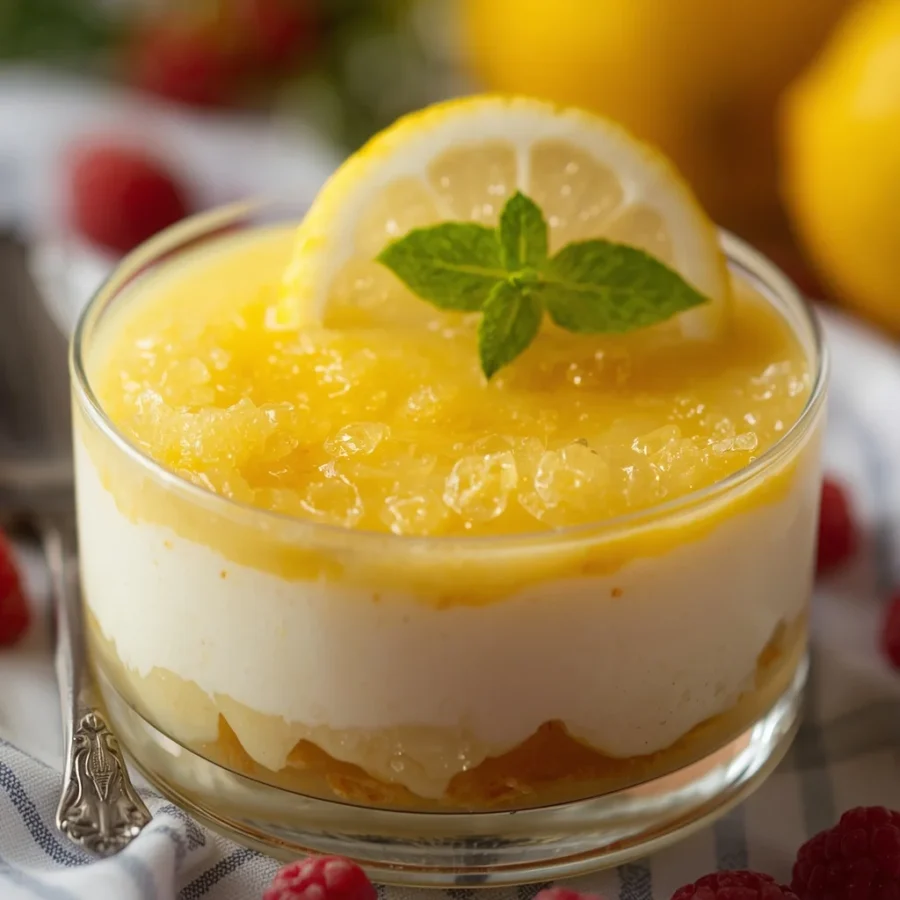
The Double Berry Fusion
For an extra layer of color and a lovely fruity complexity, you can introduce fresh berries into the assembly process. Scatter a cup of fresh red raspberries or sliced strawberries directly over the cream cheese layer before you pour the citrus pudding on top. The natural tartness of the fresh berries cuts through the sweet dairy beautifully and creates an incredible visual surprise when your guests cut into their square slices.
FAQs: Lemon Lush Dessert
Can I use cook-and-serve pudding instead of instant pudding?
No, it is highly recommended that you stick strictly to instant pudding mix for this specific recipe. Cook-and-serve pudding requires heat to activate its thickening agents and contains a different starch structure. If you pour hot pudding onto your cream cheese layer, it will melt the cheese instantly, causing the layers to run together into a messy puddle. Instant pudding sets up beautifully using only cold milk.
Why did my Lemon Lush Dessert layers turn out too soft or runny?
A runny texture is almost always caused by using too much liquid or choosing the wrong type of milk. This recipe purposefully calls for three cups of milk instead of the four cups usually required by two standard boxes of pudding. Reducing the liquid ensures the layer is extra sturdy. Additionally, using whole milk or two percent milk provides the necessary fat content to help the pudding set firmly. Avoid using skim milk or plant-based milks, as they often result in a softer set.
Can I freeze this dessert for a frozen summer treat?
Yes, this pan treat freezes exceptionally well. If you prefer a firmer, ice-cream-like consistency, you can place the fully assembled dish into the freezer for several hours. Just make sure to let it sit on your kitchen counter for roughly ten to fifteen minutes before you attempt to slice it, allowing the shortbread base to soften slightly so it does not crumble apart.
Conclusion: Lemon Lush Dessert
Bringing a wave of pure joy to your dining table does not require complex pastry skills or rare ingredients. This Lemon Lush Dessert showcases the absolute perfection that can be achieved when simple, accessible layers are combined thoughtfully. By anchoring a velvety cream cheese layer and a bright, tangy citrus pudding onto a crisp, buttery nut crust, you create an balance of flavors that easily surpasses any bakery purchase. It is a refreshing, reliable treat that stores beautifully in the refrigerator, making it the ultimate stress-free addition to your baking repertoire. Whether you are treating your immediate family on a warm evening or bringing a beautiful dish to a neighborhood gathering, this recipe guarantees a magnificent outcome that will have everyone asking for your secret method.
Print
Lemon Lush Dessert
- Total Time: 38 minutes (plus 4 hours chilling)
- Yield: 12 servings 1x
- Diet: Vegetarian
Description
This creation is a premium, four-layer chilled treat that belongs to a beloved family of traditional American pan desserts. It is constructed systematically from the bottom up, ensuring that every spoonful offers a complete sensory experience. The foundation is a simple, baked cookie base that incorporates chopped nuts for an earthy depth and a satisfying crunch.
Ingredients
For the Crust
- 1 cup all-purpose flour
- ½ cup unsalted butter, melted
- ½ cup chopped pecans (optional)
- ¼ cup granulated sugar
Cream Cheese Layer
- 8 ounces cream cheese, softened
- 1 cup powdered sugar
- 1 teaspoon vanilla extract
- 1 cup whipped topping
Lemon Pudding Layer
- 2 (3.4-ounce) boxes instant lemon pudding mix
- 3 cups cold milk
Topping
- 2 cups whipped topping
- 1 tablespoon lemon zest
- Thin lemon slices for garnish (optional)
Instructions
- Preheat the oven to 350°F (175°C). Lightly grease a 9×13-inch baking dish.
- In a medium bowl, combine the flour, melted butter, sugar, and chopped pecans until crumbly.
- Press the mixture evenly into the baking dish.
- Bake for 15–18 minutes, or until lightly golden. Cool completely.
- In a large bowl, beat the cream cheese until smooth. Add the powdered sugar and vanilla, then fold in 1 cup of whipped topping.
- Spread the cream cheese mixture evenly over the cooled crust.
- In another bowl, whisk together the lemon pudding mix and cold milk for about 2 minutes until thickened.
- Spread the lemon pudding evenly over the cream cheese layer.
- Top with the remaining whipped topping, smoothing it into an even layer.
- Sprinkle with fresh lemon zest and garnish with lemon slices if desired.
- Refrigerate for at least 4 hours, or overnight, before slicing and serving.
Notes
This Lemon Lush Dessert is an easy layered dessert that’s rich, creamy, and bursting with fresh lemon flavor. Whether you’re serving it at a summer barbecue, holiday dinner, or casual family meal, it’s a refreshing dessert that’s sure to impress.
- Prep Time: 20 minutes
- Cook Time: 18 minutes
- Category: Dessert
- Method: Baking
- Cuisine: American
Nutrition
- Serving Size: 1 slice
- Calories: 360 kcal