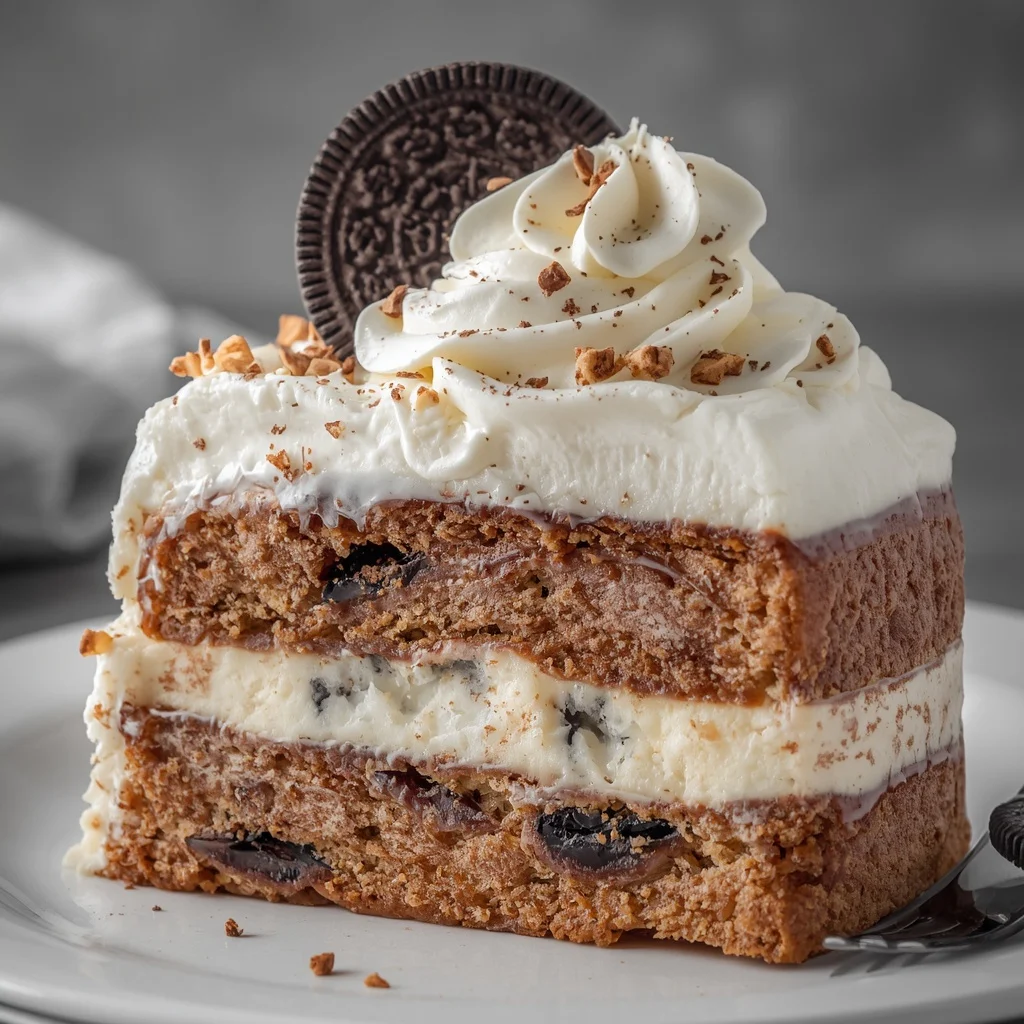
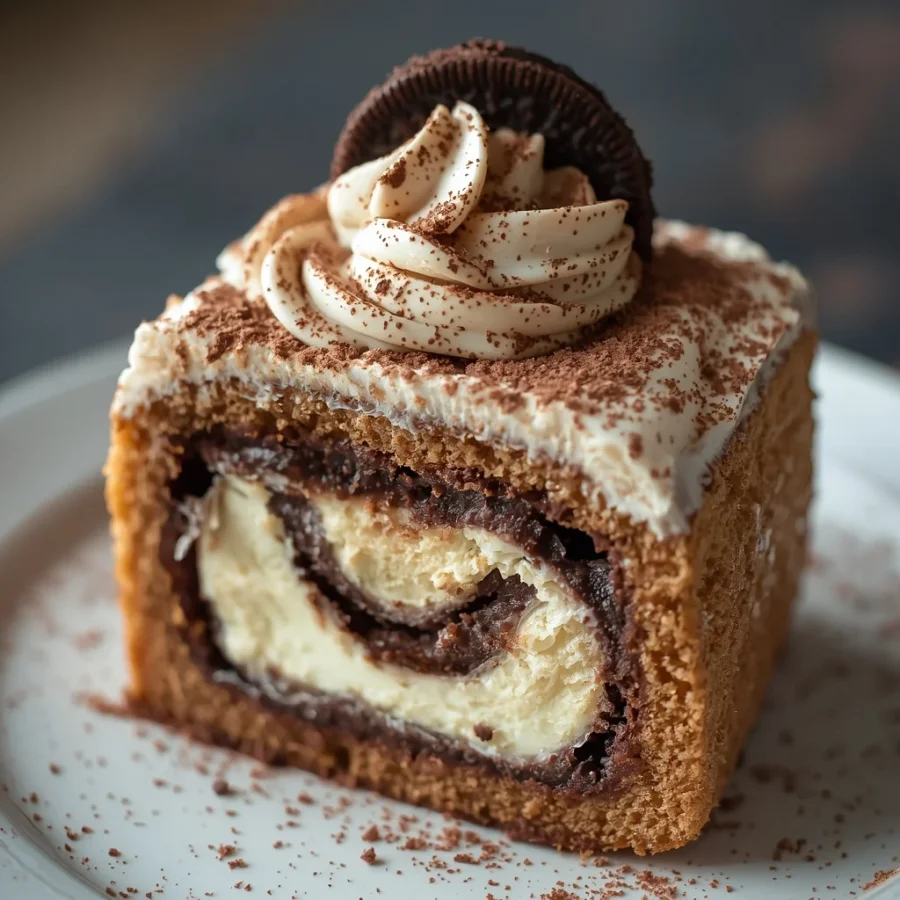
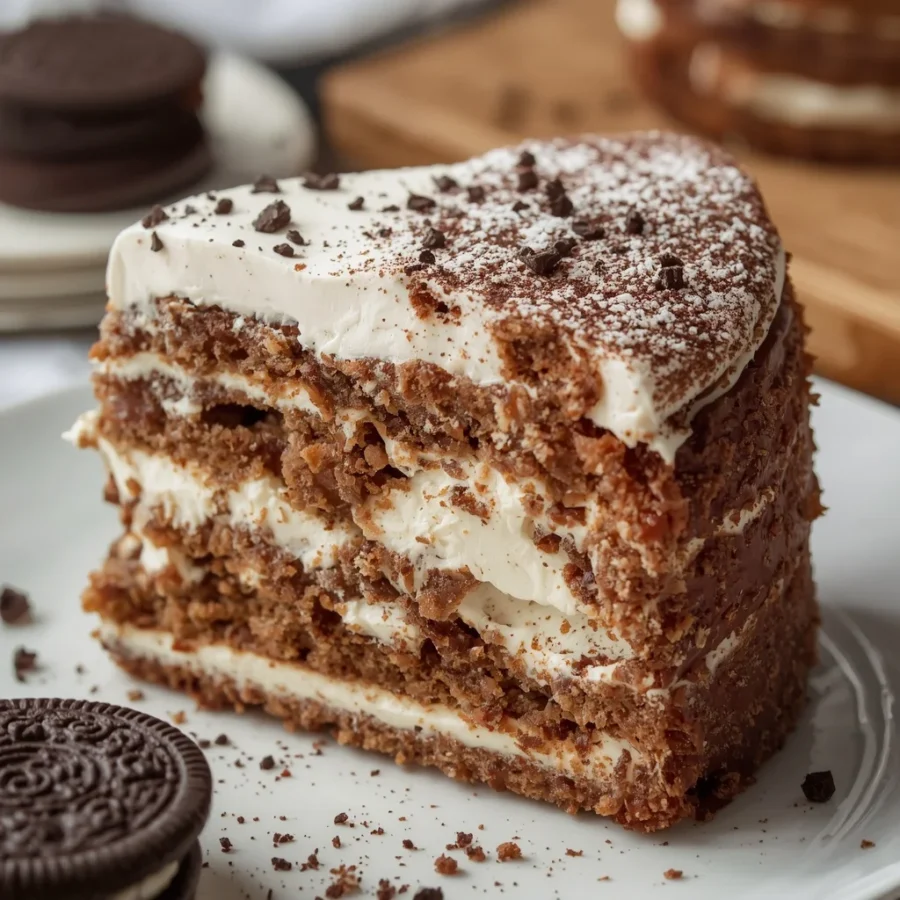
What is an Oreo Cinnamon Roll Icebox Cake?
At its heart, this particular sweet creation is a creative spin on the vintage American refrigerator dessert. Instead of using traditional graham crackers or basic chocolate wafers, this variation brings together two iconic flavor worlds that rarely meet but belong together. You get the deep, dark cocoa punch of sandwich cookies paired with the warm, buttery, brown sugar spice of sweet rolls.
The magic relies entirely on the science of time and moisture transfer. When you assemble the dish, the cookies are crunchy and the baked buns are dense. However, after sitting in the refrigerator for several hours, the cookies pull liquid from the surrounding cream filling, turning into a soft texture that mimics baked chocolate sponge cake. It gives you all the luxury of a gourmet layered cheesecake or bakery masterpiece, but without the stress of preheating your stove, measuring baking powders, or worrying about a cake collapsing in the heat.
The Origin of the Oreo Cinnamon Roll Icebox Cake
To appreciate why this specific Oreo Cinnamon Roll Icebox Cake is such a brilliant innovation, it helps to understand the history of this cooking style. The concept first stepped into the culinary spotlight during the nineteen twenties. During this decade, commercial electric refrigerators, historically referred to as iceboxes, were becoming standard household appliances across North America.
To help market these new appliances, manufacturing companies began printing quick recipes on the backs of cookie boxes and inside promotional booklets. Home cooks quickly realized they could create elegant desserts by simply layering thin cookies with heavily whipped sweetened cream. Over the decades, these quick treats evolved from simple chocolate wafer stacks into complex, multi-textured logs and squares. By infusing the classic base with modern elements like cream cheese, warm cinnamon sugar, and gooey caramel, we are taking a historical household staple and turning it into a contemporary gourmet experience.
Ingredients and Exact Quantities: Oreo Cinnamon Roll Icebox Cake
Before you begin assembling your sweet masterpiece, you will want to gather your ingredients. Having everything measured out ahead of time ensures a smooth assembly line.
For the Cream Filling
-
Cream Cheese: Eight ounces, or approximately two hundred and twenty-five grams. Make sure this is completely softened to room temperature before you begin mixing to avoid any frustrating little lumps in your final batter.
-
Powdered Sugar: One cup of finely sifted powdered sugar to provide a smooth sweetness without any grittiness.
-
Vanilla Extract: One teaspoon of pure vanilla extract to add a rich, aromatic undertone to the dairy base.
-
Ground Cinnamon: One teaspoon of high-quality ground cinnamon to tie the cream directly into the warm flavor profile of the pastries.
-
Heavy Whipping Cream: Two cups of heavy whipping cream. This must be poured straight from the refrigerator as cold cream traps air much more efficiently, allowing you to achieve stiff, stable peaks when whipping.
Structural Layers
-
Oreo Cookies: Thirty-six whole sandwich cookies, roughly crushed into a mixture of fine crumbs and larger, bite-sized structural chunks.
-
Cinnamon Roll Pieces: Two full cups of baked cinnamon rolls, cut into small, bite-sized cubes. You can use homemade leftovers or premium store-bought buns from your favorite local bakery.
-
Cinnamon Sugar: One-half cup of a standard cinnamon sugar mixture for an extra layer of sweet, warming spice between the tiers.
-
Caramel Sauce: One-half cup of rich caramel sauce, either homemade or a thick store-bought variety, to provide a gooey contrast to the light cream.
-
White Chocolate Chips: One-half cup of sweet white chocolate morsels, which are completely optional but highly recommended if you want to introduce a subtle, milky snap to the internal layers.
For the Gorgeous Topping Display
-
Whipped Cream: One additional cup of stable whipped cream to act as your fluffy top layer canvas.
-
Crushed Oreo Cookies: A handful of extra dark cookie crumbs to scatter across the top for a striking visual contrast.
-
Mini Cinnamon Roll Pieces: A few small pieces of mini pastries, which are optional but make for a stunning presentation.
-
White Chocolate Drizzle: A generous drizzle of melted white chocolate or prepared cream cheese icing to mimic the classic glaze look.
-
Ground Cinnamon: A delicate final dusting of ground cinnamon for a beautiful fragrant finish.
Step-by-Step Direction and Preparation Method
Creating this dessert is incredibly straightforward, making it an excellent option for beginners or busy parents. Follow these steps to build clean, beautiful layers that slice neatly.
Step 1: Whipping Up the Fluffy Cream Filling
Begin by placing your eight ounces of softened cream cheese into a large mixing bowl. Using a hand mixer or a stand mixer fitted with a paddle attachment, beat the cream cheese on medium speed for two to three minutes until it looks completely smooth, glossy, and free of any lumps. Slow the mixer down to low speed and gradually add your one cup of powdered sugar, followed by the one teaspoon of vanilla extract and the one teaspoon of ground cinnamon. Once the sugar is incorporated, turn the speed up slightly to blend everything into a uniform, aromatic paste, then set the bowl aside.
In a separate, completely clean, and ideally chilled glass mixing bowl, pour in your two cups of cold heavy whipping cream. Using clean beaters, start whipping the cream on low speed, gradually ramping up the power to high as it begins to thicken. Continue whipping until the cream forms stiff peaks, meaning when you lift the beaters straight up, the cream holds its shape sharply without drooping.
Take a third of your stiff whipped cream and drop it into the cream cheese paste. Use a rubber spatula to gently fold it in, which helps lighten the dense base. Once combined, add the remaining whipped cream and fold very gently, moving your spatula in a circular motion from the bottom of the bowl upward. This careful folding ensures you do not deflate the trapped air, leaving you with a filling that is incredibly light, airy, and fluffy.
Step 2: Constructing the First Foundation Layer
Grab a standard nine-by-nine-inch baking dish. To ensure your first layer of cookies does not slip and slide around when you try to slice the cake later, take a few tablespoons of your prepared cream filling and spread it into a paper-thin layer across the absolute bottom of the clean dish.
Next, take a third of your roughly crushed sandwich cookies and scatter them evenly over the thin cream base. You want enough cookies to form a solid layer, but it is perfectly fine if there are small gaps.
Directly on top of the dark cookies, distribute a third of your cubed cinnamon roll pieces. Gently press down with the palms of your clean hands to nestle the pastry cubes into the cookie layer. To finish this initial tier, take your caramel sauce and drizzle it lightly in a zigzag pattern across the entire layout, ensuring every section gets a hint of gooey sweetness.
Step 3: Repeating the Tiered Assembly Process
Spoon a generous portion of your remaining cream filling directly over the caramel-drizzled pastry layer. Use an offset spatula or the back of a large spoon to smooth the cream out into an even layer, working it gently into the corners of the pan so it seals the cookies and pastries underneath.
Repeat the exact same sequence again. Scatter another round of crushed dark cookies, follow with a generous layer of cubed sweet roll pieces, and apply another beautiful drizzle of rich caramel sauce. If you choose to use the optional white chocolate chips, scatter half of them across this middle layer now to provide a wonderful surprise crunch.
Continue this layering process until you have used up your ingredients. Depending on the exact depth of your baking dish, you will typically end up with two or three complete tiers. Make sure you manage your quantities so that you finish with a smooth layer of the creamy mixture completely covering the very top of your creation.
Step 4: Decorating Your Dessert Canvas
Now that your structural tiers are fully assembled, it is time to make the top look as irresistible as possible. Spread your one cup of fresh whipped cream over the top cream cheese layer to create a crisp white background.
Sprinkle your reserved dark cookie crumbs and optional mini pastry pieces across the top, clustering them slightly toward the center or scattering them in an elegant border.
Warm up your white chocolate or cream cheese icing slightly so it runs smoothly, then use a fork or a small piping bag to create beautiful, sweeping lines across the surface. Finish the entire look by holding a fine-mesh strainer over the dish, dropping in your ground cinnamon, and tapping it gently to create a soft, uniform dusting of aromatic spice across the top.
Step 5: The Essential Refrigeration Rest
Your cake is now fully assembled, but it is not quite ready for the knife. Cover the baking dish securely with a layer of plastic wrap or aluminum foil, taking care that the cover does not touch and smudge your beautiful top decorations. Slide the dish into the coldest section of your refrigerator.
Leave the cake to chill undisturbed for a bare minimum of six hours. If time permits, it is highly recommended to leave it in the refrigerator overnight. This extended rest is absolutely critical because it gives the dry cookies and bready pastry cubes ample time to absorb moisture from the cream cheese filling, ensuring the entire dessert transforms into a uniform, sliceable texture.
Step 6: Slicing and Presentation
When your waiting time is finally up, remove the cover from the dish. The cake should feel firm to a gentle touch. To get clean, restaurant-quality squares, fill a tall glass with hot tap water and dip a sharp, long knife into it. Wipe the warm blade dry with a clean kitchen towel before making your first long cut straight down through all the layers.
Clean and re-warm the knife blade in the hot water between every single slice to prevent the dark cookie crumbs from smudging into the clean white cream sections. Lift each square out carefully with a small spatula, place it onto a dessert plate, and if you want to go extra indulgent, finish it off with a tiny extra drizzle of warm caramel sauce right before serving.
Delicious Flavor Variations to Explore: Oreo Cinnamon Roll Icebox Cake
The basic structure of an Oreo Cinnamon Roll Icebox Cake is incredibly versatile, allowing you to tweak the ingredients to suit different seasons or personal preferences.
The Decadent Peanut Butter Twist
If you are someone who believes chocolate and peanut butter are the ultimate flavor combination, this variation is tailored for you. When you are beating your cream cheese base, fold in one-half cup of smooth, creamy peanut butter along with the sugar. Swap out the standard chocolate sandwich cookies for peanut butter filled chocolate cookies, and replace the white chocolate accents with chopped peanut butter cups. The rich, salty nuttiness cuts through the sweetness beautifully, creating an incredibly satisfying treat.
The Warm Apple Pie Fusion
To transform this into the ultimate autumn dessert, you can introduce a fruity element that pairs naturally with the existing spice. Before you assemble the layers, take a can of apple pie filling or chop up fresh apples and sauté them with butter and brown sugar until soft. Layer these spiced apple pieces directly alongside your cinnamon roll cubes. This tweak gives you a dessert that tastes like a hybrid between an apple cobbler, a cinnamon bun, and a classic cookies-and-cream cheesecake.
The Intense Dark Chocolate Espresso Variety
For a more mature, less intensely sweet flavor profile that appeals to coffee lovers, try infusing the dessert with a bit of espresso. Dissolve two teaspoons of instant espresso powder directly into your vanilla extract before mixing it into the cream cheese base. Use dark chocolate or extra-bitter cocoa cookies instead of standard ones, and swap out the sweet caramel drizzle for a rich, bittersweet dark chocolate ganache. The coffee notes deepen the cocoa flavor, making it taste like an upscale café creation.
Pro-Tips for the Best Dessert Results: Oreo Cinnamon Roll Icebox Cake
-
Manage Your Cookie Crush: When breaking up your sandwich cookies, aim for a balanced mixture of sizes. Do not pulverize them all into a fine dust using a food processor. You want a good amount of larger, quarter-sized cookie chunks because they provide the necessary structural stability to hold the cream up, giving you distinct visual lines when you slice into the cake.
-
Warm up Your Leftovers: If you are using leftover homemade cinnamon rolls that have gone a bit stale or dry, do not worry. That dryness actually works to your advantage here, as the stale bread will act like a sponge, eagerly soaking up the cream filling and softening up beautifully. Just ensure they are cut into small pieces so they are easy to chew.
-
Keep It Cold: Never try to hasten the process by putting the cake in the freezer instead of the refrigerator. Freezing will simply harden the cream without allowing the moisture to actually penetrate and soften the cookies and pastries. The slow, steady chill of a refrigerator is non-negotiable for achieving that perfect texture.
Frequently Asked Questions: Oreo Cinnamon Roll Icebox Cake
Can I make Oreo Cinnamon Roll Icebox Cake gluten-free?
Yes, you can easily adapt this recipe for a gluten-free diet. Look for certified gluten-free chocolate sandwich cookies at your local grocery store, which taste virtually identical to the original version. For the pastry layer, you can use gluten-free cinnamon rolls or even gluten-free cinnamon muffins cut into small cubes to achieve the exact same texture and flavor.
How long can I store Oreo Cinnamon Roll Icebox Cake in the refrigerator?
If you have leftovers, keep the dish covered tightly with plastic wrap or transfer the pieces to an airtight container and store them in the refrigerator for up to three days. Note that as the days progress, the cookies will continue to soften and the layers may begin to lose their distinct boundaries, but the dessert will remain absolutely safe and delicious to eat.
Can I use store-bought whipped topping instead of heavy cream?
While making your own fresh whipped cream from scratch using heavy cream provides the absolute best flavor and structural stability, you can use an equal volume of thawed, store-bought whipped topping in a pinch. If you do this, reduce the powdered sugar in the cream cheese base by half, as commercial whipped toppings already contain a high amount of sugar.
What should I do if my cream cheese filling looks lumpy?
Lumps happen when the cream cheese is too cold when you start beating it. If your mixture looks grainy, simply leave the bowl on the counter for twenty minutes to let it warm up to true room temperature, then beat it vigorously on high speed. You can also microwave the bowl for a brief five seconds to soften the fats slightly before mixing again.
Conclusion: Oreo Cinnamon Roll Icebox Cake
Creating a memorable dessert does not have to involve hours of standing over a hot stove or checking the oven every few minutes. By bringing together familiar kitchen favorites in a fresh way, this Oreo Cinnamon Roll Icebox Cake proves that some of the most luxurious treats come together with just a bit of clever layering and patient chilling. It is a sweet project that rewards your minimal effort with beautiful, distinct stripes of chocolate, cream, and spiced pastry in every single bite. The next time you are asked to bring a dish to a potluck or simply want to treat your family to something special on a warm weekend afternoon, clear a spot in your refrigerator and let this no-bake wonder work its magic.
Print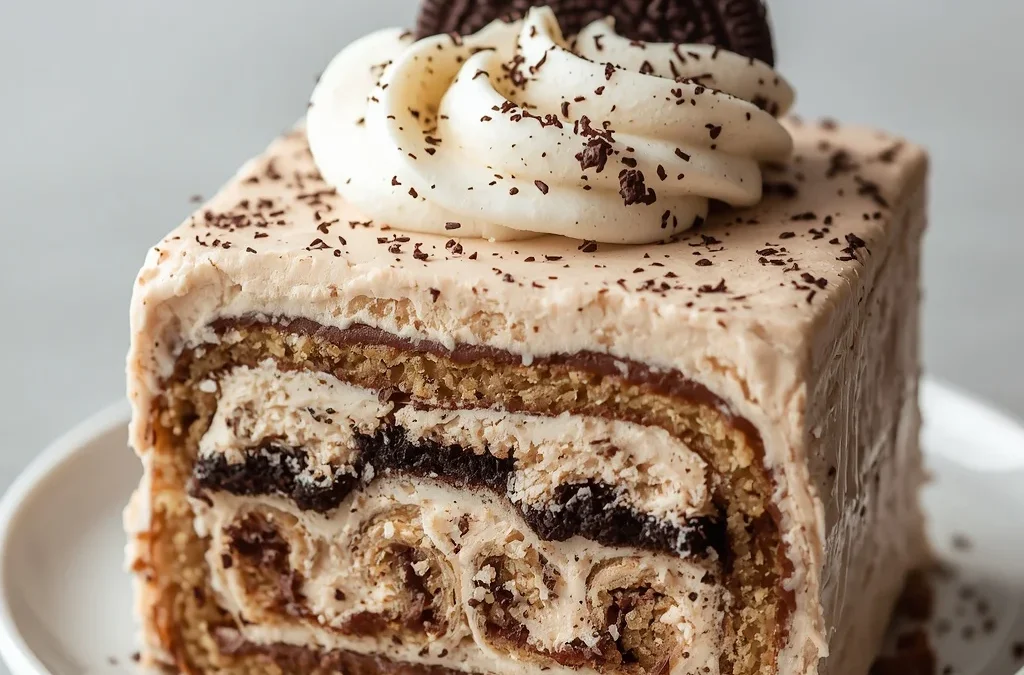
The Ultimate Oreo Cinnamon Roll Icebox Cake Recipe
- Total Time: 6 hours 25 minutes (including chilling time)
- Yield: 10 servings 1x
- Diet: Vegetarian
Description
To appreciate why this specific Oreo Cinnamon Roll Icebox Cake is such a brilliant innovation, it helps to understand the history of this cooking style. The concept first stepped into the culinary spotlight during the nineteen twenties. During this decade, commercial electric refrigerators, historically referred to as iceboxes, were becoming standard household appliances across North America.
Ingredients
For the Cream Filling
- 8 oz (225 g) cream cheese, softened
- 1 cup powdered sugar
- 1 tsp vanilla extract
- 1 tsp ground cinnamon
- 2 cups heavy whipping cream, cold
For the Layers
- 36 Oreo cookies, roughly crushed
- 2 cups cinnamon roll pieces or baked cinnamon rolls, cut into bite-sized cubes
- ½ cup cinnamon sugar
- ½ cup caramel sauce
- ½ cup white chocolate chips (optional)
For the Topping
- 1 cup whipped cream
- Crushed Oreo cookies
- Mini cinnamon roll pieces (optional)
- White chocolate drizzle or cream cheese icing
- Ground cinnamon for garnish
Instructions
- Prepare the filling
- Beat the cream cheese until smooth.
- Mix in powdered sugar, vanilla, and cinnamon.
- In a separate bowl, whip the heavy cream to stiff peaks.
- Fold the whipped cream into the cream cheese mixture until light and fluffy.
- Build the first layer
- Spread a thin layer of the cream filling in the bottom of a 9×9-inch dish.
- Add a layer of crushed Oreos.
- Scatter cinnamon roll pieces over the cookies.
- Drizzle lightly with caramel sauce.
- Repeat the layers
- Spread another layer of cream filling.
- Add more Oreos, cinnamon roll pieces, and caramel.
- Continue until all ingredients are used, finishing with cream filling on top.
- Decorate
- Top with whipped cream.
- Sprinkle crushed Oreos and mini cinnamon roll pieces.
- Drizzle with white chocolate or cream cheese icing.
- Dust lightly with ground cinnamon.
- Chill
- Cover and refrigerate for at least 6 hours, preferably overnight, to allow the layers to soften.
- Serve
- Slice and serve chilled.
- Drizzle with extra caramel sauce if desired.
Notes
- Prep Time: 25 minutes
- Cook Time: 0 minutes
- Category: Dessert
- Method: Chilled
- Cuisine: American
Nutrition
- Serving Size: 1 slice
- Calories: 420 kcal
Keywords: No-Bake Oreo Cinnamon Cake, Layered Oreo Refrigerator Dessert, Cinnamon Roll Icebox Treat