The world of baking is constantly shifting, but every once in a while, a culinary crossover comes along that completely rewrites the rules of dessert. If you love rich, decadent treats but crave an unexpected textural crunch, you are about to fall in love with this masterpiece. This comprehensive recipe for pistachio kunafa brownies brings together the absolute best elements of classic Western baking and traditional Middle Eastern pastry art. By layering an ultra-fudgy, dense chocolate base with buttery, toasted kataifi strands and a velvety nut paste, you create an unforgettable dessert that offers a magnificent contrast in every mouthful. Whether you are aiming to dazzle guests at a formal dinner party, surprising your family with a trendy weekend project, or simply looking to experience the ultimate fusion sweet treat, these bars are engineered to outperform anything you can find in a standard bakery display.
What is a Pistachio Kunafa Brownie?
To fully appreciate the genius behind this creation, it helps to understand how these contrasting culinary components work together. Essentially, this modern confection is a hybrid dessert that seamlessly fuses a traditional American chocolate square with the textures of a classic Levantine pastry. Instead of relying purely on a uniform, cake-like crumb, this specialized bar is built in distinct, contrasting strata.
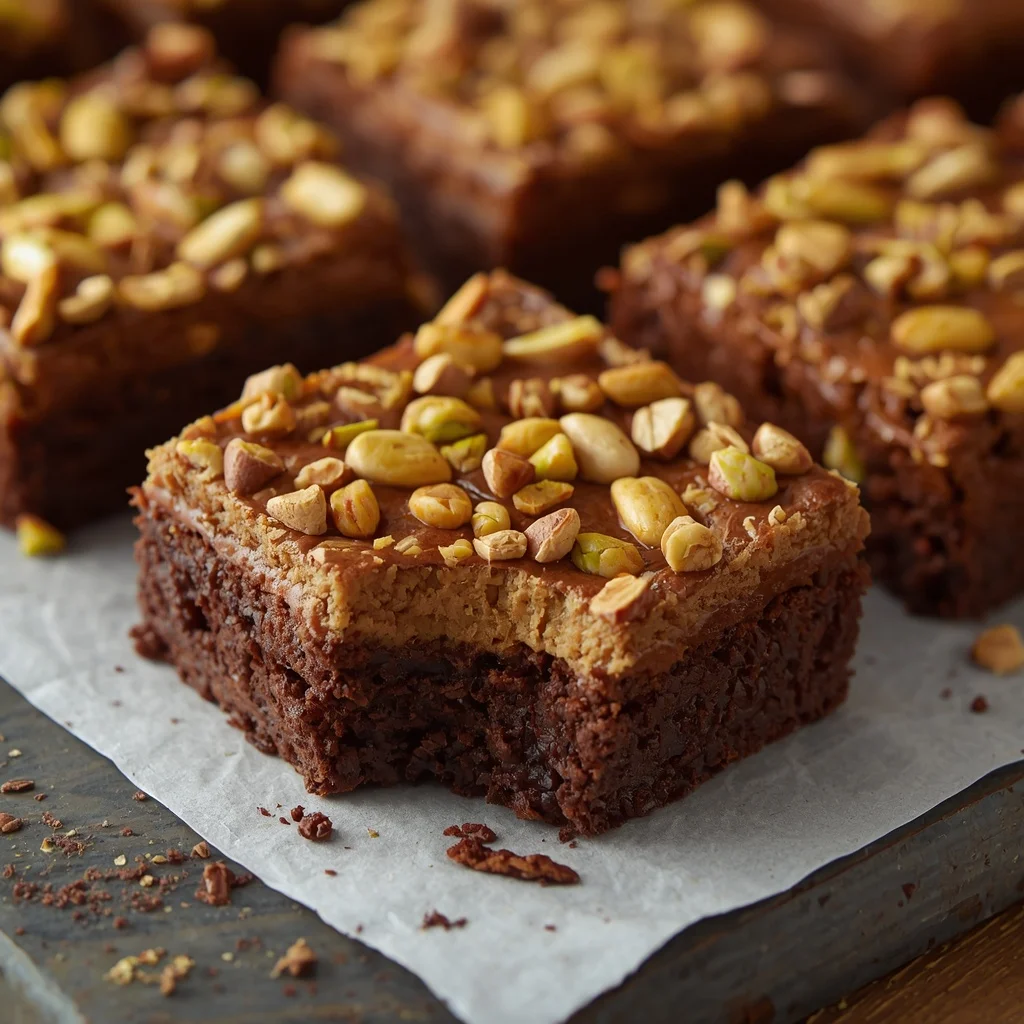
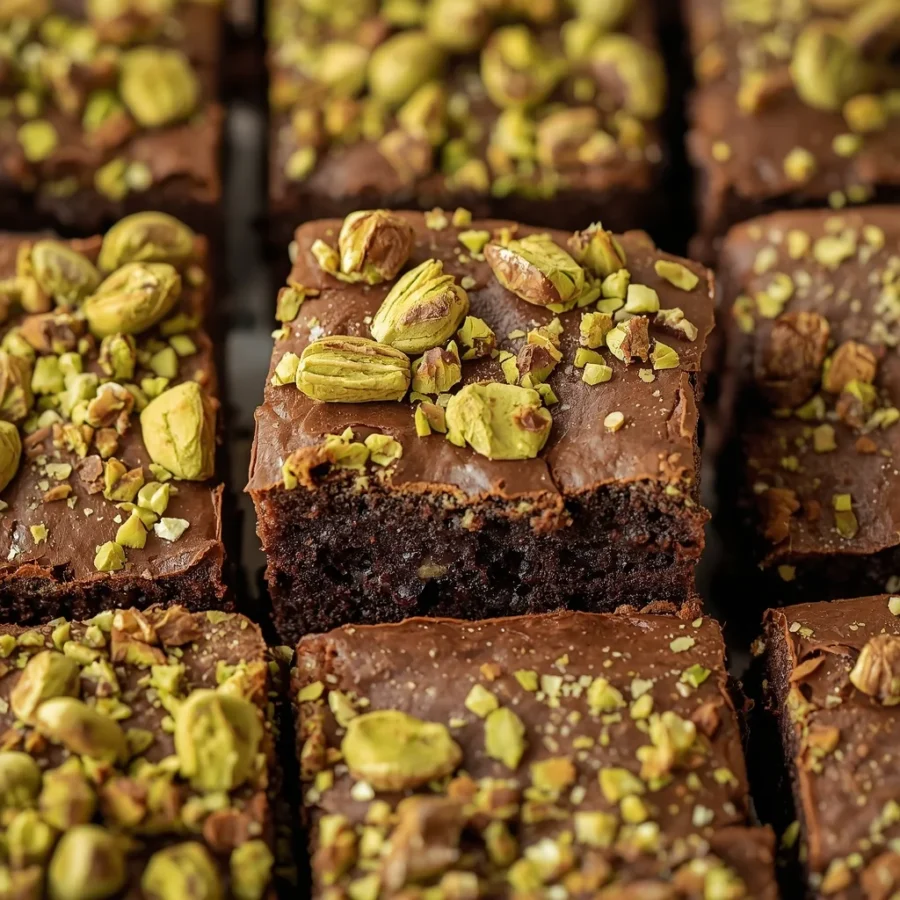
The foundation consists of a deeply dark, rich, and dense cocoa batter that remains moist and fudgy beneath the heat of the oven. Perched directly on top of this chocolate layer is a generous blanket of shredded kataifi dough, which is tossed in sweet fat and baked until it turns incredibly crisp and golden. Crowned with a rich, vibrant green nut spread and a scattering of crushed nuts, these pistachio kunafa brownies deliver an exquisite multi-sensory experience that balances deep cocoa bitterness with a nutty, buttery, and shatteringly crisp crunch.
The Global Origin of pistachio kunafa brownies
While the fudgy chocolate base traces its heritage back to late nineteenth-century home kitchens in the United States, the crispy topping boasts an ancient and storied lineage originating half a world away. Kunafa, also frequently spelled knafeh, is a legendary dessert that has been cherished across the Levant, Egypt, and Turkey for centuries.
Historically, historians trace early versions of the pastry back to the royal courts of the Umayyad or Abbasid caliphates during the Middle Ages, where it was often prepared by palace chefs as a hearty, comforting food to sustain royals during the fasting hours of Ramadan.
The Evolution into Modern Dessert Culture
Traditionally, the classic Middle Eastern pastry involves spinning wheat flour into fine, hair-like strands called kataifi, which are then layered with stretchy cheese, drenched in clarified butter, baked in heavy copper pans, and soaked in an aromatic rose or orange blossom sugar syrup. In recent years, creative pastry chefs in vibrant culinary hubs like Dubai began experimenting with these traditional textures, pairing the crispy, buttery pastry strands with rich nut spreads and high-quality chocolates.
This sparked a massive global phenomenon, capturing the imaginations of sweet lovers across continents. Bringing these ancient eastern textures into a Western pan results in pistachio kunafa brownies, a brilliant cross-cultural evolution that respects time-honored baking traditions while offering a completely fresh, exciting format for modern food enthusiasts.
Selecting Premium Ingredients for Perfect Contrast
Creating a flawless batch of these fusion squares depends entirely on the quality of your staples and how they behave under heat. Because we are pairing a dense, moisture-heavy batter with an ultra-delicate pastry strand, selecting the proper components ensures that your layers remain distinctly defined without becoming a mushy or oily mess.
For the Rich Fudgy Foundation
-
Unsalted butter: You will need half a cup of real butter, melted down to act as the rich fat base for our batter. Using melted fat instead of creamed fat is the ultimate secret to achieving a dense, fudgy interior rather than a light, cake-like structure.
-
Granulated sugar: One cup of white granulated sugar. The sugar dissolves into the melted fat and eggs, which helps create that desirable, shiny, crinkly skin on the chocolate base.
-
Eggs: Two large eggs at room temperature. Eggs provide the essential structure and lift for the base without the need for heavy chemical leaveners.
-
Vanilla extract: One teaspoon of pure vanilla extract to deepen the complexity of the cocoa flavors.
-
Cocoa powder: One third of a cup of unsweetened cocoa powder. Opt for a high-quality product, as this provides the intense, dark chocolate profile that grounds the sweetness of the toppings.
-
All-purpose flour: Half a cup of standard flour. Keeping the flour quantity relatively low ensures the base stays dense, rich, and intensely fudgy.
-
Leavening and salt: Quarter of a teaspoon of fine salt to balance the sugars, and a mere quarter of a teaspoon of baking powder to give just a hint of tenderness to the crumb.
Crispy Pastry Strands
-
Shredded kunafa dough: Two cups of kataifi pastry dough, thawed completely if you purchased it frozen. This dough consists of paper-thin, thread-like strands of wheat batter that crisp up beautifully when baked.
-
Melted butter: Four tablespoons of unsalted butter to thoroughly coat the delicate pastry threads, ensuring they turn a beautiful golden color and develop a rich taste.
-
Granulated sugar: Two tablespoons of white sugar tossed with the pastry strands to assist with caramelization and add a subtle crunch.
For the Vibrant Nutty Crowning
-
Pistachio paste: Half a cup of smooth, premium nut paste. If you cannot find pure paste at your local market, you can easily create your own by grinding shelled, unsalted nuts in a high-speed food processor with a small touch of honey or simple syrup until it turns completely smooth and spreadable.
-
Chopped pistachios: Two tablespoons of raw or dry-roasted nuts, chopped finely for a beautiful rustic visual finish and an extra layer of raw texture.
-
Sweet drizzle: A light, optional drizzle of pure honey or simple sugar syrup to finish the bars with a glossy shimmer.
Step-by-Step Preparation and Baking Method
Now that your ingredients are measured and your kitchen scale is put away, it is time to embark on the rewarding process of baking. Follow these stages carefully to ensure every layer turns out beautifully.
Stage 1: Mixing the Chocolate Base Batter
The path to crafting incredible pistachio kunafa brownies starts with establishing a solid, ultra-fudgy foundation. Begin by setting your oven to a steady three hundred and fifty degrees so it can preheat thoroughly. Grab an eight-inch by eight-inch square baking pan and line it carefully with sheets of parchment paper, leaving a slight overhang on the sides so you can easily lift the completed squares out later.
In a large, heatproof mixing bowl, pour in your half cup of melted unsalted butter while it is still warm. Add your one cup of granulated sugar and whisk the two together vigorously until the sugar begins to absorb the fat.
Drop in your two large room temperature eggs one at a time, followed by the one teaspoon of vanilla extract. Whisk the mixture energetically for a full two minutes. You are waiting for the liquid to transform into a pale, thick, and distinctly glossy consistency, which indicates that the eggs and sugar have emulsified perfectly with the butter.
Sift in your one third cup of cocoa powder, half a cup of all-purpose flour, quarter of a teaspoon of salt, and quarter of a teaspoon of baking powder directly over the wet mixture. Switch to a silicone spatula or a wooden spoon and stir the ingredients together gently, mixing just until the dry pockets disappear. The resulting batter will be thick, dark, and incredibly smooth. Pour it into your prepared square pan, using an offset spatula to smooth the surface into a perfectly flat, even layer.
Stage 2: Preparing the Golden Pastry Coating
With your chocolate base resting quietly in the pan, you can immediately transition to preparing the sensational pastry layer. Take your two cups of thawed, thread-like kataifi dough and place it onto a large, clean cutting board. Using a sharp chef’s knife, gently chop across the long strands to break them down into shorter, manageable pieces that are roughly half an inch to an inch in length. Transfer these chopped pastry threads into a medium-sized mixing bowl.
Pour your four tablespoons of melted unsalted butter and two tablespoons of white granulated sugar directly over the chopped pastry threads. Using your clean fingers or a pair of salad tongs, gently toss and massage the mixture continuously.
You want to ensure that every single thread of the pastry dough is lightly coated in the melted fat and sugar grains. This thorough coating is the absolute key to achieving a uniform crispiness; any dry strands left without butter will simply dry out and burn in the hot oven rather than frying into a delicious, golden crust. Once the pastry is uniformly glistening and well-distributed, set the bowl aside for a brief moment.
Stage 3: Layering and Baking to Perfection
Now comes the beautiful assembly step that sets this fusion treat apart from standard baked goods. Take your buttered pastry strands and scatter them evenly across the surface of the raw chocolate batter in your square pan. Work slowly, ensuring you create a uniform blanket that covers the dark batter entirely from corner to corner.
Once the pastry layer is arranged, use the flats of your fingers or the back of a large spoon to press down very lightly on the threads. You want to press just enough so that the bottom strands adhere firmly to the sticky chocolate batter underneath, ensuring the layers stick together as a single cohesive unit during the baking process, but avoid pressing so hard that you submerge the delicate pastry into the wet batter.
Slide the pan into the center rack of your preheated three hundred and fifty degree oven. Bake the bars for thirty to thirty-five minutes. Keep a close eye on the oven during the final ten minutes; you are waiting for the chocolate base to set firmly around the edges and for the pastry topping to puff up and take on a gorgeous, uniform golden-brown hue.
Remove the pan from the oven and place it on a wire cooling rack. It is absolutely imperative that you let the pan cool down completely to room temperature for at least one full hour; attempting to add the nut topping while the pastry is hot will cause the paste to melt and run off, ruining your distinct layers.
Stage 4: Spreading the Nutty Glaze and Slicing
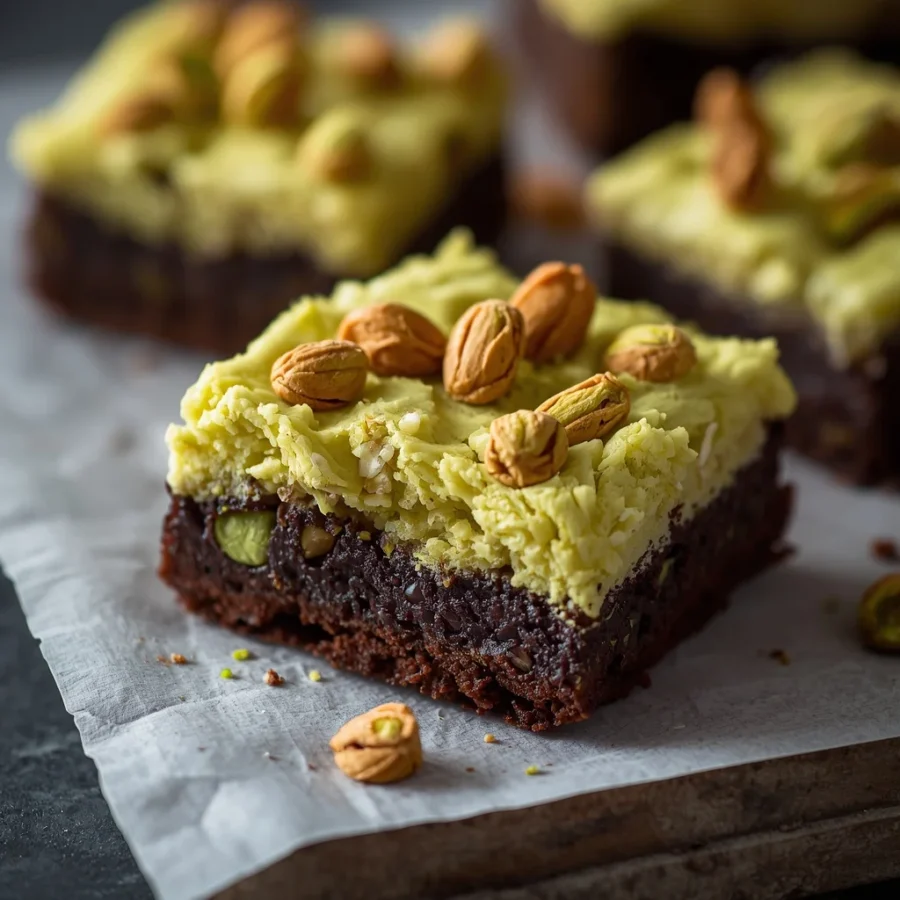
Once your baked pan has cooled completely and feels cool to the touch, you can apply the luxurious finishing details. Take your half cup of smooth pistachio paste and stir it briefly to ensure it is uniform. Using a spoon or an offset spatula, dollop the rich green paste across the crisp, golden pastry layer, then spread it gently into a smooth, even sheet that coats the entire pan.
Immediately after spreading the smooth paste, take your two tablespoons of finely chopped nuts and scatter them generously across the wet green surface, adding a lovely rustic aesthetic and extra textural depth. If you enjoy a touch of elegant sweetness, take a jar of clear honey or simple sugar syrup and use a fork to zigzag a light, beautiful drizzle across the nut layer.
To slice the bars cleanly, lift the entire block out of the pan using the parchment paper handles and place it onto a sturdy cutting board. Take a large, very sharp chef’s knife and wipe the blade with a warm, damp towel.
Commit to firm, straight-down slices rather than a sawing motion, which prevents crushing the delicate pastry strands into the fudgy base. Clean and re-warm your knife blade between every single cut to ensure you get pristine, professional-looking squares with perfectly defined green, golden, and dark brown layers. Arrange the squares on a platter and get ready to serve.
Creative Recipe Variations to Explore: pistachio kunafa brownies
Mastering the foundational architecture of this fusion bar allows you to experiment with different flavor profiles, blending various nut varieties and chocolate types to suit your personal tastes.
The Silky White Chocolate Contrast
For a variation that delivers an intensely sweet and milky flavor profile, you can modify the base of the bar completely. Omit the cocoa powder entirely and increase the all-purpose flour to three quarters of a cup. Melt half a cup of high-quality white chocolate chips along with your butter before mixing in your sugar and eggs. This creates a dense, buttery blondie foundation that highlights the natural vanilla aromatics of the dough, providing a gorgeous pale background that makes the vibrant green color of your nut spread pop beautifully.
The Spicy Cardamom and Rose Water Infusion
If you want to lean even further into traditional Middle Eastern flavor dynamics, you can infuse your ingredients with warm, exotic spices and floral aromatics. Add half a teaspoon of ground cardamom directly into your dry flour mixture when preparing the chocolate base. Additionally, splash half a teaspoon of organic rose water or orange blossom water into your syrup or honey drizzle before decorating the top of the bars. This creates a highly sophisticated dessert that carries a beautiful floral aroma, cutting through the rich fat of the dairy and nuts.
The Decadent Nutella Swirl
For those who believe there can never be too much chocolate, you can introduce a rich hazelnut element to compete with the pistachio profile. Before scattering your buttered pastry strands over the raw batter, warm half a cup of creamy hazelnut chocolate spread until it is fluid. Dollop the warm hazelnut spread across the chocolate batter and use a butter knife to gently swirl it into the dough. Proceed with your pastry and baking steps as written. This yields a multi-layered chocolate experience that feels incredibly luxurious on the palate.
Technical Pro Tips for Bakery-Quality Results: pistachio kunafa brownies
Achieving pristine definition between your layers and maximum crunch requires paying close attention to a few subtle baking dynamics:
-
Thaw the pastry dough correctly: Never attempt to chop or use kataifi dough while it is still frozen or damp with frost. Let it thaw completely inside its original packaging in your refrigerator overnight, then let it sit on your counter for twenty minutes before opening. Dry, room temperature strands absorb butter much more efficiently.
-
Avoid over-baking the base: Because the chocolate base is hidden beneath a blanket of pastry threads, you cannot use the traditional toothpick test easily. Trust the timer; thirty to thirty-five minutes at three hundred and fifty degrees is the sweet spot. Over-baking will transform your moist, fudgy foundation into a dry, crumbly cake texture.
-
Grind your own fresh paste for maximum color: If you are making your nut paste from scratch, blanch your raw shelled nuts in boiling water for one minute, then immediately plunge them into an ice bath. This allows you to easily peel away the papery brown skins, leaving you with brilliant, bright green kernels that yield a spectacular, vibrant paste.
-
Let the bars rest before slicing: While eating a warm square sounds divine, these bars need time to set structurally. Letting them sit at room temperature, or even sliding the pan into the refrigerator for twenty minutes before cutting, ensures the fudgy chocolate base cuts cleanly without smearing.
Frequently Asked Questions: pistachio kunafa brownies
Where can I purchase kunafa pastry dough?
Kataifi or kunafa dough is widely available at Mediterranean, Middle Eastern, or international grocery stores, usually tucked away in the freezer section near the phyllo pastry sheets. It typically comes packaged in a plastic bag inside a long box. If you do not have an international market nearby, you can easily order it through online gourmet food distributors. Always keep it frozen until the day before you plan to bake your treats.
Can I make pistachio kunafa brownies completely gluten-free?
Yes, you can adapt this fusion dessert to accommodate gluten sensitivities with a few specific adjustments. Swap out the half cup of all-purpose flour in the chocolate base for a high-quality, one-to-one gluten-free baking flour blend that contains xanthan gum. Finding a gluten-free alternative for the kataifi dough can be more challenging, but many specialty online retailers now offer gluten-free shredded pastry strands made from rice flour which crisp up beautifully when tossed in butter.
How should I store leftover fusion brownies?
To maintain the delicate contrast between the moist chocolate base and the crunchy pastry topping, store any leftover squares in an airtight container in a single layer to prevent the toppings from sticking. You can keep the container at room temperature for up to three days, or store it in the refrigerator for up to five days. If you store them in the fridge, the chocolate base will take on an incredibly dense, truffle-like texture that tastes spectacular when paired with a hot beverage.
Why did my pastry topping turn out soggy instead of crunchy?
A soggy pastry layer is almost always caused by adding your toppings too early or over-drizzling the baked bars with liquid syrup. If you spread your nut paste over the pastry while the pan is still warm from the oven, the trapped residual steam will soften the crisp threads. Additionally, while a light drizzle of honey adds a lovely shimmer, drenching the bars in syrup will cause the delicate pastry strands to absorb the liquid and lose their characteristic crunch. Always ensure the pan is completely cold before decorating.
Conclusion: pistachio kunafa brownies
Baking a fresh batch of pistachio kunafa brownies is an incredibly satisfying and creative kitchen project that beautifully bridges the gap between distinct global pastry traditions. By taking the time to carefully whip up a glossy, fudgy chocolate foundation, thoroughly coating your chopped pastry threads in sweet butter, and finishing the cooled bars with a rich, vibrant nut sheet, you create a dessert experience that easily surpasses standard cookies or basic brownies. This recipe demonstrates that with just a few precise techniques, like breaking down your kataifi strands uniformly and allowing the baked pan to cool fully before decorating, you can achieve gorgeous, restaurant-quality results right in your home kitchen. Gather your premium ingredients, enjoy the rhythmic process of assembling these beautiful layers, and share a platter of these unforgettable crisp and fudgy squares with the people you love most.
Print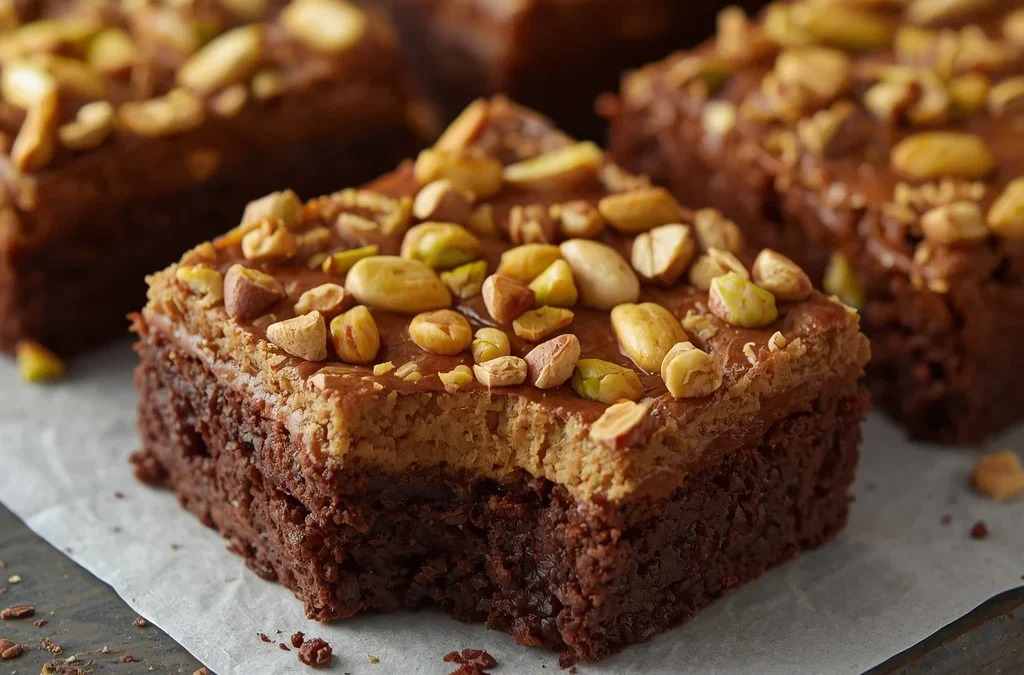
Pistachio Kunafa Brownies
- Total Time: 2 hours
- Yield: 12 squares 1x
- Diet: Vegetarian
Description
To fully appreciate the genius behind this creation, it helps to understand how these contrasting culinary components work together. Essentially, this modern confection is a hybrid dessert that seamlessly fuses a traditional American chocolate square with the textures of a classic Levantine pastry. Instead of relying purely on a uniform, cake-like crumb, this specialized bar is built in distinct, contrasting strata.
Ingredients
For the Brownie Base
- ½ cup (115 g) unsalted butter
- 1 cup (200 g) granulated sugar
- 2 large eggs
- 1 teaspoon vanilla extract
- ⅓ cup (40 g) cocoa powder
- ½ cup (65 g) all-purpose flour
- ¼ teaspoon salt
- ¼ teaspoon baking powder
For the Kunafa Layer
- 2 cups shredded kunafa (kataifi dough), thawed if frozen
- 4 tablespoons unsalted butter, melted
- 2 tablespoons sugar
Pistachio Topping
- ½ cup pistachio paste (or finely ground pistachios mixed with a little honey)
- 2 tablespoons chopped pistachios
- Optional: drizzle of sweet syrup or honey
Instructions
1. Prepare the Brownie Batter
- Preheat oven to 350°F (175°C). Line an 8×8-inch baking pan.
- Melt butter, then whisk in sugar.
- Add eggs and vanilla, mixing until glossy.
- Stir in cocoa powder, flour, salt, and baking powder until just combined.
- Pour into prepared pan and smooth evenly.
2. Prepare Kunafa Layer
- Toss shredded kunafa with melted butter and sugar until evenly coated.
- Spread gently over brownie batter in an even layer.
- Press lightly so it adheres.
3. Bake
- Bake for 30–35 minutes, until brownie is set and kunafa is golden and crispy on top.
- Let cool completely before adding topping.
4. Add Pistachio Layer
- Spread pistachio paste evenly over cooled kunafa layer.
- Sprinkle chopped pistachios on top.
- Drizzle lightly with honey or syrup if desired.
Notes
- Prep Time: 25 minutes
- Cook Time: 35 minutes
- Category: Dessert
- Method: Baking
- Cuisine: Middle Eastern Fusion
Nutrition
- Serving Size: 1 square
- Calories: 420 kcal
Keywords: fudgy kataifi chocolate bars, middle eastern fusion dessert squares, crispy pistachio brownie recipe