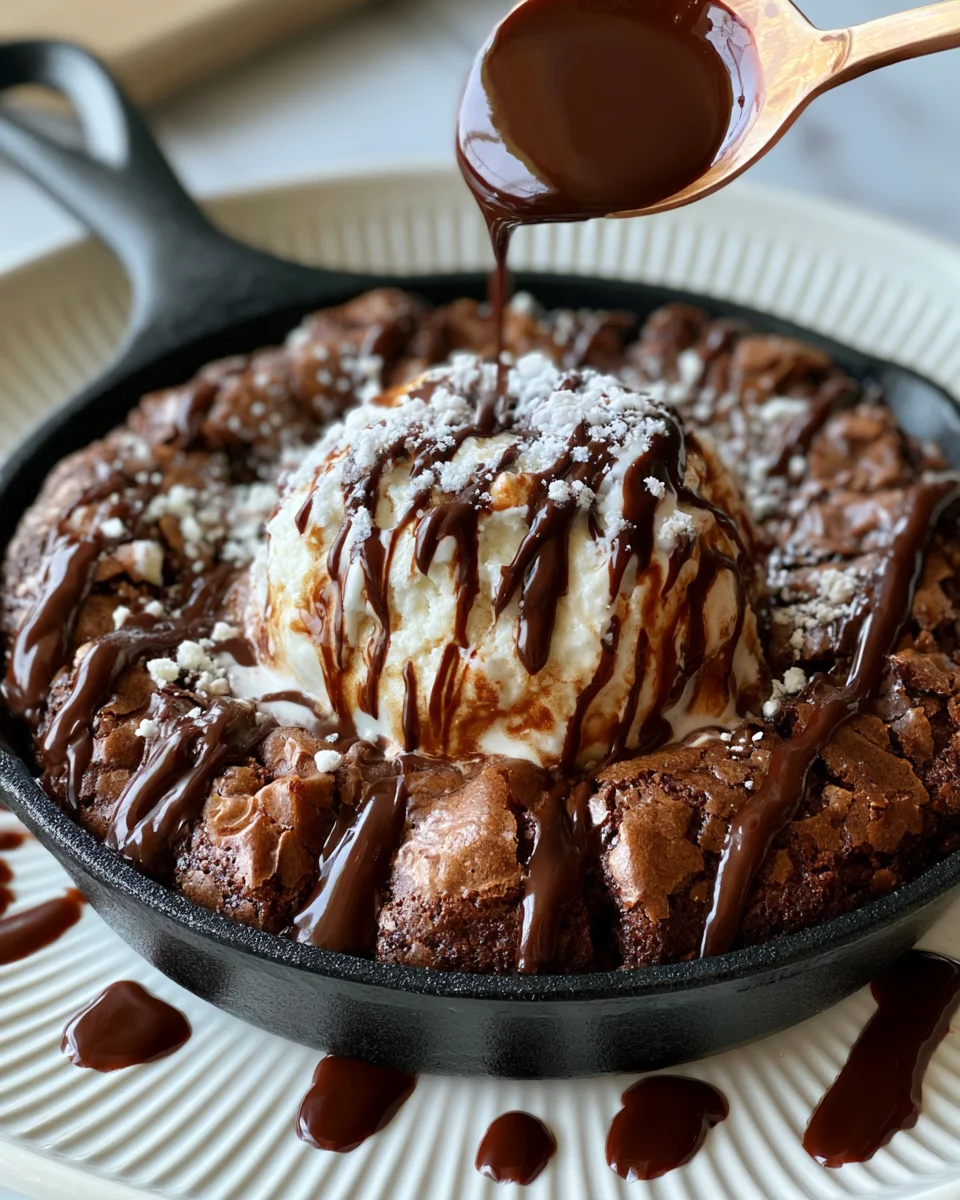
Nothing captures the internet quite like a spectacular dessert transformation, and the Viral Crinkle Top Brownie Skillet is the absolute peak of modern baking trends. If you have spent any time browsing food videos online recently, you have likely seen this beautiful masterpiece glistening under kitchen lights. It features an incredibly shiny, wafer-thin crackled crust that shatters gently when your spoon breaks the surface. Beneath that signature crinkle top lies a deep, intensely fudgy center that remains completely molten and gooey. Baking this classic treat directly inside a heavy cast iron pan completely changes the game. It creates a beautiful contrast between the crisp, caramelized edges along the perimeter and the warm, decadent center. It is an approachable yet luxurious chocolate experience designed for sharing, celebrating, or simply satisfying a serious late-night craving.
When you present a dessert straight from the oven in a rustic pan, it instantly creates an inviting, cozy atmosphere. You bypass the tedious steps of cutting clean individual squares or lining complex baking sheets with parchment paper. Instead, you focus entirely on delivering maximum chocolate flavor and a visually stunning texture that rivals any high-end bakery. This guide will walk you through the precise science of achieving that elusive shiny crust, the fascinating evolution of pan-baked desserts, and the step-by-step methods needed to master this magnificent creation in your own home.
What is a Viral Crinkle Top Brownie Skillet?
If you are wondering what sets the Viral Crinkle Top Brownie Skillet apart from a standard box-mix tray, the secret lies entirely in the structure and the baking vessel. This recipe is a ultra-premium, completely scratch-made chocolate batter engineered to maximize fudginess while developing a distinct, paper-thin sugar crust on top. Unlike traditional cake-like brownies that rely on chemical leaveners like baking powder or baking soda, this skillet version relies strictly on the physical whipping of eggs and sugar to create its structure. This results in a dense, rich texture that bridges the gap between a classic fudge and a traditional baked good.
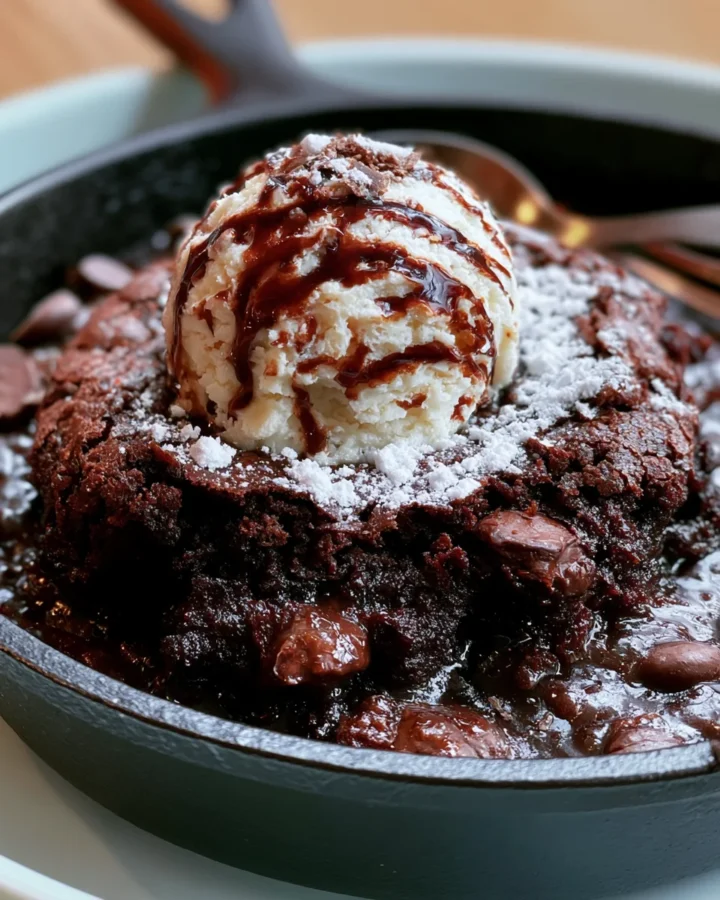
Baking the entire mixture in an eight-inch cast iron skillet alters how the heat interacts with the batter. Cast iron holds an immense amount of thermal energy, distributing it evenly across the bottom and sides of the pan. This intense heat causes the outer edges of the batter to crisp up and caramelize rapidly, while the center remains beautifully soft and gooey. The final result is a multi-textural experience where you get a delicate crunch from the top skin, a deep chew from the outer edges, and a warm, melting center that begs for a scoop of cold vanilla bean ice cream.
Origin of This Viral Crinkle Top Brownie Skillet
To understand how the Viral Crinkle Top Brownie Skillet became a global sensation, we have to look at the intersection of comfort food history and modern internet culture. Brownies themselves have been an American staple since the late nineteenth century, originally created as a portable, dense chocolate treat for picnics and luncheons. For generations, they were strictly baked in square or rectangular tins, sliced into uniform portions, and served cold or at room temperature.
However, the concept of baking cookies and brownies in skillets gained massive popularity in casual dining restaurants during the late twentieth century, often marketed as warm, giant shareable desserts. Fast forward to the modern era, and home bakers began sharing short-form videos showing the hypnotic process of whisking the sugar until a glossy skin formed on top of the batter. The internet fell in love with the auditory satisfaction of cracking through that shiny surface with a spoon. By marrying the nostalgic comfort of a restaurant skillet dessert with the strict scientific techniques required to create a perfect crinkle skin, this viral phenomenon was born, turning an old-fashioned comfort food into an interactive baking art form.
Essential Ingredients with Exact Textual Quantities: Viral Crinkle Top Brownie Skillet
Achieving a spectacular result depends heavily on using the proper balance of ingredients. Because we are skipping chemical leaveners, each component plays a critical role in building both the flavor profile and the final texture of the dessert.
The Melting Elements
-
Unsalted butter: One half of a cup, which is equivalent to one hundred and thirteen grams. This provides the rich, fatty base that keeps the interior incredibly moist and helps dissolve the sugar.
-
Semi-sweet chocolate chips: One full cup, which is equivalent to one hundred and seventy grams. This gets melted directly into the hot butter to establish the foundational depth of chocolate flavor.
The Sweetness and Structure Providers
-
Granulated white sugar: Three quarters of a cup. This crystalline sugar is absolutely vital for creating the signature shiny crust on top of the batter.
-
Light brown sugar: One half of a cup. Packed with natural molasses, this sugar introduces a subtle caramel note and contributes heavily to the soft, fudgy chew of the center.
-
Large eggs: Two pieces, kept at room temperature. These act as the primary emulsifier and structural framework for the dessert.
-
Vanilla extract: One teaspoon. A generous splash of premium vanilla rounds out the sharp edges of the cocoa and amplifies the overall sweetness.
The Dry Base ingredients
-
All-purpose flour: One half of a cup. This relatively small amount of flour ensures the dessert remains dense and fudgy rather than turning dry or cake-like.
-
Unsweetened cocoa powder: One quarter of a cup. Using a high-quality cocoa powder injects a punch of pure, dark chocolate intensity that balances the sugars.
-
Salt: One half of a teaspoon. A crucial element that balances the intense sweetness and enhances the natural flavor notes of the cocoa beans.
Optional Visual and Textural Enhancements
-
Extra chocolate chips or chunks: One half of a cup. These are folded into the finished batter to create pockets of melted, flowing chocolate throughout the interior.
Step by Step Direction and Preparation Method: Viral Crinkle Top Brownie Skillet
Step One: Preparing Your Cast Iron Skillet
Success in baking begins with proper preparation. Start by preheating your kitchen oven to three hundred and fifty degrees Fahrenheit, which is equivalent to one hundred and seventy-five degrees Celsius. While the oven is warming up to temperature, grab your eight-inch cast-iron skillet or an equivalent oven-safe baking dish.
Apply a generous coating of unsalted butter or a high-quality baking spray to the entire interior surface of the pan, paying special attention to the bottom seams and the high side walls. This greasing step is essential because the sugars in the batter will caramelize against the hot metal, and a well-lubricated pan ensures the edges can be scooped out cleanly without sticking or tearing.
Step Two: Melting the Rich Chocolate Foundation
Place a medium-sized heatproof glass bowl over a saucepan of gently simmering water, creating a makeshift double boiler, or prepare your microwave for short, controlled bursts of heating. Place your one half cup of unsalted butter and your one full cup of semi-sweet chocolate chips into the bowl.
Heat the mixture gently, stirring continuously with a heatproof spatula until the butter and chocolate chips have completely melted down into a glossy, uniform liquid. Remove the bowl from the heat source immediately once it is smooth. Letting the chocolate overheat can cause it to scorch or separate, which would ruin the velvety texture of your final batter.
Step Three: Developing the Iconic Crinkle Top Skin
This is the absolute most critical step of the entire process if you want to achieve that famous internet-worthy crust. Pour your three quarters of a cup of granulated white sugar and your one half cup of light brown sugar directly into the warm melted chocolate mixture. Whisk them together briefly until the sugars are completely integrated. Next, add your two room-temperature eggs into the bowl one at a time.
Now, grab a sturdy balloon whisk and beat the mixture vigorously for a full two to three minutes. Do not skimp on this time. You need to whip the eggs and sugars together until the batter undergoes a physical transformation, becoming thick, pale, and incredibly glossy. This intense whisking forces the sugar to dissolve completely into the egg whites, creating a delicate, meringue-like layer that rises to the top during baking to form the classic crinkle skin. Once this glossy state is achieved, stir in your single teaspoon of vanilla extract.
Step Four: Incorporating the Dry Ingredients Gently
Set your whisk aside and grab a fine-mesh sifter. Position the sifter over your wet chocolate mixture and add your one half cup of all-purpose flour, one quarter cup of unsweetened cocoa powder, and one half teaspoon of salt. Sift the dry ingredients directly into the bowl to eliminate any stubborn lumps of cocoa powder.
Switch to a flexible silicone spatula and begin folding the ingredients together using gentle, sweeping motions. Mix only until the flour and cocoa powder have barely vanished into the wet base. Overmixing at this stage will develop the gluten in the flour, which will transform your fudgy masterpiece into a tough, bread-like texture. If you are choosing to use the extra one half cup of chocolate chips or chunks, toss them into the bowl now and fold them in with two quick turns of the spatula.
Step Five: Baking the Skillet Masterpiece to Perfection
Gently pour the thick, glossy chocolate batter into your prepared eight-inch cast-iron skillet. Use your spatula to spread the mixture evenly into the corners and smooth out the top surface. Place the skillet onto the middle rack of your preheated oven. Bake the dessert for twenty-two to twenty-eight minutes.
Keep a very close eye on the oven during the final minutes of baking. You are looking for the outer edges to become completely set and slightly firm to the touch, while the very center should still remain slightly soft and gently jiggle when the pan is moved. A toothpick inserted into the perimeter should come out clean, but a toothpick inserted into the exact center should emerge with a few moist, fudgy crumbs attached. Avoid overbaking at all costs; if the center sets completely hard, you will lose that decadent, molten interior that makes this skillet dessert so magical.
Step Six: Cooling, Dressing, and Serving Warm
Carefully remove the hot skillet from the oven using heavy-duty oven mitts and place it onto a heat-safe wire rack or trivet. The cast iron will continue to hold heat and cook the interior gently even after it leaves the oven, so let the brownie cool and stabilize for fifteen to twenty minutes before diving in. As it cools, you will notice the top skin tightening and developing those beautiful, microscopic fractures that characterize a perfect crinkle top.
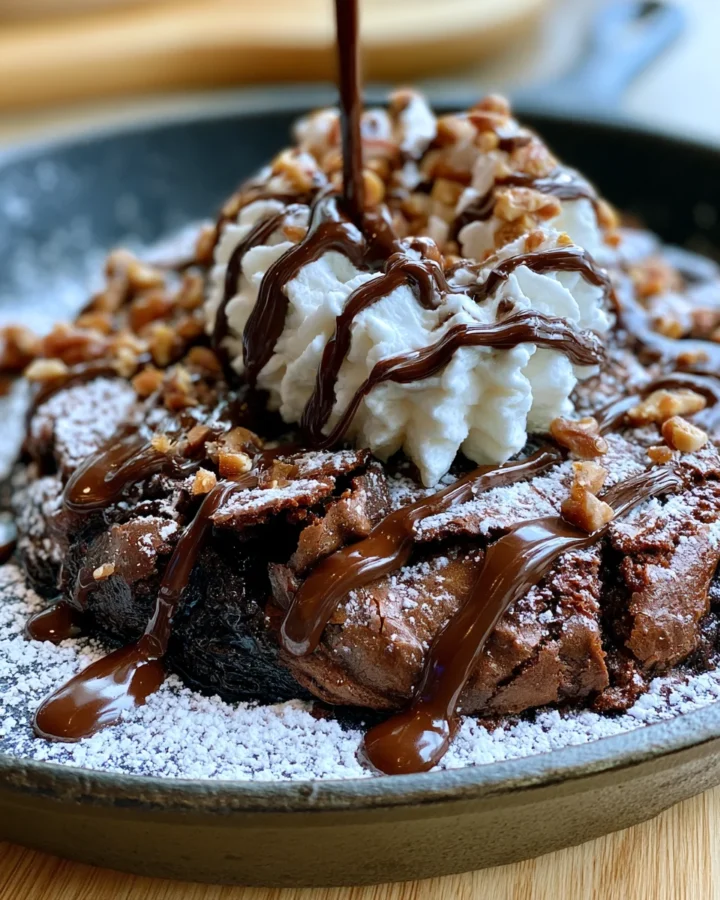
While this treat is absolutely spectacular all on its own, it truly shines when you add a few luxurious toppings. Place a massive scoop of premium vanilla bean ice cream directly onto the center of the warm brownie, allowing it to slowly melt into the cracks of the crust. If you want to go all out, drizzle ribbons of rich chocolate sauce or warm caramel over the top, or scatter a handful of chopped toasted walnuts or fresh raspberries across the surface for a touch of elegance. Serve it warm directly from the pan with multiple spoons for a fun, interactive family style dessert experience.
Creative Recipe Variations to Explore: Viral Crinkle Top Brownie Skillet
Once you have perfected the foundational technique for this dessert, you can easily customize the batter to fit your personal flavor preferences or celebrate special occasions.
The Ultimate Salted Caramel Swirl
Before placing your filled skillet into the hot oven, drop several large dollops of high-quality sea salt caramel sauce across the surface of the raw batter. Use a butter knife or a toothpick to gently drag the caramel through the chocolate, creating a beautiful marbled pattern. The contrast between the salty caramel and the dark chocolate elevates the dessert to a sophisticated level.
The Triple Peanut Butter Explosion
If you love the timeless combination of chocolate and nut butter, this variation is a dream come true. Fold one half cup of peanut butter chips into the batter along with your standard chocolate chunks. Right before baking, warm up two tablespoons of creamy peanut butter and drizzle it across the top, swirling it into the surface layer to create an extra layer of savory richness beneath the crinkle crust.
The Espresso Infused Dark Chocolate Twist
For an adult-friendly profile with immense depth, whisk one full tablespoon of instant espresso powder directly into the hot melted butter and chocolate mixture during step two. Coffee acts as a natural flavor enhancer for cocoa, making the chocolate taste significantly richer and darker without adding any actual coffee bitterness to the finished skillet.
Frequently Asked Questions: Viral Crinkle Top Brownie Skillet
Why did my skillet brownie fail to develop a shiny crinkle top?
The lack of a shiny, crackled skin is almost always caused by under-whisking the eggs and sugar, or using cold eggs. If the sugar does not fully dissolve into the egg whites during the mixing stage, the delicate meringue layer cannot form on the surface during baking. Ensure your eggs are completely at room temperature and whisk the mixture vigorously for at least two to three full minutes until it looks thick and remarkably glossy.
Can I bake Viral Crinkle Top Brownie Skillet in a regular baking dish if I do not own a cast iron skillet?
Yes, you can absolutely use an eight-inch round or square glass or ceramic baking dish instead. However, because these materials conduct heat differently than heavy metal, you may need to adjust your baking time by adding an extra two to four minutes. Keep a close eye on the visual cues of the edges and center rather than relying strictly on the timer.
How should I store any leftovers, and how do I reheat them?
If you happen to have any leftovers, allow the skillet to cool completely to room temperature. Cover the top tightly with aluminum foil or transfer the remaining portions into an airtight container and store it at room temperature for up to three days. To enjoy it again, simply pop a portion into the microwave for fifteen to twenty seconds to restore that ultra-fudgy, melted texture.
Is it possible to make this recipe completely gluten free?
It is incredibly simple to adapt this dessert for gluten-free diets because it uses such a small quantity of flour to begin with. Simply replace the one half cup of all-purpose flour with an equal amount of a high-quality, measure-for-measure gluten-free flour blend that contains xanthan gum. The final texture will remain beautifully dense, rich, and fudgy.
Conclusion: Viral Crinkle Top Brownie Skillet
Mastering the perfect Viral Crinkle Top Brownie Skillet is an incredibly rewarding kitchen project that instantly transforms simple, everyday pantry staples into a show-stopping dessert experience. By understanding the simple science behind dissolving your sugars into room-temperature eggs, and leveraging the superior heat retention of a traditional cast iron pan, you can consistently achieve that beautiful contrast of a paper-thin, crackly crust and an ultra-fudgy, molten center. It is an exceptionally forgiving recipe that values texture and deep chocolate richness over rigid, mathematical perfection. Whether you choose to serve it completely plain or loaded with melting ice cream and gourmet sauces, this dessert is guaranteed to capture the hearts and appetites of everyone around your table. Grab your whisk, heat up your oven, and prepare to experience the ultimate evolution of homemade chocolate baking.
Print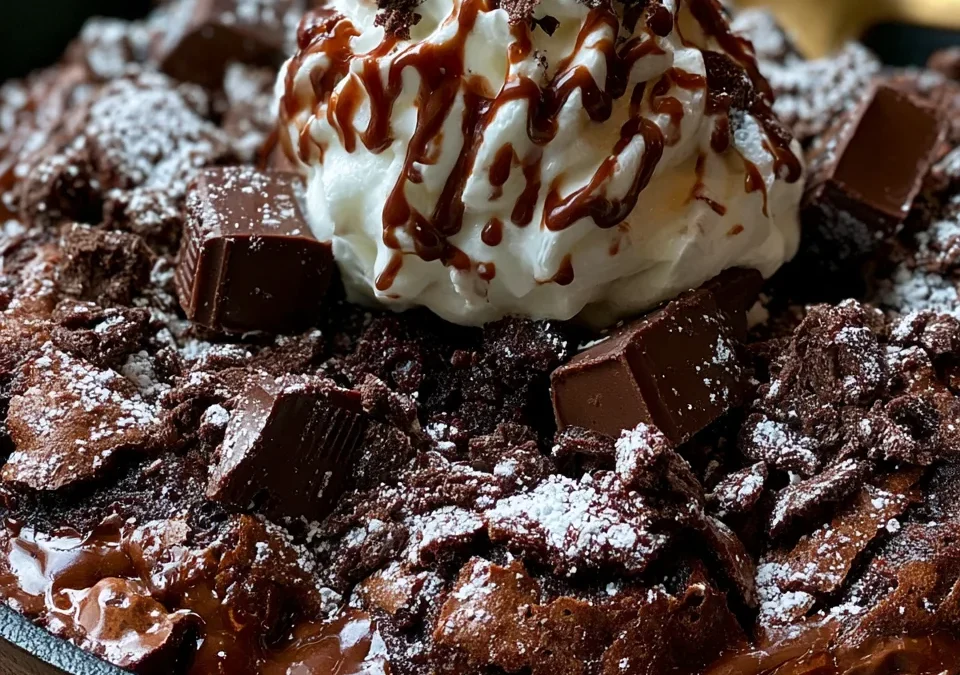
Ultimate Guide to the Viral Crinkle Top Brownie Skillet
- Total Time: 40 minutes
- Yield: 8 servings 1x
- Diet: Vegetarian
Description
If you are wondering what sets the Viral Crinkle Top Brownie Skillet apart from a standard box-mix tray, the secret lies entirely in the structure and the baking vessel. This recipe is a ultra-premium, completely scratch-made chocolate batter engineered to maximize fudginess while developing a distinct, paper-thin sugar crust on top. Unlike traditional cake-like brownies that rely on chemical leaveners like baking powder or baking soda, this skillet version relies strictly on the physical whipping of eggs and sugar to create its structure. This results in a dense, rich texture that bridges the gap between a classic fudge and a traditional baked good.
Ingredients
- ½ cup (113g) unsalted butter
- 1 cup (170g) semi-sweet chocolate chips
- ¾ cup granulated sugar
- ½ cup light brown sugar
- 2 large eggs, room temperature
- 1 tsp vanilla extract
- ½ cup all-purpose flour
- ¼ cup unsweetened cocoa powder
- ½ tsp salt
- ½ cup chocolate chips or chunks (optional)
Instructions
1. Prepare the Skillet
- Preheat the oven to 350°F (175°C).
- Grease an 8-inch cast-iron skillet or oven-safe baking dish.
2. Make the Brownie Batter
- Melt the butter and 1 cup chocolate chips together in a heatproof bowl. Stir until smooth.
- Add the granulated sugar and brown sugar, whisking until combined.
- Whisk in the eggs one at a time for about 2–3 minutes total until the mixture becomes glossy.
- Stir in the vanilla extract.
- Sift in the flour, cocoa powder, and salt.
- Fold gently until just combined.
- Stir in the extra chocolate chips if using.
3. Bake
- Pour the batter into the prepared skillet and spread evenly.
- Bake for 22–28 minutes, or until the edges are set and the center is slightly soft.
- Avoid overbaking for a fudgy texture.
4. Cool and Serve
- Let the brownie cool for 15–20 minutes.
- Serve warm directly from the skillet or slice into wedges.
Notes
- Prep Time: 15 minutes
- Cook Time: 25 minutes
- Category: Dessert
- Method: Baked
- Cuisine: American
Nutrition
- Serving Size: 1 slice (1/8 of skillet)
- Calories: 410 kcal
Keywords: Shiny crackle top brownie pan, viral cast iron fudge brownie, glossy skin skillet brownie, crackled top chocolate skillet dessert