If you are looking for a dessert that perfectly balances a satisfying crunch with a rich, gooey sweetness, look no further than these crispy rice cereal caramel bars. There is something incredibly nostalgic about a cereal treat, but this version takes the classic childhood favorite and elevates it into a decadent, bakery-worthy masterpiece. By adding a luscious layer of smooth caramel and a velvety blanket of melted chocolate, you transform a simple snack into an absolute crowd-pleaser. Whether you need a quick treat for an upcoming neighborhood bake sale, a dynamic addition to a holiday dessert table, or just a sweet reward after a long week, this recipe delivers maximum flavor with minimal effort.
The beauty of making crispy rice cereal caramel bars lies in how easily they come together without ever requiring you to turn on your oven. This is a completely no-bake dessert, meaning you can achieve layers of complex textures and flavors using just your stovetop and a microwave. The contrast between the airy, crispy cereal base, the deeply buttery caramel middle layer, and the snappy chocolate topping creates a multi-textured experience in every single bite. It is a foolproof recipe that appeals to kids and adults alike, proving that you do not need complicated techniques or exotic ingredients to make something truly extraordinary.
What are Crispy Rice Cereal Caramel Bars?
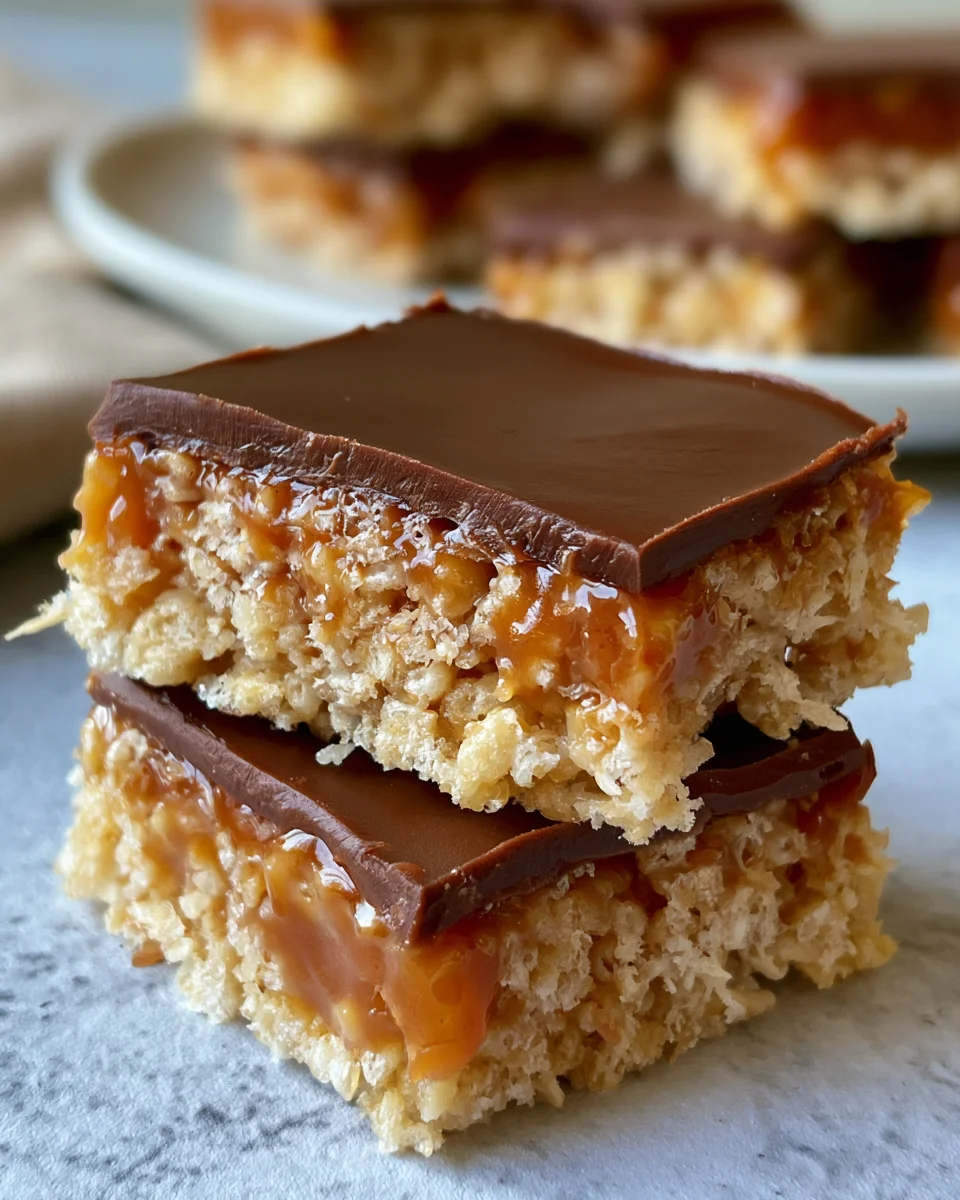
At its core, this dessert is a premium upgrade to the traditional marshmallow cereal square. Instead of stopping at a simple mixture of puffed rice and melted marshmallows, this recipe introduces a distinct, luxurious layer of homemade style caramel right in the middle, followed by a final layer of smooth chocolate. The result is a three-tiered dessert bar that mimics the flavor profile of a gourmet candy bar but retains the comforting, homemade charm of a classic kitchen treat.
When you bite into one of these bars, you first experience the rich snap of the chocolate topping, followed immediately by the soft, stretchy chew of the caramel. Finally, your teeth sink into the light, buttery crispness of the cereal base. It is a carefully orchestrated combination of textures that prevents the bar from feeling too heavy or overly sweet. By using high-quality ingredients and following a specific layering process, you create a dessert where each component shines individually while contributing to a harmonious whole.
The Origin of Cereal Treats and Caramel Bars
To understand where this delicious creation comes from, we have to look back at the history of puffed grain treats. Puffed rice treats were originally invented in the late nineteen-thirties by home economists working for major cereal companies. The goal was to create an affordable, easy-to-make snack that utilized the company’s signature crispy cereal. The combination of melted marshmallows, butter, and puffed rice quickly became a staple in households across the country because the ingredients were inexpensive and the process required zero baking skills.
As home bakers grew more creative over the decades, they began experimenting with additions like peanut butter, butterscotch, and chocolate. The concept of adding a dedicated caramel layer to these bars evolved from the popularity of traditional millionaire shortbread and turtle candies. By merging the beloved, lightweight crunch of a marshmallow cereal treat with the decadent, liquid gold texture of soft caramel, innovative bakers created a hybrid dessert that offered the best of both worlds. Today, these bars represent a modern evolution of classic home baking, celebrating simplicity while delivering a truly luxurious flavor profile.
Ingredients for Success
Before you begin assembling your dessert, it is essential to gather your ingredients and measure them out. Using fresh ingredients is the secret to ensuring your bars turn out perfectly chewy rather than hard or stale.
For the Crispy Base
-
Four cups of crispy rice cereal
-
One-fourth cup of unsalted butter
-
Four cups of mini marshmallows
Rich Caramel Layer
-
One cup of soft caramel candies, completely unwrapped
-
Three tablespoons of heavy cream
-
Two tablespoons of unsalted butter
For the Velvety Chocolate Topping
-
One cup of semi-sweet chocolate chips
-
One tablespoon of vegetable oil or coconut oil
Step-by-Step Preparation Method: crispy rice cereal caramel bars
Creating these crispy rice cereal caramel bars is an easy and enjoyable process, but timing is important. Because melted marshmallows and hot caramel can set quickly, having all your tools and ingredients ready before you start will guarantee a smooth, stress-free experience.
Preparing Your Baking Space
The very first thing you need to do is prepare your baking pan. Take an eight-by-eight-inch square baking pan and line it carefully with a sheet of parchment paper. Make sure to leave a little bit of overhang on the sides, as these extended edges will act as handles later on, allowing you to lift the entire block of bars out of the pan effortlessly. Once your parchment paper is in place, lightly grease the surface of the paper with a small amount of butter or non-stick cooking spray. This guarantees that your sticky marshmallow base will release cleanly when it is time to slice and serve.
Crafting the Perfect Crispy Base
Now, let us build the foundation of our dessert. Place a large saucepan on your stovetop over low heat. Add your one-fourth cup of unsalted butter and let it melt completely, swirling it around to coat the bottom of the pan. Once the butter is melted, dump in your four cups of mini marshmallows.
[Low Heat Stovetop] -> Melt Butter -> Add Marshmallows -> Stir Constantly
It is vital to keep the heat low and stir the mixture constantly with a heat-resistant spatula. If you rush this step or use heat that is too high, the sugar in the marshmallows will overheat, resulting in a finished bar that is rock-hard instead of soft and chewy. Keep stirring until the marshmallows have completely broken down into a smooth, glossy, white liquid.
As soon as the mixture is perfectly smooth, remove the saucepan from the heat source entirely. Immediately pour your four cups of crispy rice cereal into the melted marshmallow mixture. Using your spatula, gently fold the cereal into the liquid, turning it over from the bottom to the top until every single grain of rice is completely and evenly coated in the sticky marshmallow mixture.
Once fully combined, transfer the sticky cereal mixture directly into your prepared eight-by-eight-inch baking pan. Press the mixture firmly and evenly into the corners of the pan. You can use a lightly greased spatula, a piece of wax paper, or even your hands coated in a tiny bit of butter to press it down without sticking. Aim for a flat, level surface so that your subsequent layers sit perfectly on top.
Melting the Decadent Caramel Layer
With your base firmly established, it is time to move on to the star of the show: the rich, gooey caramel layer. Take a medium-sized, microwave-safe bowl and combine your one cup of unwrapped soft caramel candies, your three tablespoons of heavy cream, and your two tablespoons of unsalted butter.
Place the bowl into your microwave and heat the mixture in short, thirty-second intervals. After each thirty-second period, carefully remove the bowl and give the ingredients a thorough stir. At first, it might look like the ingredients do not want to combine, but as the caramels melt, the cream and butter will smoothly incorporate. Repeat this process until the caramel is completely melted, free of any lumps, and silky smooth.
[Microwave Process] -> 30 Seconds -> Stir -> 30 Seconds -> Stir -> Smooth Caramel
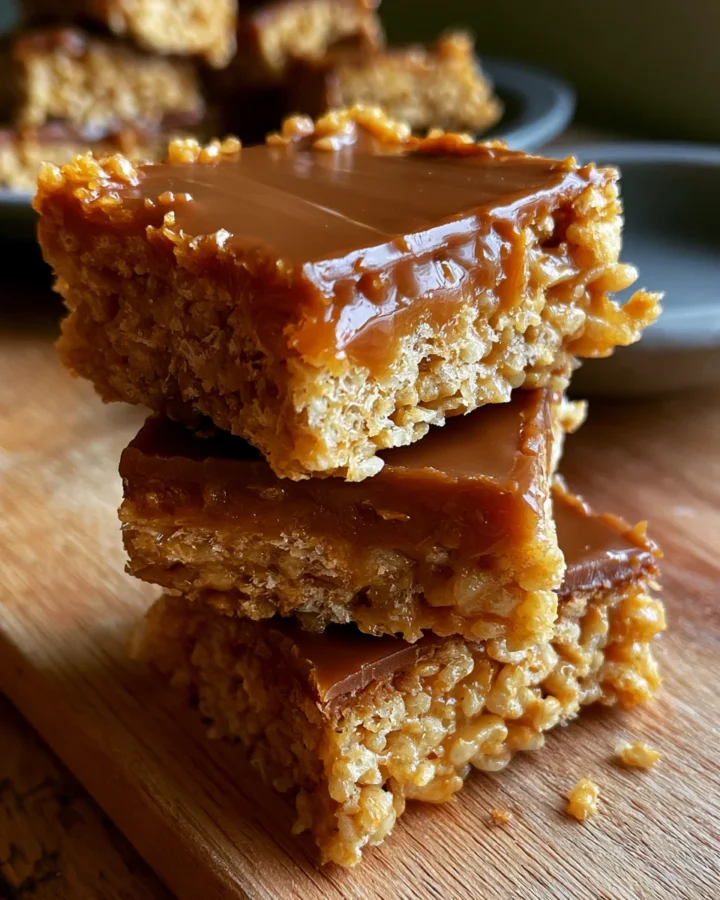
Once your caramel is ready, immediately pour it directly over your compressed cereal base. Use a clean spatula or the back of a spoon to spread the warm caramel evenly across the entire surface, ensuring it reaches all the way to the edges and corners of the pan.
Once you have created a smooth, even sheet of caramel, transfer the entire pan into your refrigerator. Let it chill undisturbed for fifteen to twenty minutes. This brief cooling period is incredibly important because it allows the caramel to firm up just enough so that when you pour the warm chocolate on top later, the two layers remain beautifully distinct instead of swirling together into a messy puddle.
Coating with Smooth Chocolate
While your caramel layer is chilling and setting in the refrigerator, you can prepare the final, indulgent chocolate topping. In another clean, microwave-safe bowl, combine your one cup of semi-sweet chocolate chips with your one tablespoon of vegetable oil or coconut oil. The addition of a tiny bit of oil is a secret baker’s trick that serves two great purposes: it helps the chocolate melt more smoothly, and it keeps the chocolate slightly yielding once it sets, preventing it from cracking into jagged, messy pieces when you slice into your bars later.
Place the chocolate and oil mixture into the microwave, heating it in thirty-second intervals just like you did with the caramel. Stir the chocolate thoroughly after each interval. As soon as the chocolate chips are mostly melted with just a few small lumps remaining, remove the bowl from the microwave and keep stirring. The residual heat of the bowl will finish melting the remaining pieces, preventing the chocolate from scorching.
Retrieve your chilled baking pan from the refrigerator. Your caramel layer should now be firm to the touch. Pour the melted, glossy chocolate directly over the caramel layer. Working quickly, use a spatula to smooth the chocolate out into a beautiful, even layer that covers every bit of the caramel beneath it.
Chilling and Slicing the Bars
Your beautiful three-layered masterpiece is now fully assembled, but it needs a little bit of time to set before you can enjoy it. Place the baking pan back into the refrigerator and let it chill completely for at least one full hour. This allows the marshmallow base, the rich caramel, and the chocolate topping to firm up to their ideal, sliceable textures.
Once the hour has passed, remove the pan from the refrigerator. Grab the overhanging edges of your parchment paper and gently lift the entire block of treats up and out of the pan, placing it onto a sturdy cutting board. To get clean, professional-looking squares, take a large, sharp chef’s knife and run the blade under hot tap water for a few seconds, then wipe it completely dry with a clean towel. The warmth of the blade will glide smoothly through the chocolate and caramel layers without compressing the crispy base. Slice the block into sixteen even squares or bars, wiping the blade clean between each cut for the prettiest presentation.
Delicious crispy rice cereal caramel bars Variations
One of the best aspects of these crispy rice cereal caramel bars is how customizable they are. Once you have mastered the foundational technique, you can easily alter the ingredients to match your personal cravings or suit different occasions.
The Sweet and Salty Upgrade
If you love the irresistible contrast of sweet and savory flavors, you can easily elevate these bars by transforming them into a salted caramel treat. All you need to do is sprinkle a generous pinch of flaky sea salt, like Maldon salt, directly over the melted chocolate topping immediately after spreading it out, while it is still warm and wet. As the chocolate cools, it will lock those beautiful salt flakes into place, providing a burst of savory contrast that cuts through the richness of the caramel and chocolate.
Switching Up the Chocolate
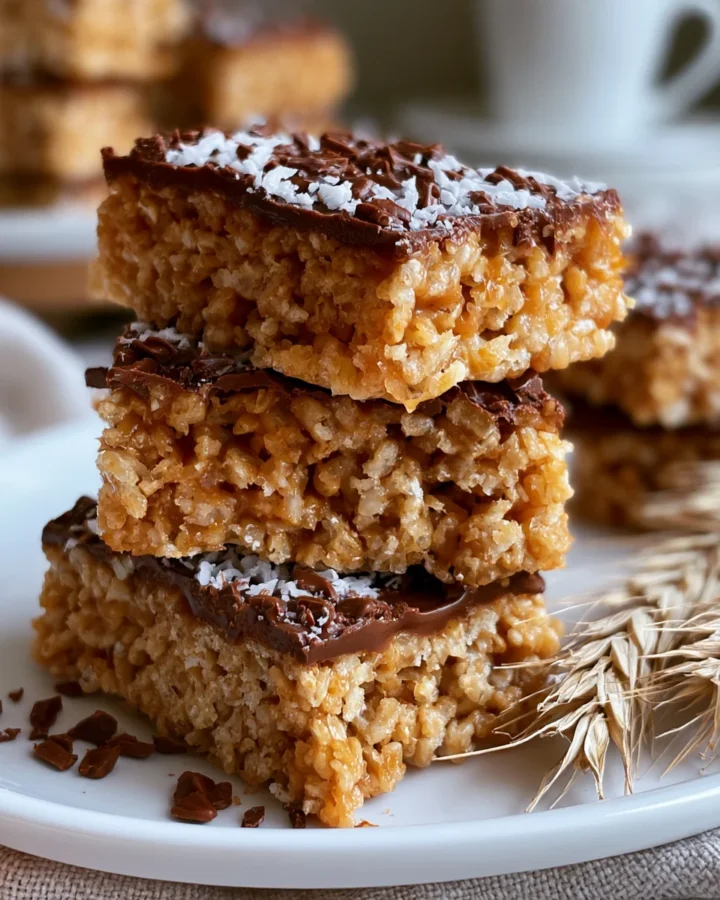
While semi-sweet chocolate offers a wonderful, classic balance, you can easily substitute it to change the entire vibe of the dessert. If you prefer a much deeper, more sophisticated, and less sweet profile, replace the semi-sweet chips with a high-quality dark chocolate. Alternatively, if you are making these bars for a children’s birthday party or simply prefer a creamier flavor, milk chocolate chips work beautifully. For a visually stunning effect, you can even melt a small handful of white chocolate chips separately and drizzle elegant white lines across the dark chocolate top before it sets.
Adding Crunch and Texture
If you want to inject an extra layer of texture into your bars, consider mixing crunchy elements into either the cereal base or the caramel layer. Stirring a half-cup of chopped, roasted peanuts, pecans, or almonds into the caramel layer before pouring it will create a bar that strongly resembles a gourmet nut-and-caramel candy bar. You could also replace a half-cup of the crispy rice cereal with crushed pretzel pieces to introduce an addictive, crispy crunch along with a built-in salty kick.
Frequently Asked Questions: crispy rice cereal caramel bars
Why did my cereal bars turn out hard and dense?
The most common reason for hard cereal bars is using too much heat when melting your butter and marshmallows. High heat cooks the sugars in the marshmallows, turning them into a hard candy consistency once they cool down. Always melt your marshmallows over the lowest possible stovetop setting and remove the pan from the heat immediately after they liquefy. Additionally, make sure you press the mixture into your baking pan gently; pressing it down too hardpacks the cereal tightly, resulting in a dense, heavy bar.
Can I make crispy rice cereal caramel bars ahead of time?
Absolutely. These crispy rice cereal caramel bars are a fantastic make-ahead dessert because they store incredibly well. You can easily prepare them a day or two before an event. Just keep them stored in an airtight container in your refrigerator to keep the caramel from softening too much. For the absolute best texture and flavor experience, let the bars sit out at room temperature for five to ten minutes before serving so the caramel becomes soft and chewy again.
What is the best way to store any leftovers?
Any leftover bars should be placed in an airtight container with layers separated by sheets of parchment paper or wax paper to prevent them from sticking together. Store the container in the refrigerator, where the bars will stay perfectly fresh, chewy, and delicious for up to five days. It is not recommended to freeze these bars, as the freezing and thawing process can alter the delicate texture of both the cereal and the caramel, making them soggy.
Conclusion: crispy rice cereal caramel bars
In summary, creating a batch of these extraordinary crispy rice cereal caramel bars is a simple, rewarding journey that yields a dessert far superior to any store-bought alternative. By combining a classic, light marshmallow base with a luxurious layer of buttery caramel and a smooth chocolate finish, you create a treat that is sophisticated enough for a dinner party yet simple enough for an afternoon snack. The ease of this no-bake method means you can whip up a truly impressive dessert without breaking a sweat or turning on your oven. Gather your ingredients, follow the careful layering steps, and enjoy the ultimate combination of crunch, chew, and chocolate bliss in every single bite.
Print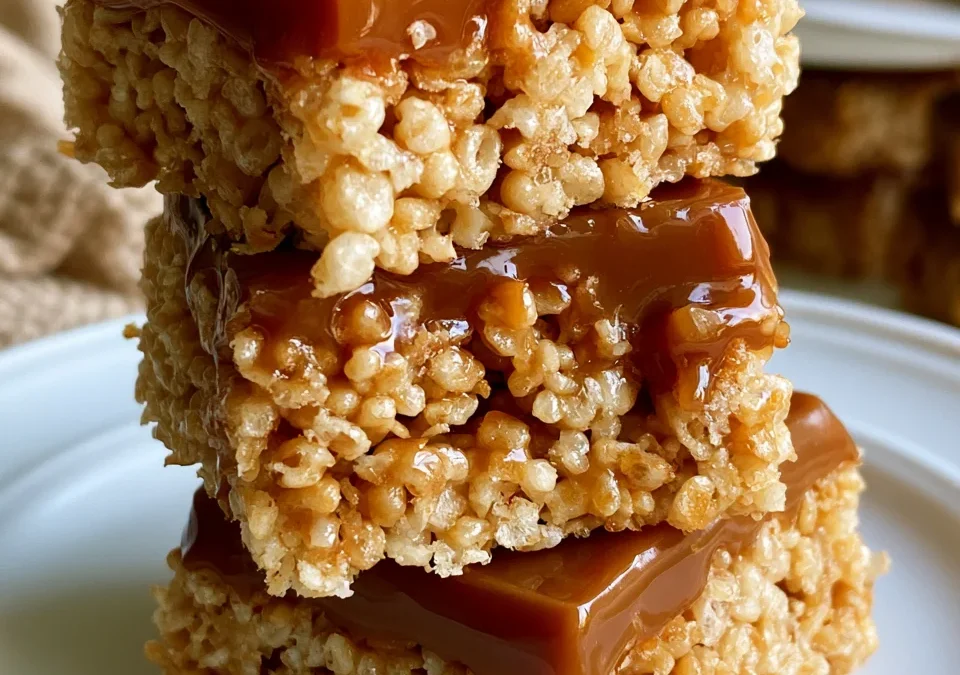
The Ultimate Crispy Rice Cereal Caramel Bars Recipe
- Total Time: 20 minutes
- Yield: 16 bars 1x
- Diet: Vegetarian
Description
At its core, this dessert is a premium upgrade to the traditional marshmallow cereal square. Instead of stopping at a simple mixture of puffed rice and melted marshmallows, this recipe introduces a distinct, luxurious layer of homemade style caramel right in the middle, followed by a final layer of smooth chocolate. The result is a three-tiered dessert bar that mimics the flavor profile of a gourmet candy bar but retains the comforting, homemade charm of a classic kitchen treat.
Ingredients
For the Base
- 4 cups crispy rice cereal
- ¼ cup (60 g) unsalted butter
- 4 cups (280 g) mini marshmallows
For the Caramel Layer
- 1 cup (200 g) soft caramel candies, unwrapped
- 3 tbsp heavy cream
- 2 tbsp unsalted butter
For the Chocolate Topping
- 1 cup (170 g) semi-sweet chocolate chips
- 1 tbsp vegetable oil or coconut oil
Instructions
1. Prepare the Pan
- Line an 8×8-inch (20×20 cm) baking pan with parchment paper.
- Lightly grease the parchment paper.
2. Make the Rice Cereal Base
- In a large saucepan, melt ¼ cup butter over low heat.
- Add the marshmallows and stir until completely melted and smooth.
- Remove from heat and gently fold in the crispy rice cereal until evenly coated.
- Press the mixture firmly into the prepared pan using a lightly greased spatula.
3. Make the Caramel Layer
- Combine the caramel candies, heavy cream, and butter in a microwave-safe bowl.
- Microwave in 30-second intervals, stirring between each, until smooth and melted.
- Pour the caramel over the cereal layer and spread evenly.
- Chill for 15–20 minutes until slightly set.
4. Add the Chocolate Topping
- Melt the chocolate chips and oil together in a microwave-safe bowl, stirring until smooth.
- Spread the melted chocolate evenly over the caramel layer.
5. Chill and Slice
- Refrigerate for 1 hour, or until fully set.
- Lift from the pan using the parchment paper.
- Cut into 16 squares or bars.
Notes
Whether enjoyed as an afternoon snack or a festive dessert, these caramel bars offer the perfect balance of sweetness and crunch. A sprinkle of sea salt takes them to the next level.
- Prep Time: 10 minutes
- Cook Time: 10 minutes
- Category: Dessert
- Method: No-Bake
- Cuisine: American
Nutrition
- Serving Size: 1 bar
- Calories: 230 kcal
Keywords: no bake caramel cereal treats